Media Walls · 13 min read · 1 April 2026
Can the TV be changed later without rebuilding everything?
Yes, if the wall is planned for it. Size the panel for the next screen, fix the bracket into generous backing, run cables through conduit that takes the plugs, and leave a way in behind the TV.

By Ali Haider Basra, Founder, Al Tareeq Decor · Contact our workshop
Key takeaways
- Size the panel behind the screen for at least the next TV size up, not for the set you own today; each 10-inch step adds roughly 22 cm of width and 12 cm of height.
- Fix solid backing across a wide area behind the panel, so a heavier or larger TV with a different VESA pattern can still be mounted securely.
- Run HDMI and power through conduit sized for the plugs rather than the cables, keep bends gentle and leave a draw cord inside for the next cable.
- Keep a removable panel or an open bay where the cables arrive, so changing a connection never means cutting into a finished surface.
- Avoid a flush recess cut to one TV's exact size; it is the hardest design to adapt when the screen changes.
On this page
- Key takeaways
- The short answer
- Why TVs outgrow the walls built around them
- How much bigger is the next TV?
- Approximate 16:9 screen dimensions
- Panel margin: the simplest insurance
- Recesses and flush pockets
- Brackets, VESA patterns and backing
- Depth: thin TVs, thick TVs and what sits behind
- Cable routes sized for plugs, not cables
- Sockets and where they sit
- Removable panels and service access
- What a TV swap looks like on a well-planned wall
- Settle these before the drawing is approved
- Common questions
The short answer
Yes. A media wall can outlive several televisions, but only if it was drawn with that in mind. The wall itself is built to last many years; the screen on it will almost certainly be replaced sooner, usually by something larger, thinner or with its connections in a different place. The goal is to make that swap a matter of lifting one TV off and hanging another, rather than a job for a carpenter.
Four decisions make the difference: the size of the panel behind the screen, what the bracket is fixed into, how the cables travel between the TV and the equipment, and whether there is a way into the wall without damaging it. Get those right at the drawing stage and changing the TV later is straightforward. Get them wrong and even a modest upgrade can mean cutting finished panels.
Why TVs outgrow the walls built around them
Screens rarely get smaller. When a household replaces a television, the new one is usually bigger, because prices for large sizes fall over time and a wall that once felt full starts to look modest. Planning guides warn against building tightly around the current set for exactly this reason and recommend leaving room for airflow, cabling and future upgrades.
Size is not the only change. A new model can be thinner or deeper than the old one, use a different mounting pattern, place its sockets on the other side of the casing, or route its connections through a separate box. A media wall designed around one TV's exact dimensions and connection layout can trip over any of those differences.
How much bigger is the next TV?
It helps to put numbers on the upgrade. The table gives the approximate screen size of common 16:9 televisions, worked out from the diagonal. Each step of 10 inches adds roughly 22 cm of width and about 12 cm of height, which is a useful rule of thumb when deciding how much margin to leave.
Treat these as minimums for the visible screen. The casing adds a little on every side, and models of the same advertised size differ, so check the specification sheet of any TV you are considering before the panel size is fixed.
Approximate 16:9 screen dimensions
55 inch
- Approx. width
- 122 cm
- Approx. height
- 68 cm
- Extra over the size below
- —
65 inch
- Approx. width
- 144 cm
- Approx. height
- 81 cm
- Extra over the size below
- About +22 cm wide, +12 cm tall
75 inch
- Approx. width
- 166 cm
- Approx. height
- 93 cm
- Extra over the size below
- About +22 cm wide, +12 cm tall
85 inch
- Approx. width
- 188 cm
- Approx. height
- 106 cm
- Extra over the size below
- About +22 cm wide, +13 cm tall
98 inch
- Approx. width
- 217 cm
- Approx. height
- 122 cm
- Extra over the size below
- About +29 cm wide, +16 cm tall
Calculated from the diagonal for a 16:9 picture and rounded; real casings are slightly larger and vary by model. Always confirm with the TV's specification sheet.
Panel margin: the simplest insurance
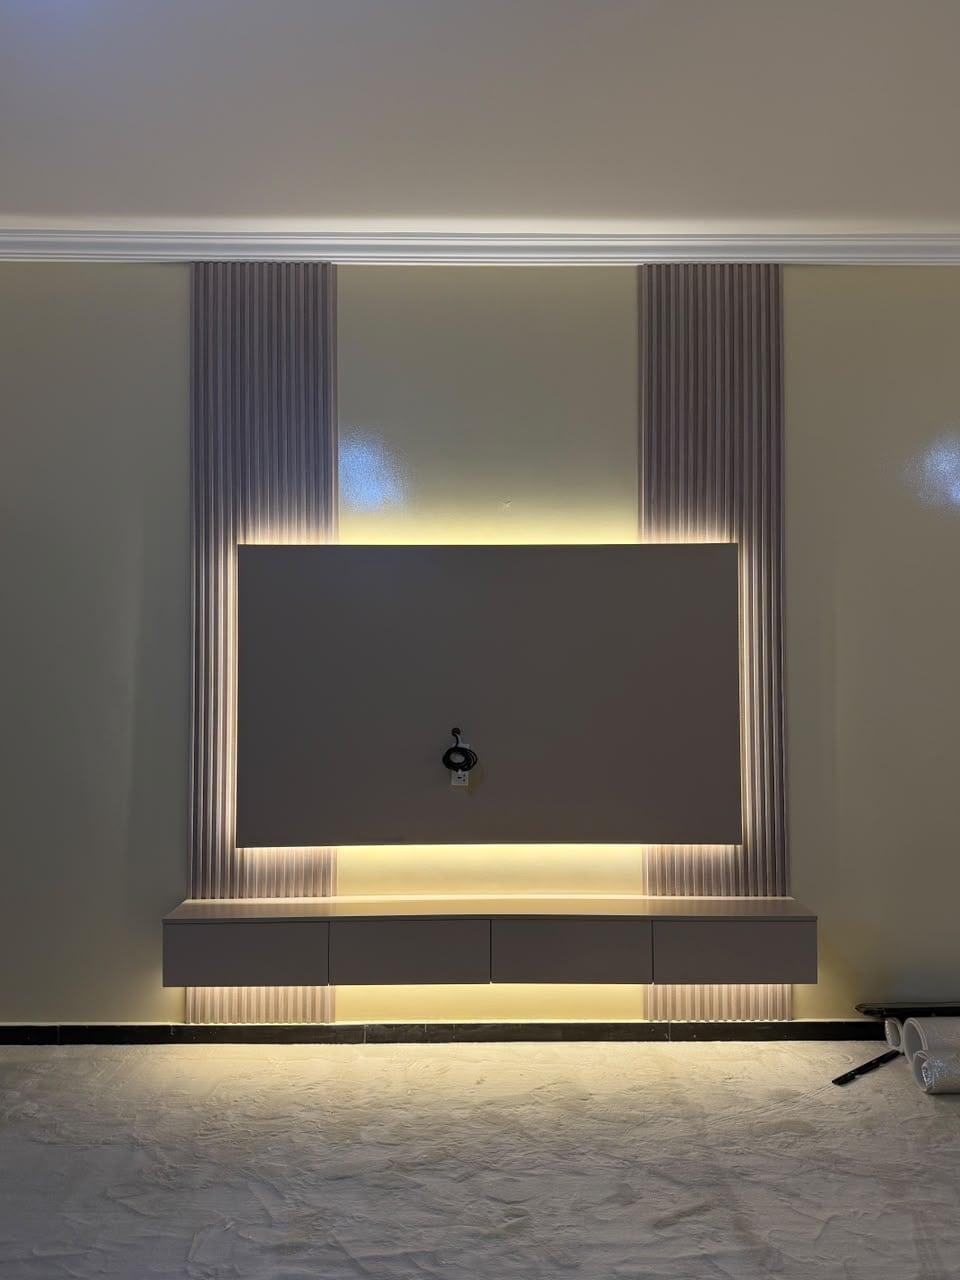
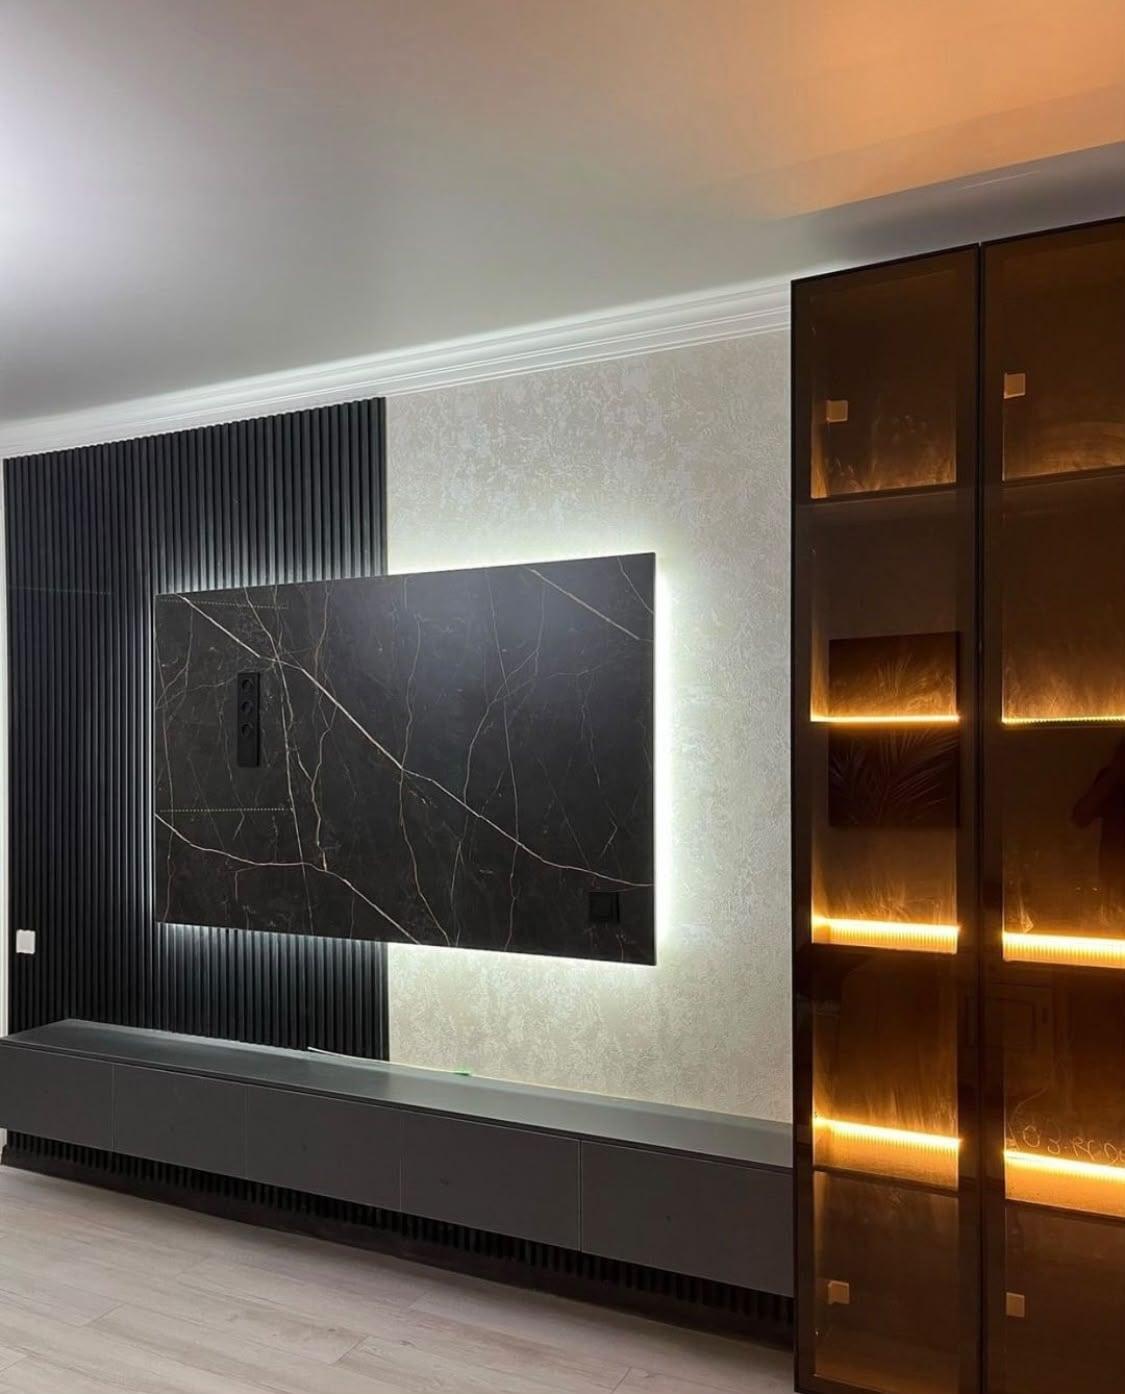
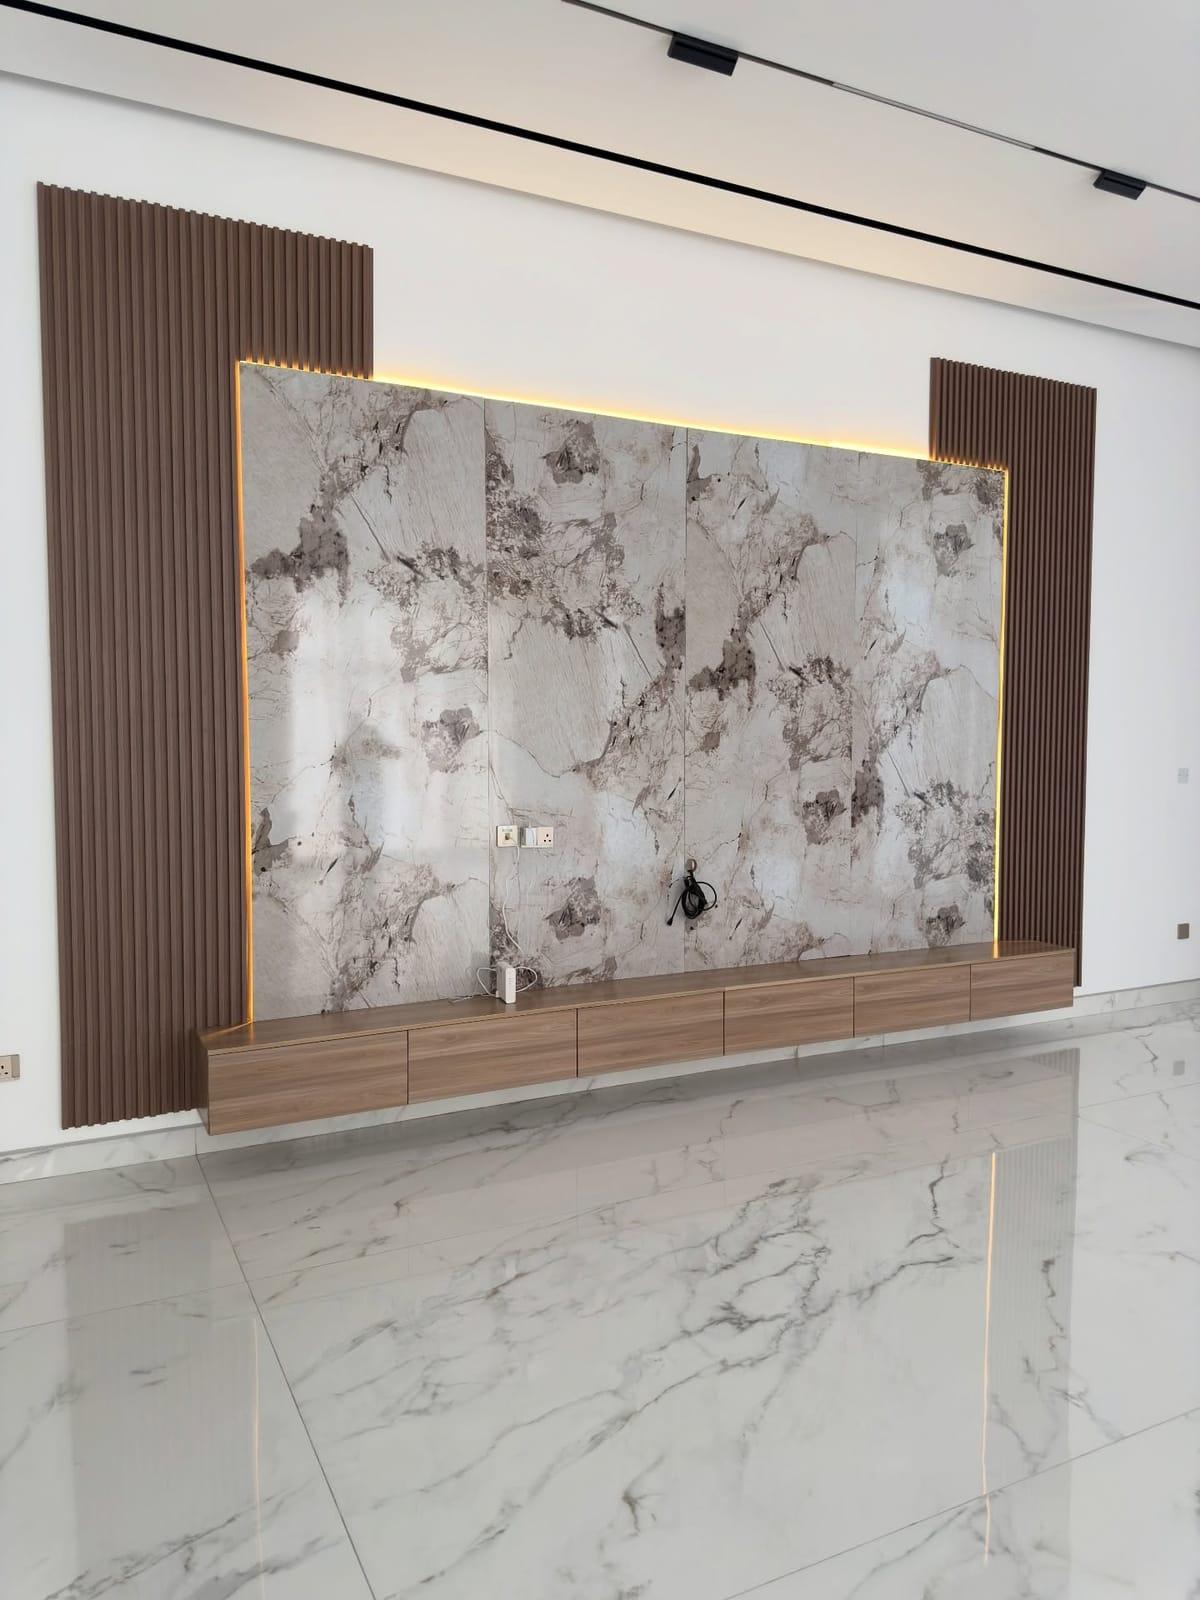
The cheapest way to future-proof a media wall is to make the backing panel behind the screen larger than the television you own now. A flat panel with a generous border looks deliberate, especially with a backlight around its edge, and it means a bigger TV can go up later without overhanging the panel or exposing raw wall.
Our recommendation is to size the panel so that at least the next size up still sits inside it with a visible border. If you own a 65-inch TV today, draw the panel to frame a 75-inch outline, roughly 166 by 93 cm of screen, plus the border you like. Ask for both outlines to be shown on the drawing so you can judge the proportions with the current set and the future one.
The photograph at the top shows the idea well: a large, lit panel between two slatted pillars, with the cable point near its centre, ready for whichever screen goes up. A margin like that costs very little extra, because the panel is being made anyway.
Recesses and flush pockets
A TV set into a recess so its face sits flush with the wall is one of the most requested looks and one of the hardest to change. The pocket is cut to one screen's width, height and depth, and almost any replacement will differ in at least one of those. A thinner TV sinks back into the hole; a larger one will not fit at all.
If you want the recessed look, there is a more forgiving way to build it: make the pocket noticeably larger than the screen in every direction and close the gap with a separate front frame or trim. When the TV changes, only that frame needs remaking. Alternatively, recess only the bracket and the cable box so the screen sits close to the wall without being boxed in. Both keep the clean appearance while leaving room to adapt.
Brackets, VESA patterns and backing
Almost every flat-screen TV is mounted using holes on its back that follow the VESA mounting standard, but the pattern is not the same on every set. Spacings such as 200 by 200, 400 by 400 and some non-square layouts are all common, the patterns are linked to screen size and weight, and many manufacturers follow the standard only loosely. A new TV may therefore need a different bracket plate or a different bracket altogether.
That is easy to handle if the bracket is fixed into something solid and generous. Samsung's guidance stresses fixing the mount to a structure strong enough for the TV's weight and notes that screw sizes such as M4, M6 or M8 depend on the TV. On a media wall, the practical answer is to put strong backing behind the panel across an area much wider and taller than today's bracket, so a future bracket can be fixed in a slightly different place without hunting for support. On slatted panelling the bracket goes to solid backing, never to the slats; see how to mount a TV on slatted panelling.
Choose the bracket type with change in mind too. A slim fixed bracket gives the neatest look; a tilting or articulating arm adds depth but makes reaching the back of the TV much easier when you swap cables. Whatever you choose, make sure the TV lifts off the bracket without removing panels, and keep the bracket's instructions with the project documents.
Weight rises with size as well. The VESA standard assigns its larger hole patterns to heavier screens, with load limits that climb as the pattern grows, so a bracket and fixings chosen for a light 55-inch set may be the wrong choice for a much bigger replacement. Ask for the backing to be specified for a heavier screen than the one you own, and check the new TV's weight against the bracket's rating before it goes up. Behind a stone-look face the load path is the same, and marble TV wall options shows how real marble, porcelain and marble-effect walls carry a bracket.
Depth: thin TVs, thick TVs and what sits behind
Depth matters more than people expect. Behind the screen there may be the bracket, a cable box, a streaming stick, sometimes a separate connection box, and the plugs of every cable. If the panel or recess leaves only enough depth for one particular TV, a model with rear-facing sockets or a thicker body can push the screen forward or refuse to sit flat.
Some televisions move most of their connections into a separate box with a single lead to the screen. That box needs a ventilated home, usually in the console, and the cable route has to suit its connector. Ventilation in general deserves attention: Samsung's guidance warns against heat near the set, noting temperatures should stay below 40°C near a fireplace, and electronics shut into a sealed space run warmer than they should.
Sound equipment changes with the TV too. A soundbar that sits on the console today may be replaced by one designed to fix beneath the screen, and some new sets ask for a particular gap below them for that purpose. Leaving clear space between the bottom of the screen panel and the console top, and a power point the soundbar can reach, means the audio can be upgraded along with the picture without moving anything permanent.
Cable routes sized for plugs, not cables
The single most common reason a TV swap turns into a rebuild is a cable route that is too tight to pass a new plug. HDMI heads are much wider than the cable behind them, and a power lead with a large moulded plug may not pass at all. One installer that fits conduit behind TV walls describes 25 mm conduit with about 21 to 23 mm inside, recommends slim HDMI cables with heads no wider than 20 mm, and warns that some power plugs need an electrician to modify them before they will go through.
Our recommendation is to size the route for the widest plug you are ever likely to pull, keep bends gentle so a cable can be pushed or pulled from either end, and run power separately from signal. Use cables rated for in-wall use, as TV makers advise. Leave a pull cord inside the conduit after the cables are in, so a new HDMI cable can be drawn through later without opening anything.
- Conduit sized for the plug heads, not the cable diameter
- Wide, gentle bends rather than tight corners
- A spare pull cord left inside for the next cable
- Separate routes for power and for HDMI, network and aerial cables
- In-wall rated cables where they run inside the structure
Sockets and where they sit
Socket position can quietly lock you into one TV. A socket placed for a large screen may show below a smaller replacement; one placed for today's set may end up behind the bracket arm of the next. The safest position is low and central within the area every likely screen will cover, so whatever goes up hides it.
Plan more outlets than you need now: a power point for the TV, one for any device that sits behind it, and a network point if the TV connects by cable. On our media walls, small electrical work such as moving or adding sockets is done by our own team, so it can be settled on the drawing rather than discovered on the day. Our guide to sockets and power for a media wall goes into the detail.
Removable panels and service access
Even with a perfect cable route, someone will eventually need to reach the space behind the TV: to add a device, replace a failed LED driver or check a connection. Plan a way in from the start. That can be a removable panel where the cables arrive, an open bay in the console, or the space behind the TV itself if the bracket lets the screen swing or lift away.
Ask how each panel is fixed and how it comes off without damaging the finish. Decorative cladding that is glued and pinned permanently looks the same as cladding fixed so it can be removed, until the day you need it. The LED drivers that power backlighting are a common culprit; they should sit behind an accessible cover or inside a cabinet, never sealed behind a fixed panel.
What a TV swap looks like on a well-planned wall
On a wall planned for change, replacing the TV is a short job. The old set is lifted off its bracket and the cables are unplugged. If the new TV uses a different VESA pattern, the bracket plate or arms are swapped, fixing into the backing that was put there for this reason. New cables, if needed, are pulled through the conduit on the cord left inside. The new set is hung, connected and checked, and the panel and its lighting stay exactly as they were.
Compare that with a wall built tightly around one TV: a recess too small for the new set, a socket that now shows, cables that cannot be replaced without opening the cladding, and a bracket fixed into the only solid spot behind a decorative panel. Each of those means cutting, refinishing or rebuilding part of the joinery. The difference between the two is almost entirely decided before the wall is made.
Settle these before the drawing is approved
At our free consultation we measure the wall with a laser, look at the TV you have and the one you might buy next, and draw the panel, backing zone, sockets and cable route around both. Our own team mounts the TV and handles the small electrical work, so those details sit in one drawing and one quotation. Our media walls start from AED 3,500 per project for a compact panel and floating console in standard laminate, and a typical wall takes about 10 days from confirmation.
Read the full media wall planning guide, compare compact TV units and floating consoles with full-height custom media walls, or start from the media wall service. Near the workshop, see media walls in Sharjah.
- The panel frames at least the next TV size up, with both outlines on the drawing.
- Solid backing covers a wide zone behind the panel, not just today's bracket position.
- Conduit is sized for plugs, with gentle bends and a pull cord left inside.
- Sockets sit low and central where any likely screen will hide them.
- There is a removable panel or open bay where the cables arrive, and the LED drivers are reachable.
Common questions
Can I put a bigger TV on my existing media wall?
Often yes, if the panel behind the screen is large enough to frame it, the backing can take the bracket and the weight, and the cables can reach. If the panel was sized tightly to the old TV, the larger set will overhang it; that can still work visually on a plain wall, but it may need the panel or lighting adjusted.
Will a new TV fit my old wall bracket?
Not always. TVs use different VESA hole patterns and screw sizes depending on their size and weight, and some brands vary the layout. Check the new model's specification against the bracket's supported patterns and load rating before you buy; changing the bracket plate is usually simple if the backing behind it is solid.
What size conduit do I need for HDMI cables?
Size it for the widest plug you will pull through, not the cable. One installer describes 25 mm conduit with roughly 21–23 mm inside and recommends slim HDMI cables with a head no wider than 20 mm. Larger conduit and gentle bends make future changes easier.
Should the TV be recessed into the wall?
A flush recess looks neat but is the least flexible choice, because a new TV with a different size or depth may not fit the pocket. If you want a recessed look, make the pocket larger than the screen and close it with a front frame that can be replaced.
Who moves the socket if the new TV is a different size?
On our media walls, small electrical work such as moving or adding a socket is done by our own team and shown as a separate line in the quotation. Placing sockets low and central behind the screen area from the start usually means a new TV does not need any change.
How much margin should I leave around the current TV?
Enough for at least the next size up. In 16:9 screens, going from 65 to 75 inches adds about 22 cm of width and 12 cm of height, so a panel that frames a 75-inch outline gives a 65-inch owner a comfortable upgrade path.

Sources & specifications
Manufacturer information applies to the named products and systems. Sources reviewed on 27 October 2026.
- Online Bedrooms: how to plan a media wall (clearance and future upgrades)online-bedrooms.co.uk(opens in a new tab)
- Intelligent Home: how TV wall conduits work (sizes, HDMI heads and power plugs)intelligent-home.helpsite.com(opens in a new tab)
- Samsung UAE: things to consider before wall mounting your TVsamsung.com(opens in a new tab)
- VESA Flat Display Mounting Interface: patterns, sizes and load ratingsen.wikipedia.org(opens in a new tab)
Want this planned for your home?
Consultation and measurement are free. Tell us the rooms, location and what you need; we arrange a sample visit and define the measured quotation.