Media Walls · 18 min read · 26 May 2026
Fluted and slatted TV walls: profiles, spacing, lighting and upkeep
Slat width and gap, vertical or horizontal, where the pattern meets the screen, light in the grooves, acoustic felt, mounting the TV and cleaning dust, with an animated comparison.

By Ali Haider Basra, Founder, Al Tareeq Decor · Contact our workshop

Key takeaways
- Choose vertical slats with a 30 mm slat and a 15 mm gap for most living rooms: about 53 slats across a 2.4 m wall, in a ratio of 2 to 1.
- A gap of about 13 mm is the minimum for an LED strip pressed into the groove; a 10 mm gap needs light behind the slats instead.
- Plan the pitch against the TV's width so no partial slat appears at either end, and keep the slats symmetrical around the screen's centre line.
- Never hang the TV from the slats: fix the bracket to solid backing, or give the screen a flat panel with slats at its sides.
- Felt-backed slats improve the sound inside the room, not between rooms; wipe the grooves every few weeks and never soak the wall.
On this page
- Key takeaways
- Fluted, slatted, ribbed or louvred: one family, five decisions
- Slat width and gap: three profiles on one wall
- Three profiles compared
- Vertical or horizontal slats behind a TV?
- Where the slats stop: alignment with the screen edges
- Screen width against slat pitch
- Light in the grooves and light on the slats
- Acoustic slat panels: what the felt does and what it does not
- Fitting a TV to a slatted wall
- Dust and cleaning: how to keep grooves clean
- Which finish and colour suit a slatted TV wall
- What a fluted TV wall costs, and what changes the price
- From idea to fitted wall
- Common questions
Fluted, slatted, ribbed or louvred: one family, five decisions
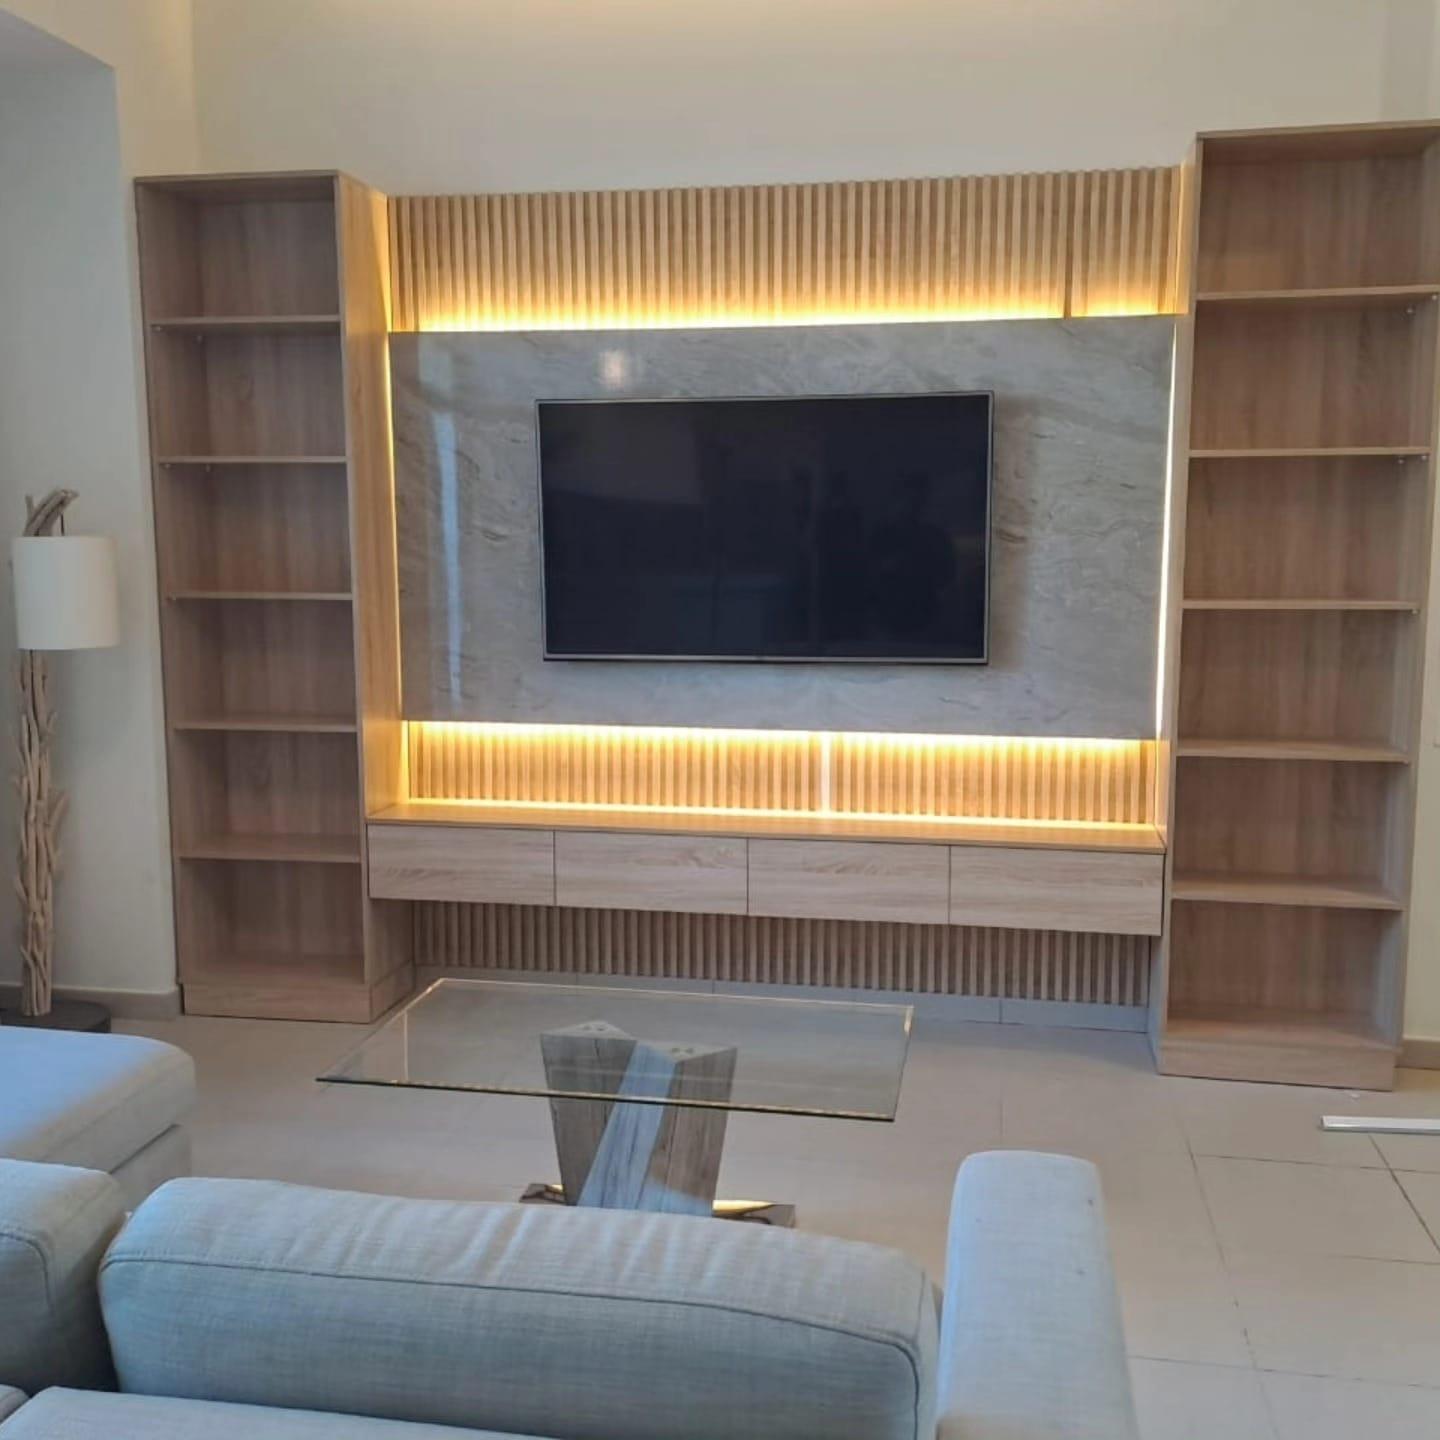
Fluted panel, slat wall, reeded panel, wood louvres: shops use all four names for the same thing, a wall covered in parallel vertical strips with a groove between each. On a TV wall the strips do three jobs at once. They give a flat plasterboard wall some depth, they make a shadow line that changes with the light, and they can hide a surprising amount of wiring and fixing detail behind a pattern that the eye reads as one surface. If you are weighing a slatted wall against a stand, what is a media wall compares them.
What you buy is less important than what you decide, and five decisions shape the result: how wide the slats are and how far apart; whether they run up or across; where the slatted field starts and stops against the screen; what light, if any, sits in the grooves; and whether there is acoustic felt behind. Two more are practical rather than stylish, namely how the TV is held, and how you will clean ribs in a dusty country. We go through them in that sequence.
One thing it does not do is compare boards. Whether the strips are MDF, WPC, PVC or timber is a separate question, covered in the MDF, WPC, PVC and wood comparison, and the checklist for asking a fitter about the core is in our media wall materials checklist. Here we assume the core is chosen, and look at how the wall should be drawn.
Slat width and gap: three profiles on one wall
Two numbers define a fluted profile: the width of the slat and the width of the gap, and together they give the pitch, the distance from one slat edge to the next identical edge. The drawing below puts three profiles on one 2.4 m wall and one 65-inch TV. Watch how the wall changes, not only how the pattern does: a fine rib puts 80 slats across the wall, a bold slat only 30, and the grooves between them go from a hairline to a deep channel that casts a real shadow.
Our suggestion for most living rooms is the middle one, a 30 mm slat with a 15 mm gap. It keeps the slat twice as wide as the gap, the ratio at which a slatted wall reads as wood with grooves rather than as grooves with wood. Fine ribs of 20 mm and 10 mm look calm from across the room and elegant in a narrow alcove, but the shadow line is so thin that the wall can look like a printed finish in daylight, and the gap is too tight to hold a strip of LED. Bold slats of 60 mm suit a large villa wall seen from three or four metres, where finer detail would simply blur.
The gap matters as much as the slat. It sets how much shadow each groove holds, how easily a cloth reaches into it, and whether a light strip can sit inside. LEDSpace, a UK maker of LED strips for slatted walls, builds its system for grooves 13 mm wide and 8 mm deep. That is the practical minimum for a strip pressed into the groove, and it is why the fine profile in the drawing is marked as unable to take one. Everything we say about light further down follows from that one number.
Three profiles compared
Fine ribs
- Slat + gap
- 20 + 10 mm
- Slats across 2.4 m
- 80
- Best for
- Small rooms, narrow alcoves, bedrooms
- Watch for
- Gap too tight for an LED strip; looks flat in strong daylight
Standard
- Slat + gap
- 30 + 15 mm
- Slats across 2.4 m
- 53
- Best for
- Most living rooms and majlis walls
- Watch for
- Needs the pitch planned against the screen width
Bold
- Slat + gap
- 60 + 20 mm
- Slats across 2.4 m
- 30
- Best for
- Large villa walls seen from 3 m or more
- Watch for
- Deep grooves collect more dust; can overpower a small TV
Our own drawing sizes, to compare profiles. The final slat and gap follow the wall, the TV and the finish we measure at your visit.
- 1. Slat profile: how wide each strip is and how many cross the wall
- 2. Shadow line: the groove between two slats, darker the deeper and wider it is
- 3. Light in the groove: a strip pressed into a gap of about 13 mm or more
- 4. Slat count and groove: the standard profile has 53 slats and a groove that holds a strip
Vertical or horizontal slats behind a TV?
Choose vertical. On a TV wall, vertical slats lift the eye towards the ceiling, so a standard 2.6 to 2.8 m wall feels taller. They also fall at right angles to the long edge of the screen, so the pattern frames the screen instead of competing with it. And they cope better with dust: a vertical groove is open at both ends, and what falls into it can be wiped or vacuumed downwards in one pass.
Horizontal slats do have a place. They make a short, wide wall feel longer, and in a room with a very high ceiling they stop a vertical pattern from stretching a narrow wall into a corridor. The costs are real, though. Every slat is a small shelf where dust settles, the lines run parallel to the screen's top and bottom edges so any small misalignment is visible, and a horizontal grid behind a moving picture is more tiring on the eye than a vertical one. If you want horizontal for the width, use it on the side panels only and keep a plain panel behind the screen.
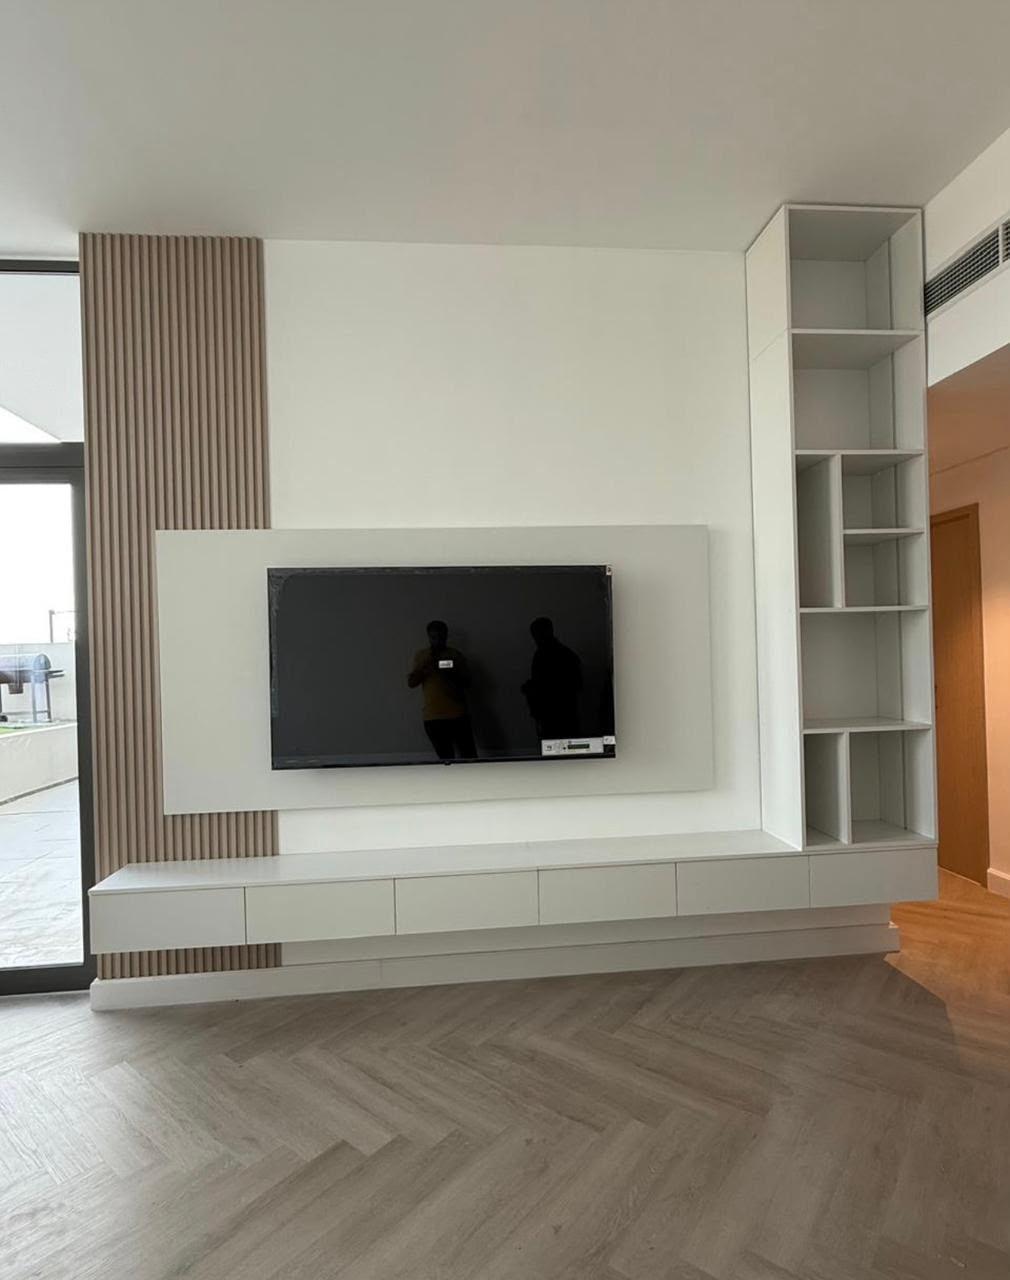
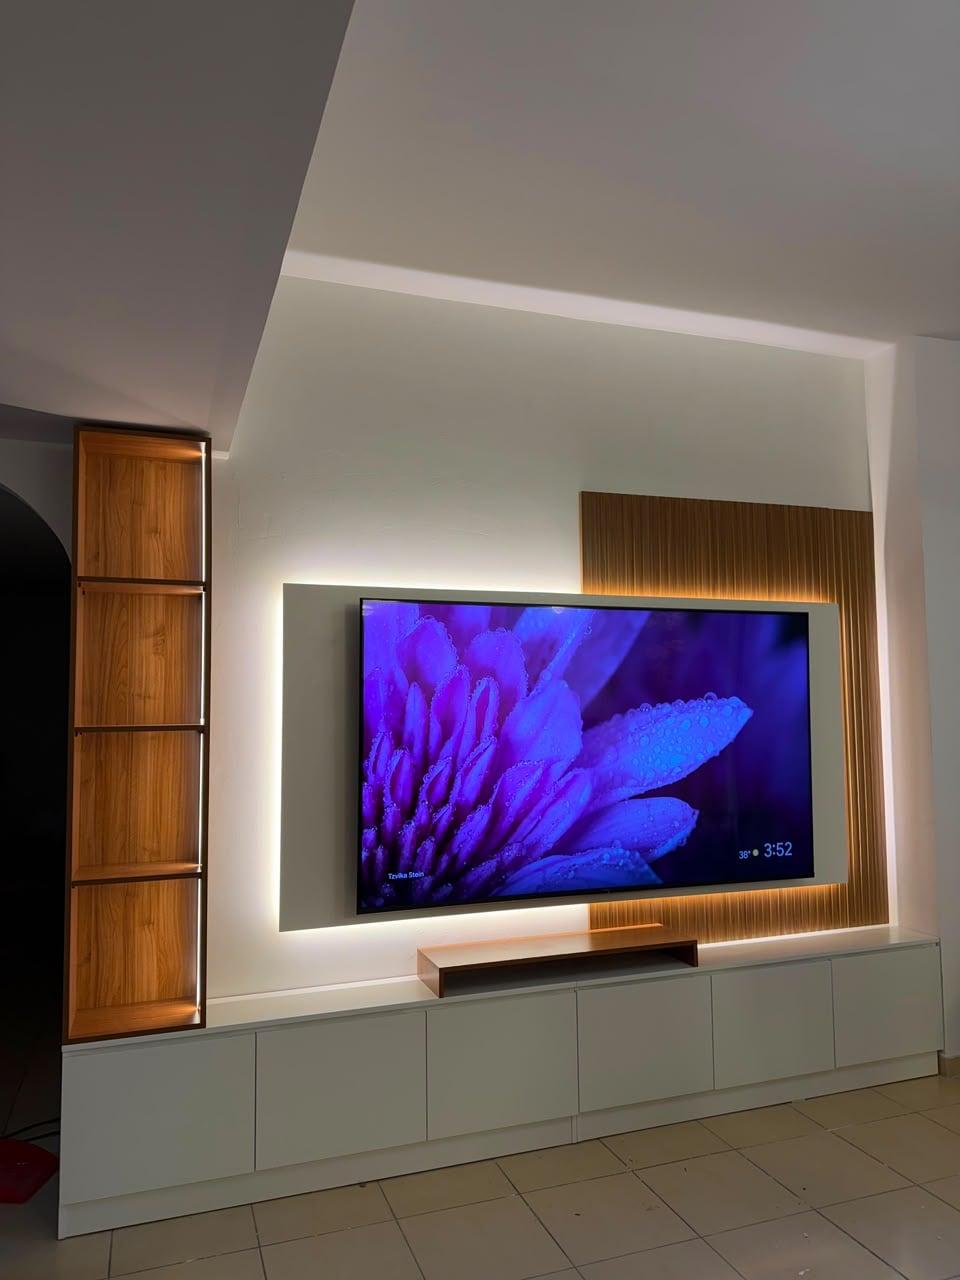
That plain panel is how most of our TV walls are built, and it is shown in the photograph below: a flat board behind the screen with a margin all round, and slats on one or both sides. It gives the TV a calm backdrop, avoids the question of fixing a bracket through a ribbed surface, and makes the screen easy to replace later, which changing the TV later explains in more detail.
Where the slats stop: alignment with the screen edges
The detail people notice most on a slatted wall is where the pattern meets the TV. Two rules prevent nearly every disappointment. First, no partial slats: every slat in the field should be full width, including the last one at each end, because a sliver cut from a wider piece looks like an accident from across the room. Second, decide whether the centre line of the screen falls on a slat or on a groove, and keep the slats symmetrical around it. An odd number of slats puts a slat in the middle, an even number a groove.
A little arithmetic makes the choice concrete. A 16:9 screen is about 0.87 times its diagonal in width, so a 65-inch set is roughly 1,440 mm wide before the bezel. At a standard pitch of 45 mm, that is 32 pitches across almost exactly, which means the edges of a slatted field the same width as the TV would land on groove lines at both sides. The table gives the same figure for other common sizes. Treat it as a way to see where edges fall, not as a spec: every brand has its own bezel, so the final cut is worked out from the TV you actually own, which is why buying the TV before the wall saves so many corrections.
How wide the slatted field should be, compared with the screen, is a proportion question that how high to hang the TV and choosing TV size and viewing distance cover from the TV side. As a starting point, a field that runs wider than the screen by about a third of the TV's width on each side looks planned, while one that ends a hand's width past the bezel looks like a mistake. And take slats up to the ceiling or the cornice line, not to an arbitrary height: a pattern that stops halfway up the wall needs a deliberate edge, such as a metal trim or the top of a cabinet.
Screen width against slat pitch
55 inch
- Width of a 16:9 screen
- about 1,220 mm
- Pitches at 30 mm
- 40.6
- Pitches at 45 mm
- 27.1
- Pitches at 80 mm
- 15.2
65 inch
- Width of a 16:9 screen
- about 1,440 mm
- Pitches at 30 mm
- 48.0
- Pitches at 45 mm
- 32.0
- Pitches at 80 mm
- 18.0
75 inch
- Width of a 16:9 screen
- about 1,660 mm
- Pitches at 30 mm
- 55.3
- Pitches at 45 mm
- 36.9
- Pitches at 80 mm
- 20.8
85 inch
- Width of a 16:9 screen
- about 1,880 mm
- Pitches at 30 mm
- 62.7
- Pitches at 45 mm
- 41.8
- Pitches at 80 mm
- 23.5
Our own sums: screen width is the diagonal multiplied by 0.872 for a 16:9 panel, divided by the pitch. Real sets differ by bezel; we measure the TV you own.
Light in the grooves and light on the slats
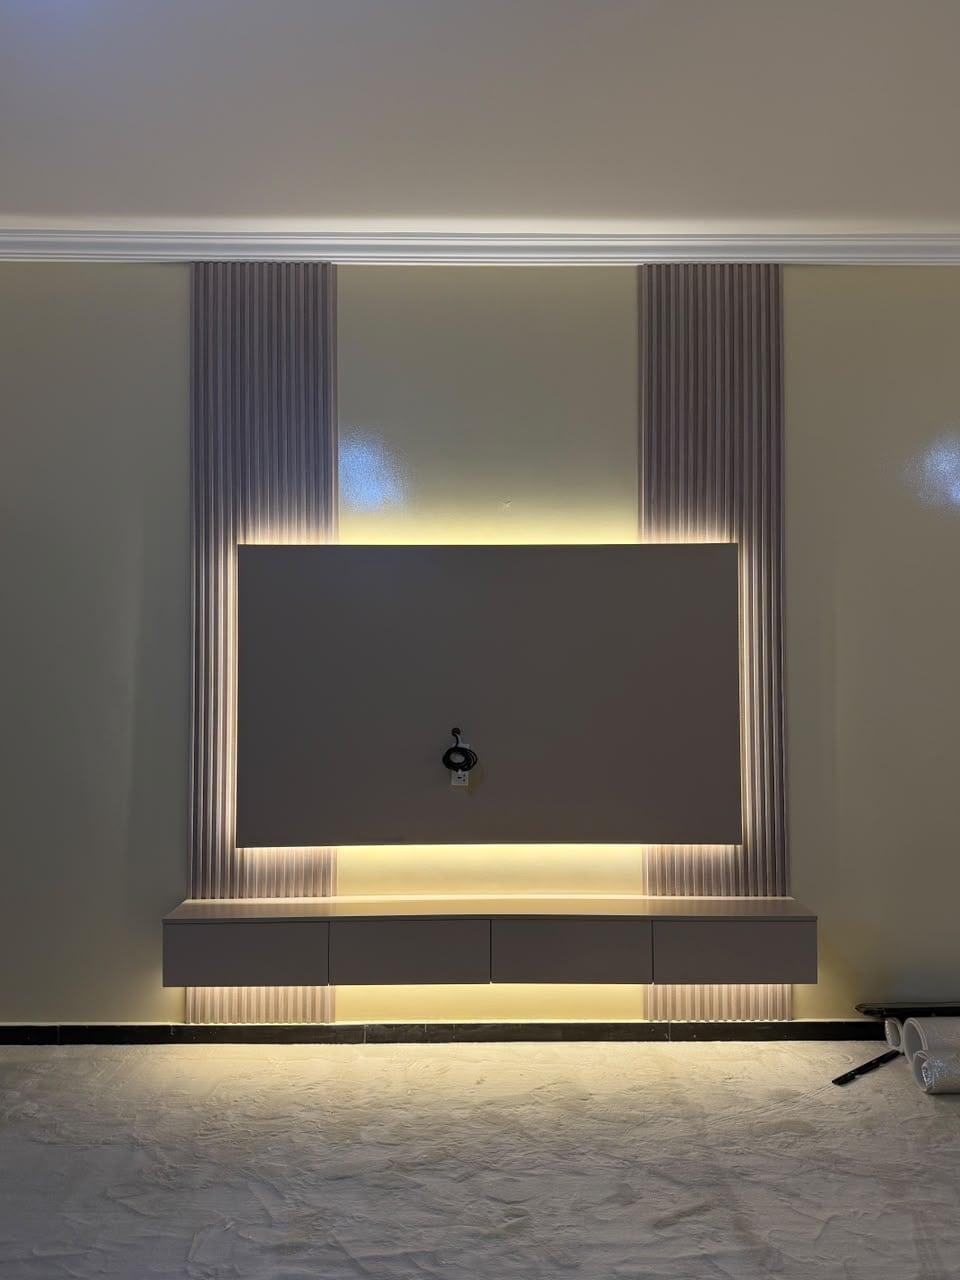
Light is what turns a slatted wall from a texture into a feature, and there are three ways to use it. A strip pressed into the groove draws a thin bright line down the wall. A strip behind the whole slatted field, hidden by an upstand or a gap at the edge, makes the slats glow as silhouettes against a lit wall. And a strip or spot above, grazing down the surface, throws a long shadow from every slat and makes the profile look deeper than it is. For colour, dimming and driver placement in each layer, see media wall lighting ideas.
Which one fits is mostly settled by the gap. LEDSpace's grooves are 13 mm wide and 8 mm deep, and its strips are pressed into them with no adhesive and cut at marked points, so a standard profile with a 15 mm gap will take them and a 10 mm gap will not. That is the only hard rule. Our own channels are 3000K warm or 4000K neutral on a dimmer; for a wood wall in a living room we nearly always recommend the warm one, which brings out the grain, while cool white makes oak look grey.
Two details decide whether the result looks expensive. The first is density: a strip with widely spaced LEDs shows as a row of dots inside the groove, while a dense one reads as a continuous line. Ask to see the strip lit, not described. The second is the driver. Every lit groove runs back to a power supply that has to be reachable, never buried, and a dimmer that is not hidden behind the TV. Planning media wall sockets and power and cable planning and service access show where those parts should go. The video below, from Vanishing Cabinets, builds a slat wall with an LED strip, trim and a sconce, step by step; watch how the strip is laid last, after the slats are up.
Acoustic slat panels: what the felt does and what it does not
Acoustic slats are the same strips of wood or MDF fixed to a felt backing, usually polyester felt, with the felt visible in the gaps. The idea is simple: sound that enters the groove is absorbed by the felt instead of bouncing back, so the room sounds less hard. In a UAE apartment with porcelain floors, glass doors and flat painted walls, that reflected sound is exactly what makes a TV harder to follow and a conversation tiring, so there is a real case for it behind a TV wall.
Be exact about what is promised. Absorption tidies the sound inside the room; it does not stop sound passing through a wall to the neighbours. The Barron Designs FAQ on acoustic panels quotes an NRC, a rating from 0 to 1 of how much sound a surface soaks up, of between 0.75 and 0.90 for its panels, depending on installation and spacing. Those are a manufacturer's own figures, and the page itself says the result depends on how the panels are installed. So ask any supplier for the test report, and for the mounting and any air gap behind the panel that produced the number, before you take it as what your wall will do.
In practice, a slatted wall behind the TV is one of several soft surfaces. A rug, curtains and a sofa do as much as the wall, and a TV wall that is only a few metres wide covers a small part of the room. If you want acoustic felt, treat it as a bonus that improves the room a little, not as a reason to choose a wall, and check the datasheet for fire performance: Barron lists reaction class B-s1,d0 for its panels, and every product has its own. The video below from SoundSettle, a short explainer on how slat absorbers work, shows why slat width and the insulation behind change the result.
Fitting a TV to a slatted wall
Never hang the TV from the slats. They are thin, they are held to the wall mainly by adhesive and a few fixings, and a large screen weighs far more than they were ever meant to carry. The bracket belongs on solid backing: a plywood or timber plate fixed to the structure behind, built out until its face is flush with the slats or the board panel. That backing, not the pattern, is what carries the screen. A fitter planning the wall with the TV model in hand sets it before any strip is glued.
There are three ways to arrange it, and we have a clear order of preference. The best is a flat board panel for the TV with the slats at its sides, as in the photograph earlier: the bracket sits on a plain, strong surface, a larger or smaller screen later needs only a new bracket, and the cables come out where nobody sees a cut slat. The second is slats behind the whole TV, with a void cut where the bracket arms land: good looking and tidy, but the cuts must be planned in advance, as the Mardom Decor guide to slat walls also advises, and a larger TV later means re-cutting. The third is a slatted field with a bare central zone left for the equipment, which Mardom suggests for easy access; it is the most practical, and the least dramatic.
Mind the depth. Slats of the profiles drawn above are 12 to 24 mm thick, and the backing under them adds more, so a fixed bracket must clear that and still put the TV close enough to look built in. Allow for the soundbar, the box and the plug, too, which need sockets in the recess. The full list of what to prepare is in planning a media wall, and the ready-made version of this combination of panel, console and slats is our wooden feature walls.
Dust and cleaning: how to keep grooves clean
Grooves hold dust, and a wall in the UAE holds more of it than one in a cooler, cleaner climate. The good news is that a slatted wall is easy to keep clean if you pick the profile and the finish with that in mind, and if you clean it on a schedule instead of waiting until it looks dirty.
Start with the profile. A fine rib with a 10 mm gap is the hardest to clean, because a cloth cannot reach into it and a vacuum nozzle has to be narrow. A 15 mm gap takes a slim crevice tool, and a 20 mm gap takes a cloth wrapped round a ruler. Vertical grooves let dust slide to the floor, so they stay cleaner than horizontal ones, which hold a shelf of grit on every slat. And finish matters too: a matt laminate or lacquer wipes clean, a dark colour shows dust sooner than a light one, and an open-grain real-wood veneer needs more care than anything sealed.
For routine care, the Andor Willow guide to cleaning wood walls suggests a microfibre cloth moved downwards from the top, and a vacuum with a slim end attachment for the grooves and a soft brush for the face. For deeper cleaning, a lightly dampened cloth with mild soap, wrung out well, then dried at once. It warns against bleach, ammonia, abrasive pads, vinegar and soaking the wall. That last point is the one to remember with MDF slats, which swell if they get wet; the core differences are in how the four cores differ. Our care and maintenance page has more on keeping finished joinery in good order.
- Every two to four weeks: dust from the top down with a microfibre cloth, then run a slim vacuum nozzle along each groove.
- Every few months: go over the faces with a lightly dampened cloth and mild soap, drying straight after.
- Never use bleach, ammonia, vinegar or a soaking-wet cloth, and test any cleaner on a hidden corner first.
- Keep the LED strips dry: switch them off at the dimmer and wipe round the strip, not over it.
Which finish and colour suit a slatted TV wall
Warm oak and walnut are the safest finishes for a living room, because they hold up against white walls, grey sofas and a dark screen alike. Charcoal and black slats suit a media room or a modern majlis, where the TV disappears against the wall and the grooves read as fine lines of shadow. We build fluted wall panelling in oak, walnut and charcoal, and the sample is the thing to judge: a photograph shows grain and tone very differently from a piece in your own light.
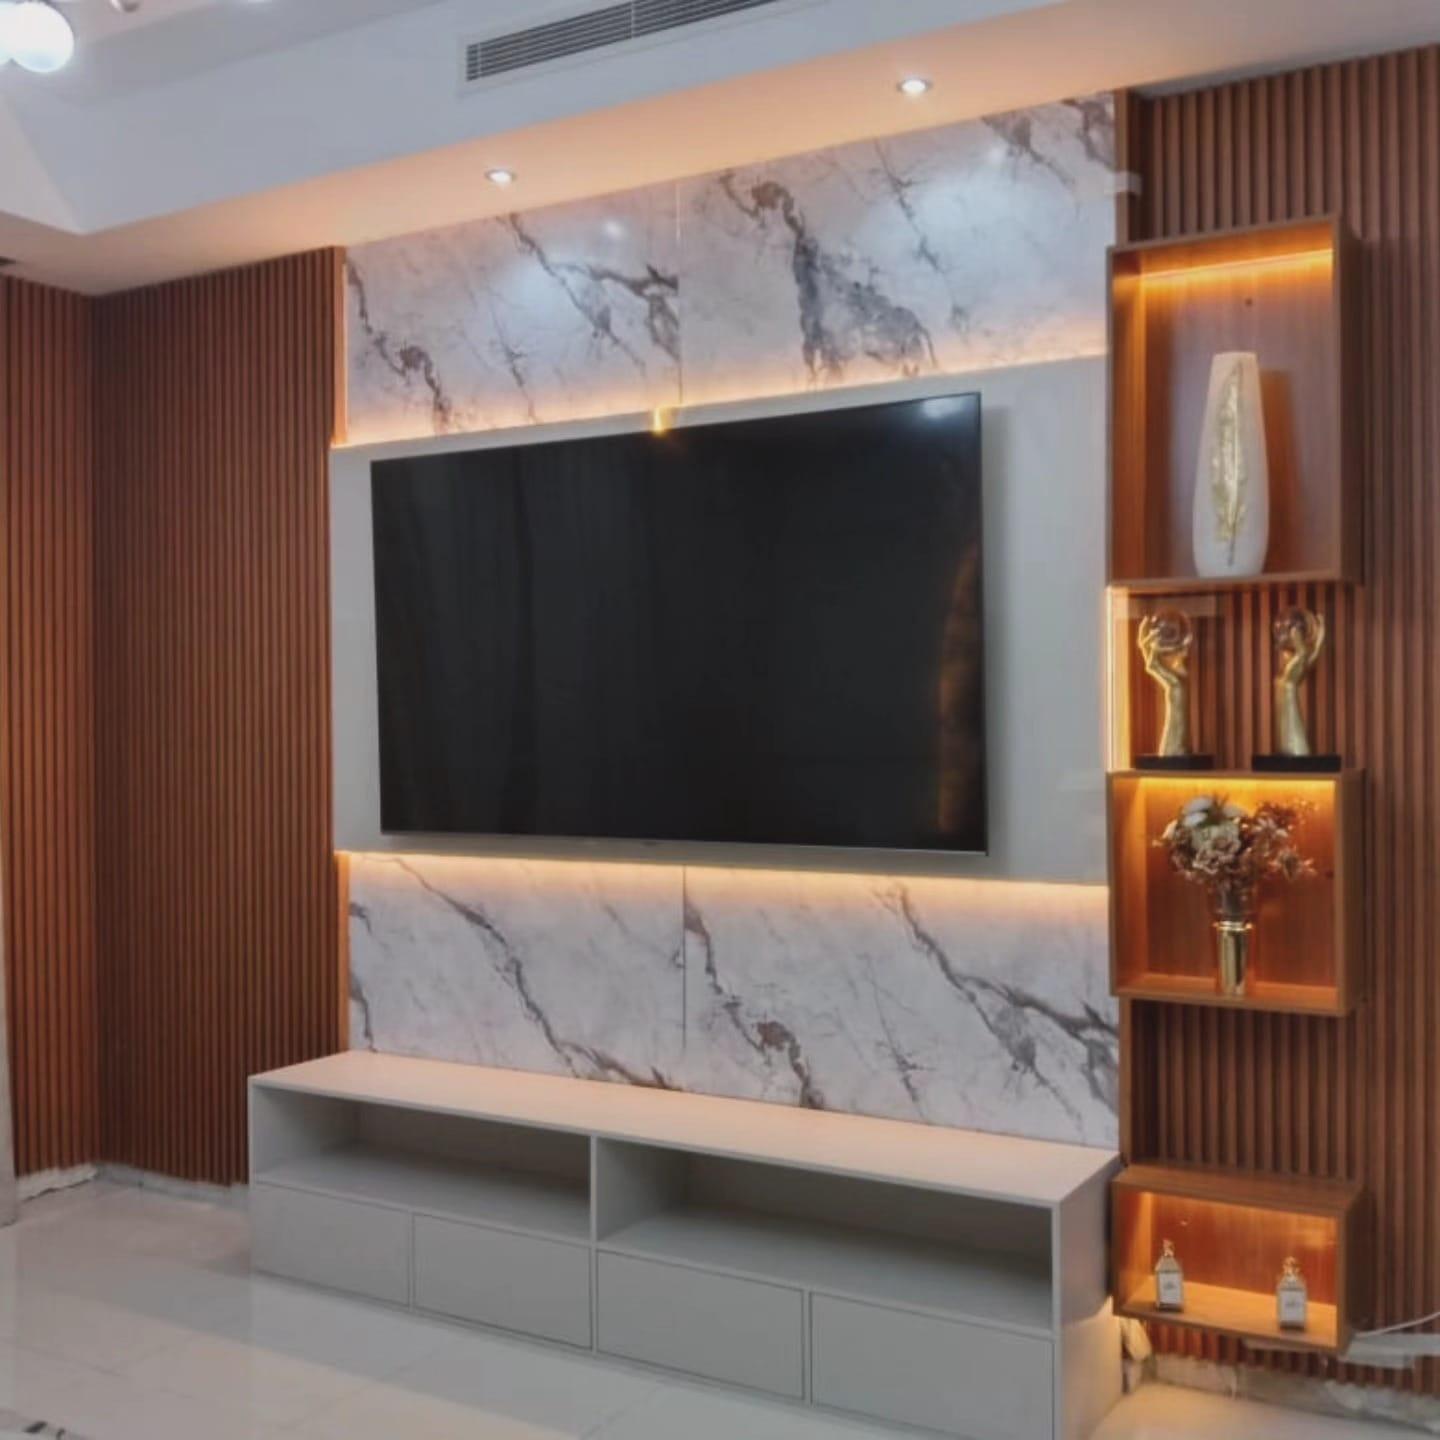
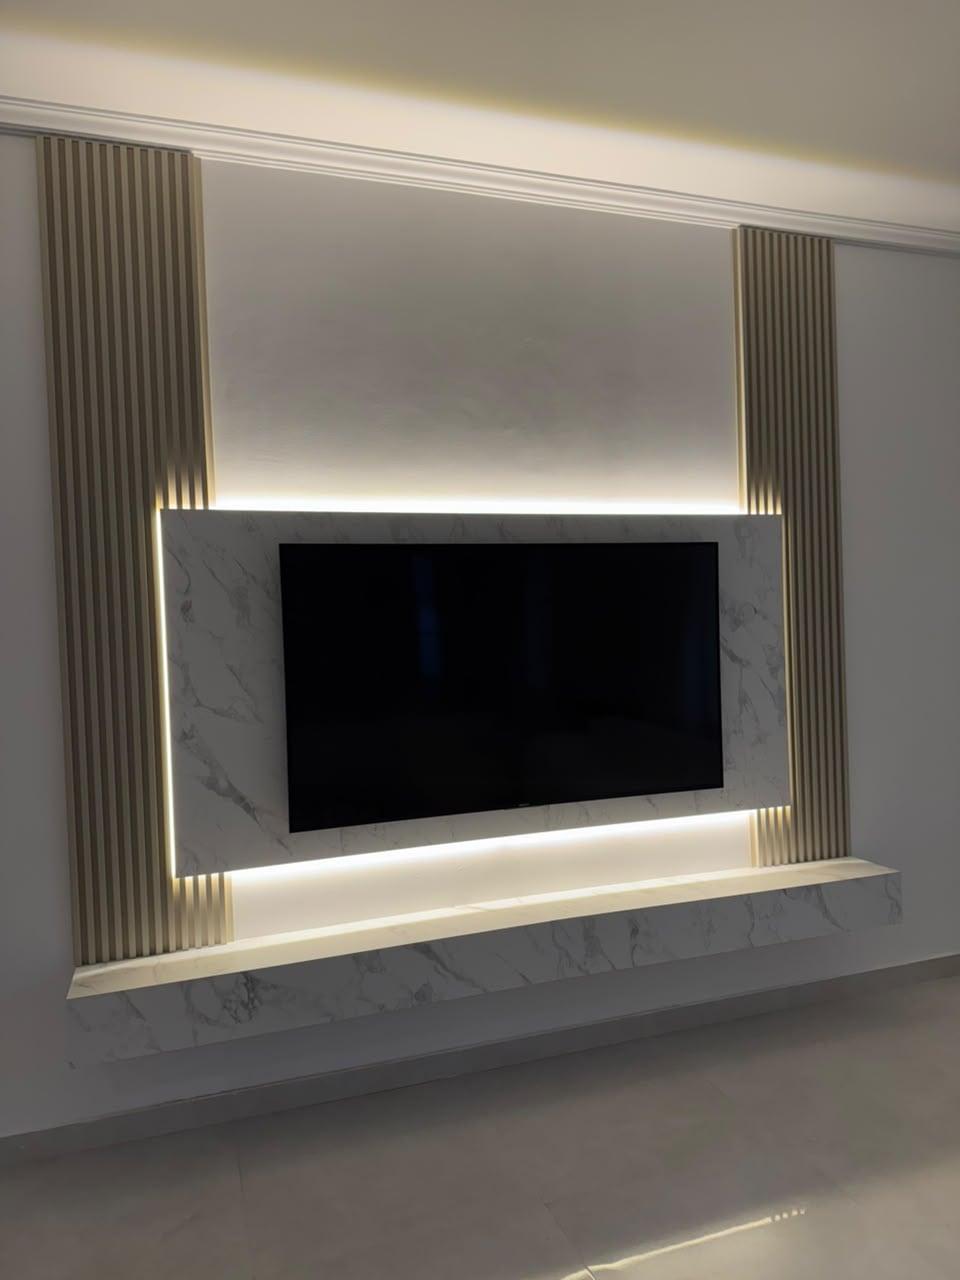
Think about the rest of the wall. Slats with a marble-effect panel set into them make a strong, formal combination; slats beside flat white joinery look calmer and are easier to live with. Keep slats and console within one colour range, and let the lighting supply the contrast. A slatted wall in a colour that matches the rest of the joinery looks built in, and one in a colour that nearly matches looks like a mistake. Marble TV wall options helps you choose the face for that centre panel.
If you are unsure, take a pale oak for a small flat and a mid walnut for a villa lounge, put the light on, and compare the two at the visit. That is cheaper than discovering after fitting that the colour you liked in daylight turns orange under warm LED. More combinations are in media wall design ideas.
What a fluted TV wall costs, and what changes the price
Our media walls start from AED 3,500 per project, for a compact panel with a floating console in standard laminate. A full slatted wall costs more, and it comes from the drawing, never from a rate per metre. The things that move it are wall size, finish (laminate, veneer or lacquer), marble-effect panels, lighting and a built-in fireplace.
Within a slatted wall, the profile you choose changes three things. A finer rib means more pieces to cut and fit for the same width. A strip in every groove means more LED length, a driver and a dimmer, and an acoustic felt backing adds a layer. None of these is expensive on its own, but together they explain why two walls that look similar in a photograph can be quoted very differently. what media walls cost in the UAE breaks down a quotation line by line.
To keep the number honest, ask for the slats, the backing board, the lighting and the console as separate lines, and compare them with the checklist in our media wall materials checklist. If a quotation says only fluted TV wall with no profile, no core and no lighting, it cannot be compared with another.
From idea to fitted wall
Start with our free home measuring visit. We arrive with finish samples, take the wall and room dimensions, note the sockets and any AC grille near the screen, and ask which set you have or intend to buy, because the slat pitch is set against it. A drawing follows with the profile, the position of the slatted field, the lighting and the console, and production begins once you approve it.
Panels and consoles are made in our Sharjah workshop and fitted by our own installers across the UAE, normally within about 10 days of confirming the order, depending on the size of the wall. Our written workmanship warranty runs 24 months. To see what we build, browse our media walls service, custom media walls and floating TV units and consoles, or see the Sharjah media wall page for local work. If you need shelving with the slats, look at media walls with display shelving. Use this list on the drawing before you approve it:
- The slat and gap sizes are written on the drawing, with the pitch.
- No partial slats at either end, and the centre line of the screen falls where you expect.
- The TV bracket is fixed to solid backing, not to the slats.
- The gap is 13 mm or more wherever a light strip is meant to sit in it.
- The driver and dimmer are somewhere reachable, and every socket the TV and soundbar need is shown.
- The finish has been seen as a sample, under the light you will use.
Common questions
What is the best slat width and gap for a fluted TV wall?
For most living rooms, a 30 mm slat with a 15 mm gap, a ratio of 2 to 1. Fine ribs of 20 and 10 mm suit small rooms, and bold 60 mm slats suit large walls seen from a distance. Wooden feature walls.
Should fluted panels on a TV wall be vertical or horizontal?
Vertical, in nearly every case: it makes the wall feel taller, frames the screen and lets dust be wiped downwards. Keep horizontal for side panels, if at all. Our media wall service.
Can you put LED lights in fluted panels?
Yes. A groove of 13 mm or more takes a strip pressed into it, and a slimmer gap can be lit from behind. The driver must stay reachable. Media wall sockets and power.
Do acoustic slat panels soundproof a TV wall?
No. Felt-backed slats absorb sound inside the room, which reduces echo; they do not stop sound passing through the wall. Ask for the test report behind any rating. MDF, WPC, PVC or wood panels.
How do you mount a TV onto slatted panelling?
Fix the bracket to solid backing behind or flush with the slats, never to the slats themselves, or give the TV a flat panel with slats at the sides. That also makes a later change of TV simple. Changing the TV later.
How do you clean a fluted wall panel?
Dust from the top down with a microfibre cloth, run a slim vacuum nozzle along each groove, and wipe with a lightly dampened cloth, drying at once. Avoid bleach, vinegar and soaking. Care and maintenance.
How much does a fluted panel TV wall cost?
Our media walls start from AED 3,500 per project for a compact panel and floating console; a full slatted wall is priced from the drawing, by size, finish and lighting. what media walls cost in the UAE.

Sources & specifications
Manufacturer information applies to the named products and systems. Sources reviewed on 28 October 2026.
- Barron Designs: acoustic wall panels FAQ (NRC 0.75–0.90 depending on installation and spacing; fire class B-s1,d0)barrondesigns.com(opens in a new tab)
- LEDSpace: how to install slat wall panels with built-in LED lighting (strips for grooves 13 mm wide and 8 mm deep)ledspace.co.uk(opens in a new tab)
- Mardom Decor: how to finish the wall behind the TV with slatted wall panels (plan the mount, leave a bare zone for equipment)mardomdecor.com(opens in a new tab)
- Andor Willow: how to clean wood walls (microfibre, slim vacuum nozzle for grooves, what to avoid)andorwillow.com(opens in a new tab)
Want this planned for your home?
Consultation and measurement are free. Tell us the rooms, location and what you need; we arrange a sample visit and define the measured quotation.