Fit-Out · 12 min read · 13 May 2026
Fit-out handover and snagging checklist: how to inspect finished work
How to check a finished fit-out before you sign: what to bring, the route to walk, joinery, finishes and electrics, writing the snag list and what to keep.

By Ali Haider Basra, Founder, Al Tareeq Decor · Contact our workshop
Key takeaways
- Inspect against the approved drawings, BOQ and samples, not against how the room looks.
- Walk the same route in every room: operate each item, then look at it by day and again under the room's own lights.
- Write each fault as location, item and how it differs from the approved work, with a wide and a close photograph.
- Sort every item into snag, change or normal characteristic before you sign.
- Our 24-month written workmanship warranty covers our own work on orders agreed from 10 October 2026.
On this page
- Key takeaways
- What snagging means, and what a handover is
- What to bring on handover day
- Set the room up for a fair inspection
- A route that covers every room the same way
- Joinery: doors, drawers, shelves and interiors
- What to test at handover, and what it usually finds
- Finishes: paint, wallpaper, ceilings and edges
- Lights, sockets and the services behind a media wall
- Writing the snag list so it gets fixed
- Snag, change or normal characteristic?
- Two videos worth watching before your walk-round
- A UAE view: an inspection on handover day
- After the walk-round: sign-off, records and warranty
- A one-page handover checklist to print
- Common questions
What snagging means, and what a handover is
A handover is the moment a finished job passes from the people who built it to the people who will live with it. Snagging is the inspection that comes just before it: a careful walk through the completed work to list the small defects and omissions that remain. The Designing Buildings wiki points out that the word has no agreed legal meaning, and is simply trade slang for finding and recording minor faults so the contractor can put them right. A snagging list is also called a punch list.
The point of doing it properly is that a room always looks finished before it is. A freshly cleaned room hides a drawer that rubs, a socket that is not live and a paint edge that was missed behind a door. Finding these at handover costs the contractor an hour to fix; finding them six months later costs both sides an argument about when and how they arose.
This guide covers a fit-out of a home or a part of one: joinery, ceilings, wall finishes, lighting and window treatments. How the quantities and prices were set is covered in reading a fit-out BOQ; here the job is done and you are checking it.
What to bring on handover day
Inspect against the agreed work, not against how the room looks. Bring the approved drawings, the BOQ or quotation, any written changes, and any sample you approved, such as a laminate chip, a fabric swatch or a paint colour card. A neat room does not by itself prove that every item in the scope has been done, and without those papers a missing item is easy to mistake for a new request.
Bring a tape, a torch and a phone with a full battery. A torch is how you find a drawer-runner scrape or a dull patch in a ceiling joint, and a cheap plug-in socket tester shows whether a socket is live. Ask the person who built the work to come with you, because they can demonstrate controls and tell you at once whether something is an error or an agreed detail.
Choose a time with good daylight and allow enough time. For a single room an hour is reasonable, and for a whole home plan on half a day. The Designing Buildings wiki estimates about an hour for every 100 m² of floor area on a larger project, which gives a feel for how long a thorough check takes.
Set the room up for a fair inspection
Before anyone starts looking, make sure the conditions are right. The same wiki advises inspecting only after a thorough clean, with protective coverings removed and permanent lighting working. A scratch hides under a plastic film and a joint disappears under a work light, so a check made too early will either miss faults or invent them.
Do it in two lights. Look first in daylight with the curtains open, then in the evening light the room will actually have, switching on the coves, downlights and any LED strips. Surface faults that vanish when you look straight at a wall show up when you look along it, so stand to one side and sight along walls, ceilings and door fronts.
Anything that is physically installed but not yet tested should be written on the sheet as not yet tested, not ignored. That includes any light circuit on a dimmer, any motorised curtain and any equipment someone else has still to commission.
A route that covers every room the same way
Inspections go wrong when people wander. Walk the same route in every room: in at the door and look down at the floor, then work your way round the walls in one direction, ending with the ceiling. The drawing below shows the route we suggest, with six stops, in a room that has a wardrobe, a media wall and a window.
At each stop, do two things: operate it, then look at it. Open and close every door and drawer, switch on every light, draw every curtain. Then step back and look at the finish with fresh eyes and a torch. Write down what you find at the stop where you find it; trying to remember seven rooms of faults afterwards is how items get lost.
- 1. Door and floor: the door closes, the floor and skirting are clean and undamaged
- 2. Wardrobe: every door and drawer opens fully and closes softly
- 3. Media wall and joinery: shelves are level, gaps even, hidden cables reachable
- 4. Sockets and switches: each one works and sits where the drawing put it
- 5. Window and curtains: tracks run smoothly, hems and fixings are even
- 6. Ceiling and lights: joints show nothing in a raking light; every fitting lights
Joinery: doors, drawers, shelves and interiors
Joinery is where handover checks pay off most, because it has the most moving parts. Open each door through its full swing and close it again: it should shut without catching, stay aligned with its neighbours and show an even gap all round. Pull each drawer out to its full length, load it in your mind with something heavy, push it shut and listen. A good soft-close drawer finishes its own movement. Test handleless and push-to-open fronts too; handles or handleless wardrobes explains how each system should feel.
Then look inside, which is where a drawing and a finished cabinet part company most often. Compare the interior with the approved drawing: the number of shelves, the rails, the drawer count, the accessories. Check that shelves are level by placing something round on them, and that handles and edge banding are fully attached, with no rough or lifted edges.
Leave the fronts as you found them. If a door has dropped slightly or a drawer rubs, it is almost always an adjustment of hinge or runner, and the person who made it will do it in a minute; do not adjust things yourself during the check. The table lists what to test, how, and what it usually turns up.
What to test at handover, and what it usually finds
Hinged doors
- How to test
- Open fully, close slowly, check all gaps
- Typical snag
- A door that catches or sits out of line with its neighbour
Drawers and runners
- How to test
- Pull to full extension, push shut, repeat
- Typical snag
- Rubbing, uneven gaps, a front that is not flush
Shelves and rails
- How to test
- Place a round object on each shelf; lean on the rail
- Typical snag
- A sloping shelf, a loose bracket
Handles and edges
- How to test
- Run a finger along edges and around handles
- Typical snag
- Lifted edge banding, a loose handle
Wall finishes
- How to test
- Look along each wall with a torch
- Typical snag
- Missed paint edges, wallpaper seams that open, marks
Ceiling and coves
- How to test
- Switch the lights on and look along the ceiling
- Typical snag
- Visible joints, uneven light along a cove
Sockets and switches
- How to test
- Plug in a tester or a lamp; press every switch
- Typical snag
- A dead socket, a switch that controls the wrong light
Curtains and blinds
- How to test
- Run through every position from end to end
- Typical snag
- A snagging track, uneven hems, a loose fixing
Our own checklist for handover walk-rounds; adapt the list to the work actually in your rooms.
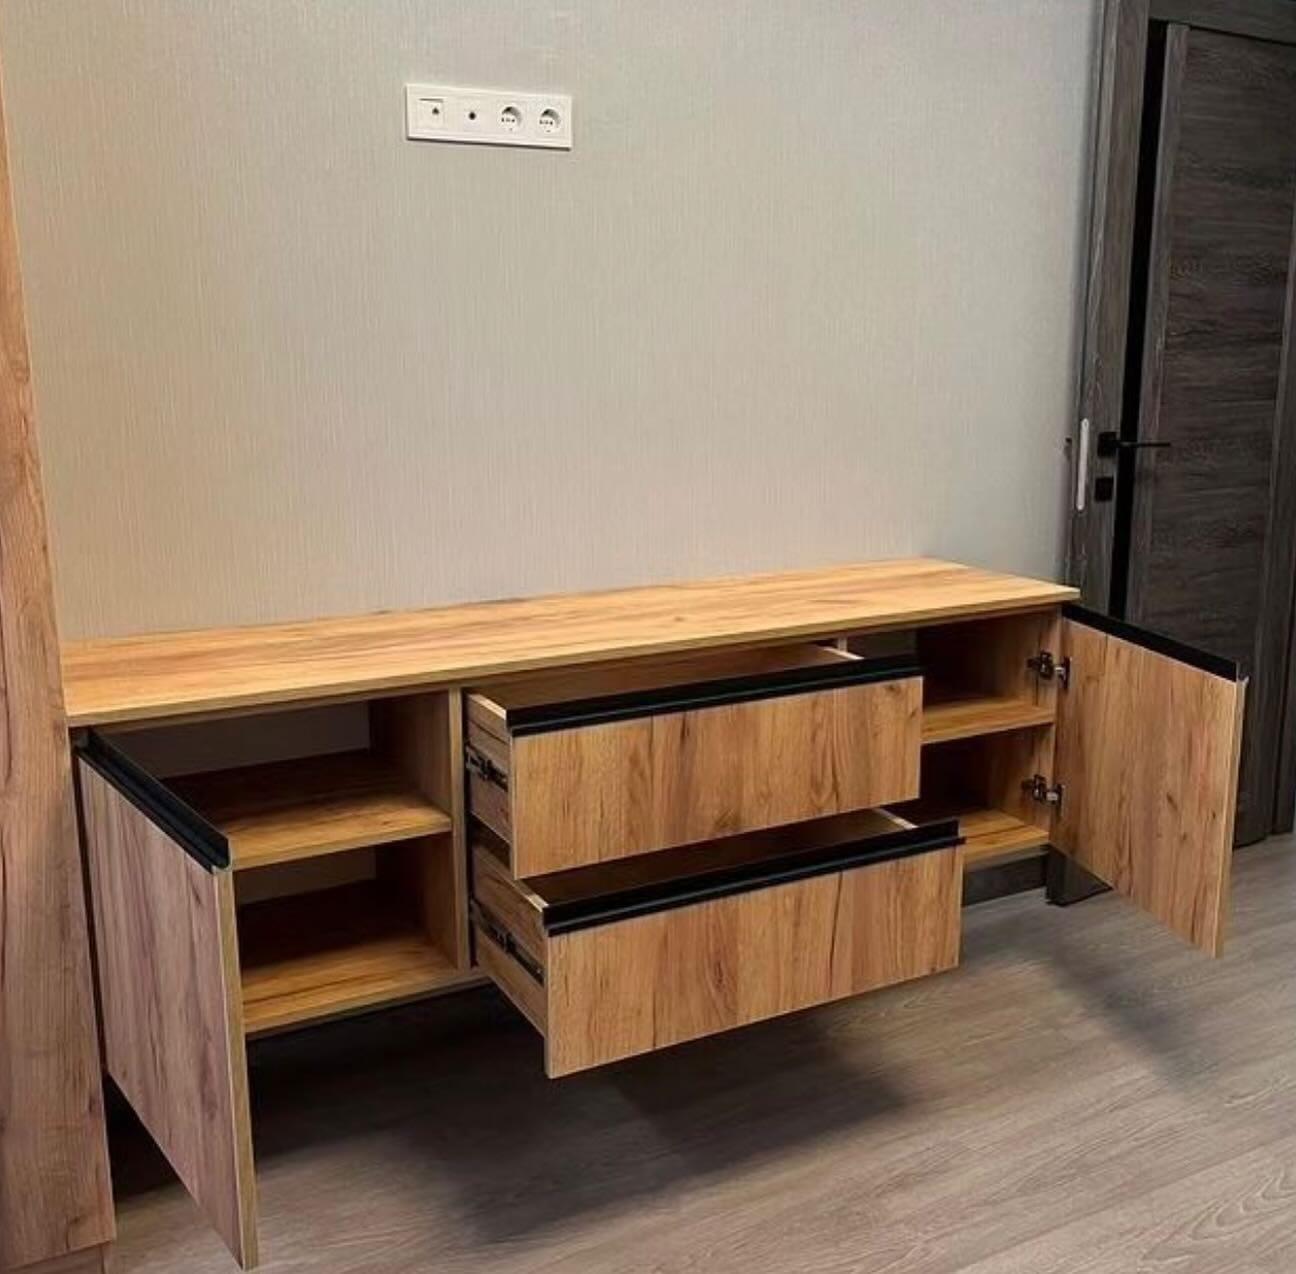
Finishes: paint, wallpaper, ceilings and edges
Look at finishes in the lighting they will live in. Compare what you see with the sample you approved, since natural variation in wood or a fabric's pattern should have been explained before ordering and is not a fault. What is a fault is a different material from the one you chose, a visible joint that was meant to be smooth, or a surface that does not match its neighbour in sheen.
On walls, run the torch along each wall and look for roller marks, missed corners and paint that has crept onto a frame. On wallpaper, check that pattern lines up across seams and that no seam has lifted. Around joinery and sockets, look for gaps between the cabinet and the wall, and for unfilled holes left by the fitters.
On ceilings, switch on every light and the cove, then look along the surface from one side. Joints that were meant to disappear show in raking light, and so does a ripple. How smooth a ceiling should be is a matter of its finish level, set out in the gypsum ceiling specification guide. Hatches matter too: check that each ceiling access panel opens and closes properly.
Lights, sockets and the services behind a media wall
Everything electrical should be tested, not assumed. Press every switch and note which light it operates; if there are dimmers, run them from lowest to highest and watch for flicker. Test every socket, including the ones on a media wall, where cables and power sit behind panels and cannot be reached after handover without opening them.
Our own team does the small electrical jobs that come with joinery and ceilings, such as moving a socket, adding LED strip wiring or fresh light points. Those items appear as lines on the quotation, so look them up there and test each one. If the work included a service channel or a cable route behind a media wall, confirm that it can still be reached, as set out in media wall cable and service access.
Anything that belongs to another trade, such as air-conditioning equipment or an appliance, is checked the same way but reported to whoever installed it. Write down what you saw and who it belongs to, so the item reaches the right person rather than sitting on a list nobody owns.
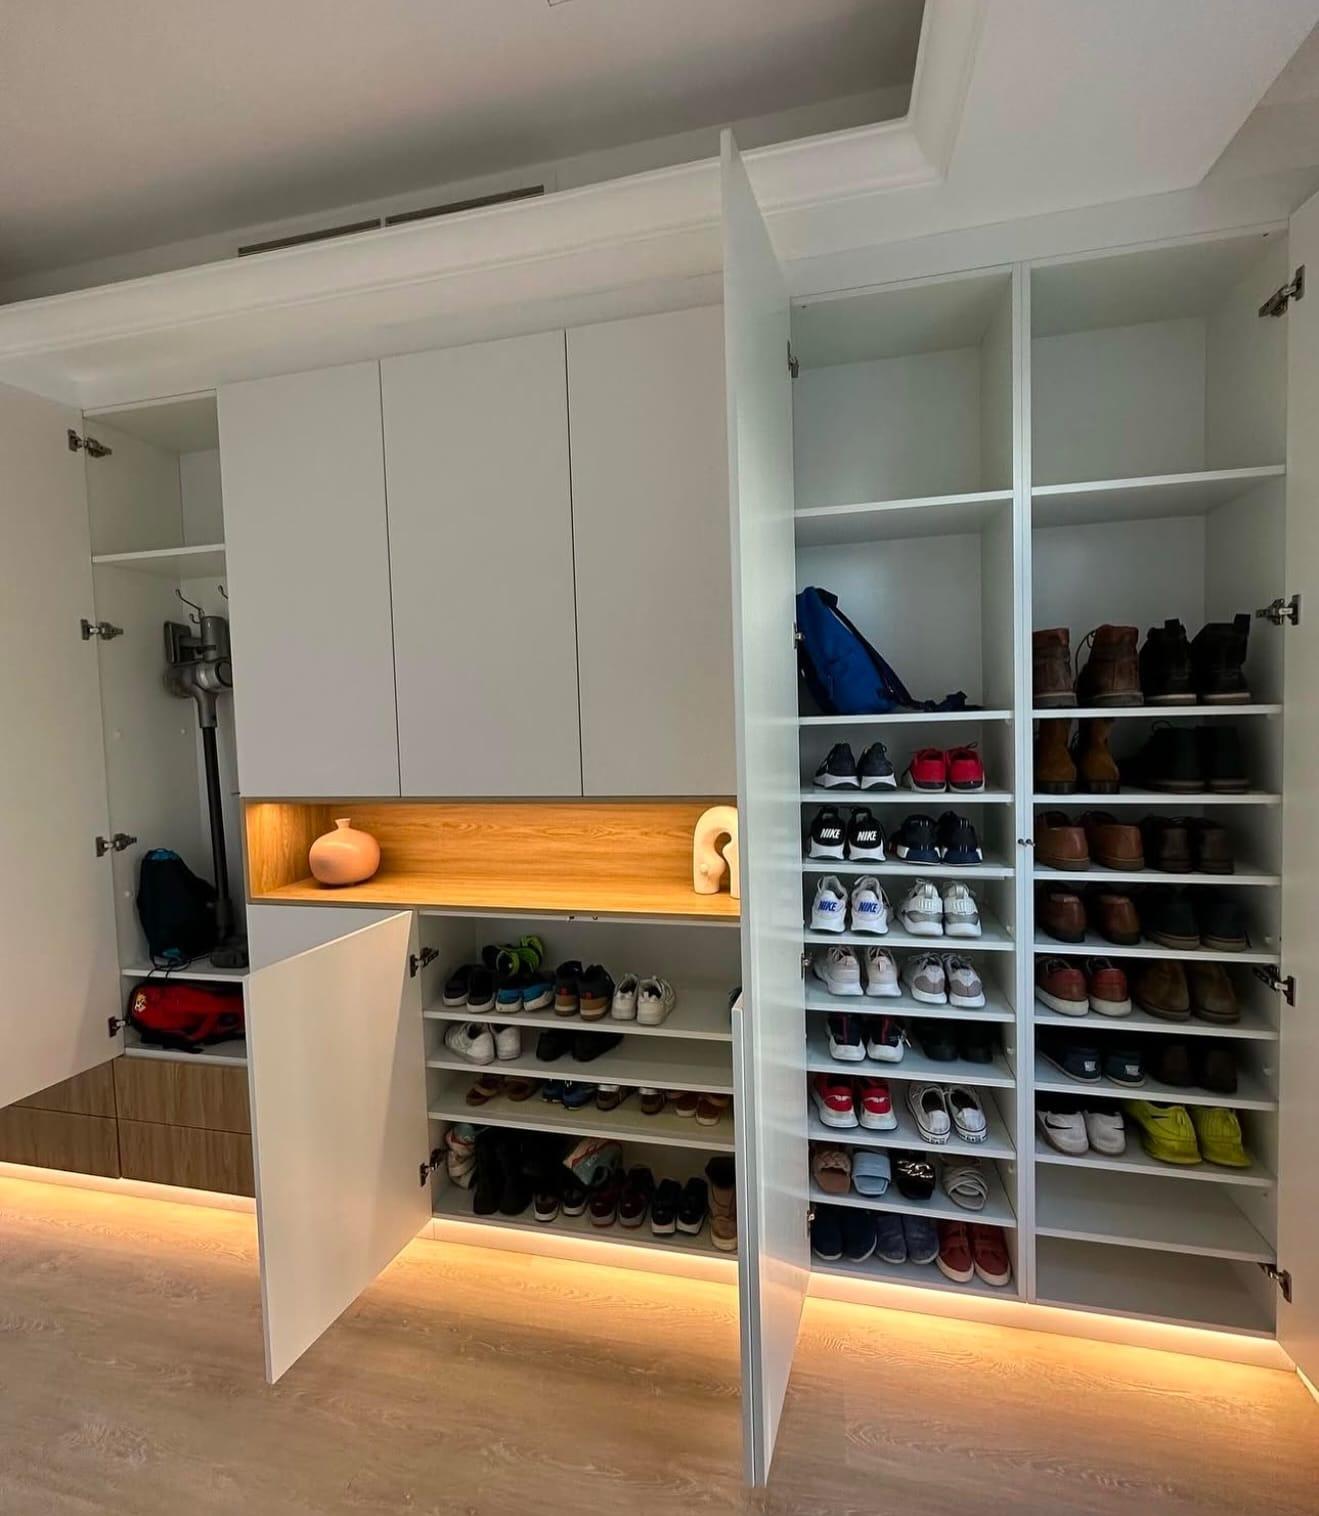
Writing the snag list so it gets fixed
A good snag list is specific. Each line gives a location, the item, and how it differs from the approved work: "Master bedroom, wardrobe door 3, rubs the frame when closing" is useful; "wardrobe not good" is not. Take a photograph wide enough to show where the problem is, and a second close enough to show what it is. The Designing Buildings wiki also advises keeping dated records and acknowledgement receipts, since defects can lead to disputes long after completion.
Sort each item into one of three groups. A snag is something that differs from the agreed work and is the contractor's to put right. A change is something you would now like different, which is a new request with its own price and timing. A characteristic is normal for the material, such as the grain of real timber or a slight shade variation between fabric lots. Telling them apart keeps the list short and the conversation calm.
Agree a date for the repairs before you leave, and a second, shorter visit to confirm them. The wiki notes that closed-off areas should be locked down to stop them deteriorating and given a final inspection before handover; the same habit works in a home.
Snag, change or normal characteristic?
A drawer rubs against the frame
- Which group
- Snag
- What happens next
- Adjusted or replaced by the contractor
A socket is not live
- Which group
- Snag
- What happens next
- Tested and repaired by the person who fitted it
A shelf was on the drawing but is missing
- Which group
- Snag
- What happens next
- Fitted, since it is in the approved scope
You would like an extra shelf that was never drawn
- Which group
- Change
- What happens next
- Priced and agreed first, then done
Real wood shows grain different from the sample photograph
- Which group
- Characteristic
- What happens next
- Explained and compared with the approved sample
A hairline mark from the day's work on a skirting
- Which group
- Snag
- What happens next
- Cleaned or touched up before handover
A sample-approved natural characteristic does not excuse the wrong material or faulty work.
Two videos worth watching before your walk-round
Two short videos show what a snagging inspection looks like in practice. The first, from Move iQ, is presented by property expert Phil Spencer. It is aimed at buyers of new-build homes in the UK, but its advice on when to start a snagging list, what to check and why not to rely on your eyes alone applies to any finished interior. Its chapters on what to check, on not using only your eyes, and on when to start the process are the useful ones.
A UAE view: an inspection on handover day
The second video is a UAE one. A Dubai broker walks through a professional handover inspection of an apartment, and its chapters on the documents to have in hand before the inspection, and on checking the kitchen cabinets and fittings and the appliance connections, are the closest match to a fit-out check. Note that it is about taking over an apartment from a developer. The compensation rules it mentions belong to buying property and do not apply to a fit-out; and the broker also promotes their own business, take the way it inspects, and leave the sales pitch.
After the walk-round: sign-off, records and warranty
When the repairs are done, repeat only the items on the list and confirm each one is closed. Only then sign the handover, and keep your own copy of the signed list. In larger building contracts the point at which the work is accepted is called practical completion, and the Designing Buildings wiki describes a defects liability period that normally runs for six to twelve months afterwards, during which the contractor must correct defects that appear. Our written commitment works differently, and is simpler.
Al Tareeq Decor gives a 24-month written workmanship warranty from completed installation or handover on the fabrication and fitting our team has done, for new orders agreed from 10 October 2026. If something shows up later, contact us by phone or WhatsApp with your order reference or installation address and a description of the issue; photographs help. After finding the cause, we repair, adjust or replace as fits. Please leave a stuck door or treatment alone, and do not open a motor, until we have seen it. Warranty and aftercare sets out the details.
Keep the drawings, the BOQ, any written changes, the signed snag list, and the care instructions and product references of the fabrics and finishes used. They make a later claim quick. A last point: if you are moving into a lived-in home, preparing an occupied home for installation explains how to protect finished work while the rest of the job continues.
A one-page handover checklist to print
Copy this list into your phone or onto paper and tick it off room by room. It covers what most home fit-outs need; strike out what your job did not include, and add what it did.
- Drawings, BOQ, written changes and approved samples are with you.
- The room is clean, covers are off, and lights and curtains are ready for a fair look.
- Every door and drawer opens fully, closes softly and shows even gaps.
- Interiors match the drawing: shelves, rails, drawer count, accessories.
- Walls, paint, wallpaper and joints are checked by day and again under the room's own lights.
- Every switch, socket, dimmer, LED strip and fitting works and is where the drawing put it.
- Curtains and blinds travel their whole length smoothly; motors respond to their controls.
- Access panels open, and service routes behind panels can still be reached.
- Each item found is written down with its place, a wide photo and a close photo.
- Repairs are dated, re-inspected, then the handover is signed and the records kept.
Common questions
What is a snagging checklist?
A room-by-room list of things to operate and look at on a finished job, so small defects are found and recorded before you sign off. Fit-out handover checklist.
What does snagging mean in a fit-out?
Snagging is the inspection that finds minor faults and omissions in completed work so they can be fixed before handover. The word has no fixed legal meaning. How a BOQ sets the scope you inspect against.
How long should a handover inspection take?
An hour is reasonable for a single room; plan on half a day for a whole home. Rushing it is how faults get signed off. Planning a fit-out.
What should I check on joinery at handover?
Open every door and drawer fully, check gaps and alignment, compare the interior with the drawing, and look for loose edges and handles. Wardrobe materials and hardware.
Who fixes defects found after handover?
For our own workmanship, we do, free of charge for materials and labour, under our 24-month written warranty on orders agreed from 10 October 2026. Contact us with your order reference and photos. Warranty and aftercare.
Should I sign the handover before the snags are fixed?
Better to agree the list and a date for repairs, check them, and then sign. Keep a copy of the signed list. Occupied-home preparation.

Sources & specifications
Manufacturer information applies to the named products and systems. Sources reviewed on 28 October 2026.
- Designing Buildings wiki: snagging (meaning, timing, snagging list, records, closed-off areas)designingbuildings.co.uk(opens in a new tab)
- Designing Buildings wiki: defects liability period (practical completion, typical six to twelve months)designingbuildings.co.uk(opens in a new tab)
- UAE government: consumer protection, invoices and supplier obligationsu.ae(opens in a new tab)
Want this planned for your home?
Consultation and measurement are free. Tell us the rooms, location and what you need; we arrange a sample visit and define the measured quotation.