Media Walls · 12 min read · 3 April 2026
Before your first media wall consultation: what to send
The photos, rough sizes, TV details, access notes and budget range that make a first media wall visit useful — with a checklist you can copy straight into WhatsApp.

By Ali Haider Basra, Founder, Al Tareeq Decor · Contact our workshop
Key takeaways
- Send two photos first: the whole TV wall taken straight on, and the view from the seat where you watch most.
- Add rough sizes only — wall width, ceiling height at both ends and the distance from sofa to wall; exact figures come from our laser measure at the visit.
- Share the exact TV model and a list of the equipment that will live on the wall, so the panel, bracket and cable route are planned around them.
- Include your location, any building or community access rules and a budget range; permits and landlord consent are yours to arrange, so ask early.
- The visit is free, with samples and laser measurement; media walls are priced from AED 3,500 per project and are normally ready around 10 days after you confirm.
On this page
- Key takeaways
- Why a few photos save a visit
- The photos that matter most
- Photo checklist
- Taking photos that show the room honestly
- Rough measurements you can take yourself
- Five rough measurements
- Your TV and everything that plugs into it
- Sockets, switches and power
- Location, building rules and access
- Style ideas and a budget range
- Villa, apartment or majlis: what to add
- What happens at our free visit
- Ready-to-copy WhatsApp checklist
- One note before you send
- Common questions
Why a few photos save a visit
The first consultation for a media wall happens at your home, because the wall, the seats and the daylight can only really be judged in the room itself. What you send before that visit decides how much it achieves. With a handful of clear photos, a few rough sizes and the details of your TV, the team arrives with samples that suit the room, already knows where the sockets and windows are, and can spend the time on decisions instead of on discovering the basics.
None of this needs special skills. A phone, a tape measure and about twenty minutes are enough. This guide covers what to photograph, what to measure, which facts about the TV and the building matter, why a budget range helps, and what then happens at our free visit. At the end there is a list you can paste straight into a WhatsApp message.
If you are still working out what the wall should do — screen, storage, display, lighting — read our media wall planning guide first. This article is only about getting ready for the first conversation.
The photos that matter most
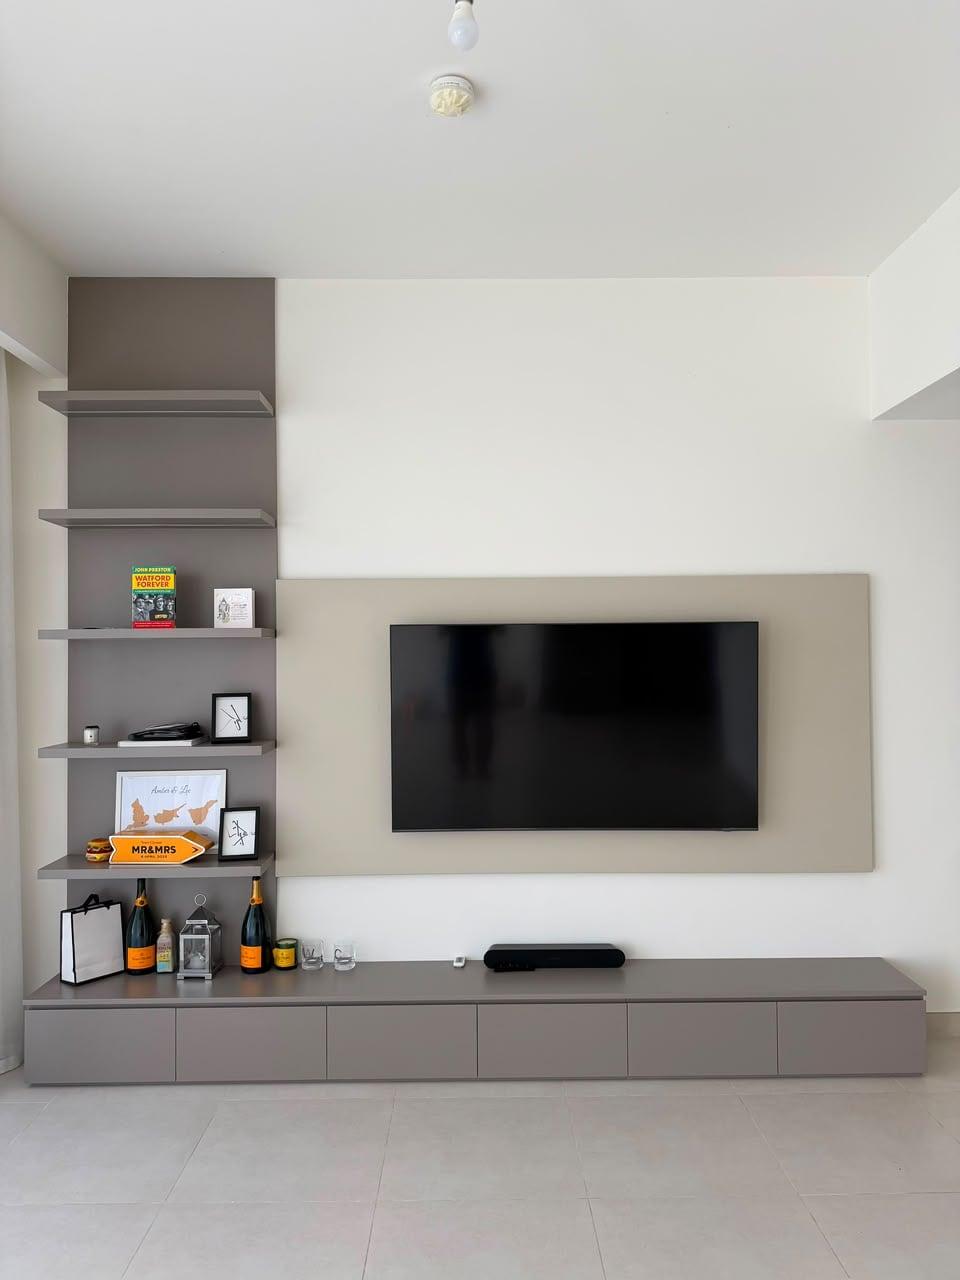
Six or seven pictures usually tell the whole story. The most important one is the wall itself, taken straight on while standing in the centre of the room, with the full width and the line where wall meets ceiling both in the frame. The second is the same wall seen from the seat where you watch most, which shows how far away the screen will be and what will surround it.
After those, photograph whatever touches the wall: the windows and curtains beside it, the sockets and switches on it, and the ceiling above it, including any cove light, downlights or AC grille. If the room has a step in the ceiling or a beam running across it, one photo taken from a corner and angled upwards makes that obvious at a glance.
Photo checklist
The whole wall
- How to take it
- Straight on, standing in the centre of the room, floor and ceiling both visible
- What it shows the team
- Width, proportions, skirting and the ceiling line
The view from your seat
- How to take it
- Sitting where you usually watch, phone at eye height
- What it shows the team
- Viewing distance and what the screen will sit among
Both corners of the wall
- How to take it
- From each corner, tilted up to take in the ceiling
- What it shows the team
- Whether the wall is square and what meets it at each side
Windows and curtains
- How to take it
- Once with curtains open, once with them closed
- What it shows the team
- Glare on the screen and how far the curtains stack
Sockets, switches and cables
- How to take it
- Close up, with a hand or a strip of tape for scale
- What it shows the team
- Where power and signal already reach the wall
Ceiling above the wall
- How to take it
- Looking up from just in front of the wall
- What it shows the team
- Cove lights, downlights, AC grilles or a bulkhead
The way in
- How to take it
- Front door, corridor and lift, if you live in a tower
- What it shows the team
- How the finished panels will be carried into the room
Send whatever you can manage. Even the first two photos make the first conversation far more useful.
- 1. Whole wall: straight on, from the middle of the room
- 2. From your seat: phone at eye height
- 3. Left corner: phone tilted up to take in the ceiling
- 4. Right corner: phone tilted up to take in the ceiling
Taking photos that show the room honestly
A planning photo is not an Instagram photo. It has to show the room as it is, with nothing hidden and nothing flattered. Open the curtains and shoot in daylight if you can, so the colours come out true and the dark corners are not lost, and switch off any coloured or very warm lamps that tint the walls.
Hold the phone level, at roughly the height of your eyes, and keep door frames and wall edges upright in the picture. Skip the ultra-wide setting if your phone has one: it stretches a small room and bends straight walls, which makes rough sizes misleading. Step back into a doorway or a corner instead.
Every corner of the TV wall, including where it meets the ceiling, should appear in at least one picture. If a sofa or cabinet blocks a corner, take one more shot from somewhere else rather than moving heavy furniture. A slow video panning across the room is a welcome extra, but it does not replace one straight photo of the wall.
If you would rather not share pictures with family members in them, take the photos while the room is empty. Only the room matters here.
Rough measurements you can take yourself
You do not need exact figures; the team takes those with a laser measure during the visit. Rough sizes still help, because they let us bring sensible samples and give you an early sense of what will fit. A tape measure and a quick sketch on paper are all you need.
Give each wall of the room a letter, starting with the TV wall as A and going round clockwise. Measure the TV wall's width along the floor and its height from floor to ceiling at both ends; in villas with stepped or sloping ceilings, and in some older buildings, the two ends can differ by a few centimetres. Write each number on the sketch beside the right wall.
Mark anything on or next to the TV wall: a window, a door and the way it swings, a column, a socket. For each one, note roughly how far it sits from the nearest corner and from the floor. Lastly, measure from the front edge of the sofa to the TV wall, because that distance, far more than the size of the room, decides how big the screen can comfortably be.
Five rough measurements
Wall width
- Where
- Along the floor, corner to corner
- Why it matters
- Sets how wide the panel and the console can be
Ceiling height
- Where
- At both ends of the TV wall
- Why it matters
- Shows whether a panel can reach the ceiling, and whether the ceiling steps
Openings
- Where
- Every window, door or column on or beside the wall
- Why it matters
- Keeps the joinery clear of doors, curtains and handles
Socket positions
- Where
- From the nearest corner and from the floor
- Why it matters
- Shows whether power is already where the TV and console need it
Seat to wall
- Where
- Front edge of the sofa to the TV wall
- Why it matters
- Guides the screen size and how deep the console can be
Your TV and everything that plugs into it
The TV shapes the whole wall, so send its exact model number if you already own it or have chosen it. You will find it on a label on the back of the set, on the box, or in the TV's settings menu. The model number lets us look up the real width, height, weight and wall-fixing pattern, none of which a size such as 75 inches tells us.
Samsung's own UAE support page on mounting a set is a useful reminder of why this matters: the wall has to carry the set's weight, the fixing screws change with the screen size, and the cable route should be settled before anything is mounted. If your TV routes its inputs through an external box, such as Samsung's One Connect, mention that too, because the box needs a place within reach of the screen.
Then list everything else that will live on or inside the wall: soundbar, receiver, satellite box, games console, router, speakers. A photo of the back of each, showing its plugs, is better still. If the TV has not been bought yet, say which sizes you are weighing up; our article on whether to buy the TV before the media wall explains when to fix the model, and the one on TV size and viewing distance helps narrow the choice.
Sockets, switches and power
Photograph every socket, switch, TV point and data point on the TV wall and within about a metre of it, close enough that each plate is clear. Tell us about any that do not work. This shows whether power already reaches the right spots or whether something needs to move.
Please do not open the wall or shift sockets yourself before the visit. If a socket sits in the wrong place, or a new one is needed behind the console, our own team handles that small electrical work as part of the media wall, and it is priced as a separate item in the quotation. Our guide to power points behind a media wall explains the options.
Location, building rules and access
Send a location pin and say which emirate and community you live in. We serve every emirate and Al Ain, working out of our Al Shuwaiheen workshop in Sharjah, and knowing the location early helps us plan both the visit and the installation days.
In a tower, add the floor number, whether there is a service lift, and whether the building management asks contractors for a permit or a gate pass. In a gated villa community, mention any entry rules for contractors. Any approval the building, the community or the landlord requires is yours to arrange, and telling us at the start means the installation date is not held up by a missing pass.
If you rent, check with your landlord before a wall is fixed. A media wall is screwed into the structure behind it, and some tenancy contracts ask for written permission before anything like that is done.
Style ideas and a budget range
Two or three photos of walls you like are worth sending, and so is one you do not, because it is often quicker to say what you want to avoid. Add a photo of the sofa, the flooring and any furniture that will stay in the room, so the finishes are chosen to sit with what you already own. Browsing TV wall design ideas first makes it easier to pick them.
A budget range is not a commitment, and it does not tie you to anything. It simply lets the team show layouts and finishes that make sense for your figure, rather than designing something that later has to be cut back.
As a guide, the starting figure is AED 3,500 per project, and that is for the entry build — one compact TV panel and a console, both in standard laminate. A longer wall, wood or veneer, marble-effect backdrops, slatted panels, built-in lighting, display shelving or an electric fireplace each add to that. The exact figure arrives in the itemised quotation after the visit, with each element priced separately, so you can keep or drop it. Our media wall prices guide shows what moves the figure.
Villa, apartment or majlis: what to add
Every home raises its own questions, and one line about yours in the first message helps the team bring the right samples.
In an apartment, say whether you own or rent, mention any balcony door or window near the wall, and note whether the wall sounds solid or hollow when you knock on it. Many apartment walls are blockwork, but some towers use gypsum-board partitions, and that changes how a wall is fixed.
In a villa, send the ceiling height, which is often far greater than in a flat, and say whether the room has a gypsum ceiling with cove lighting. A tall wall can take a full-height panel, or a panel that stops at a set line with plain wall above it; our piece on full-wall versus compact media walls compares the two.
In a majlis, say whether the seating is on the floor or raised, and where guests sit as well as the family, because a screen in a majlis is often watched from the sides. Our screen height guide shows how floor seating lowers it.
If you are moving in soon, give the handover or move-in date, so the visit and the installation can be lined up with it.
What happens at our free visit
At the visit, the team brings physical samples of panel finishes — MDF, WPC, PVC or real wood, along with marble-effect and slatted options — so you can see them beside your own walls and in your own light. They laser-measure the wall, the ceiling and every opening, and go through screen size, height, storage and cables with you, sitting where you watch.
A drawing of the wall and an itemised quotation follow the visit. When you have approved the drawing and confirmed the order, our Sharjah workshop builds the wall and our installers put it up, typically around 10 days after confirmation. The same people take care of any small electrical work, and the installation is backed by our 24-month written workmanship warranty.
If you expect to change the TV in a few years, raise it at the visit; our article on leaving room for a future TV lists what to allow for. You can book through our consultation page or on WhatsApp. In Sharjah, our Sharjah media walls page covers the local side of the service, and the media walls service page describes every option in detail.
Ready-to-copy WhatsApp checklist
Copy the lines below into a WhatsApp message, fill in what you know, attach the photos and send. Leave a line empty if you are unsure; the team will ask about it.
- Name and best time to call:
- Location pin, emirate and community:
- Villa or apartment (floor, lift, own or rent):
- Room: living room, family room, majlis or bedroom:
- Photos attached: whole wall, view from my seat, corners with ceiling, windows, sockets, ceiling, the way in
- Wall width and ceiling height (rough):
- Front of sofa to TV wall (rough):
- TV model number, or the sizes I am considering:
- Other equipment: soundbar, receiver, console, router:
- Storage or display I need:
- Finish ideas or a photo I like:
- Budget range in AED:
- Date I would like the wall ready by:
One note before you send
Professional drawings are not needed, and neither is a final choice of finishes; both are worked out with you at the visit.
One gentle note: we are set up for complete media walls and other full pieces of work, so we don't take on single small jobs by themselves. If your list is one small item, say so in the first message and we will tell you straight away whether it is something we can help with.
Common questions
Is the first consultation really free?
Yes. The visit, the samples, the laser measurement and the itemised quotation cost nothing, and there is no obligation to go ahead.
Do I need building or landlord approval before you visit?
Usually not for the visit itself, although some towers log every visitor at the gate. Approval matters for the installation, and arranging it is on your side.
Should I move furniture before the visit?
No. Leave the room as it is; just make sure the TV wall can be reached, so it can be measured from floor to ceiling and from corner to corner.
Who should be at home for the visit?
Ideally whoever will choose the finishes and the screen size. Samples look different in every room, and deciding together in front of the wall saves a second round of messages.
What if I don't know my budget yet?
Say so in your message. At the visit the team can show where the entry build sits and what each upgrade adds, so you can settle on a range with the samples in front of you.

Sources & specifications
Manufacturer information applies to the named products and systems. Sources reviewed on 27 October 2026.
- Samsung UAE support: wall-mounting checks for Samsung TVs (wall strength, screws by size, cable routing)samsung.com(opens in a new tab)
- DocuSketch: camera and tripod placement (corners, openings and extra shots per area)help.docusketch.com(opens in a new tab)
- Matt Hughes Photography: how to photograph a room (eye level, straight verticals, daylight)matthughesphoto.com(opens in a new tab)
- Decorilla: how to measure a room (labelled walls, openings, outlets, door swing)decorilla.com(opens in a new tab)
Want this planned for your home?
Consultation and measurement are free. Tell us the rooms, location and what you need; we arrange a sample visit and define the measured quotation.