Media Walls · 21 min read · 29 August 2026
Media wall delivery to an apartment: lifts, doors and access
Plan media wall delivery to your apartment: record lift and doorway access, confirm building arrangements and agree who receives the finished joinery.

By Ali Haider Basra, Founder, Al Tareeq Decor · Contact our workshop
Key takeaways
- Check the complete route from vehicle to living room before manufacturing divisions are approved.
- Send clear opening measurements and photographs; the fitting team assesses whether pieces can pass.
- Confirm building arrangements in writing and keep TV delivery separate when it has another supplier.
- Agree access, component responsibilities and the actual fitting appointment together.
On this page
- Key takeaways
- Start with a practical review
- Begin at the vehicle, not the apartment door
- Ask building management in writing
- Measure the clear openings along the route
- What to photograph and measure — route reference
- Look at turns, thresholds and the final approach
- Let the route inform the manufactured pieces
- Keep the TV, console and devices on separate lists
- Equipment and delivery — what to track separately
- Write a delivery responsibility sheet
- Delivery responsibility record
- Confirm the date after the open questions are closed
- Receive the work without rushing the final checks
- Passenger lift or service lift: the answer changes the design
- Booking the lift and the loading bay: slots, deposits and who arranges them
- Walk-up buildings, stairs and landings
- Protecting lift linings, corridor walls and floors
- Splitting a wall into sections that suit the route
- Delivery day: who stands where and what happens first
- Send one useful message before the free visit
- Common questions
Start with a practical review
A media wall can fit the living-room drawing and still be difficult to deliver. The route starts where the vehicle can stop and continues through the entrance, lift, corridor and apartment door. If one turn is overlooked, the fitting team may reach the building with finished pieces that cannot reach the room in the intended form. Check that route before approving how the joinery will be divided for manufacture.
This guide is for a homeowner arranging access, rather than a crew planning a lift. You do not need to work out how to carry heavy panels. Your job is to provide accurate building information, arrange the access agreed with management and let the installer decide the delivery method. Keep the television's own delivery separate from the joinery delivery unless the quotation expressly combines them.
Begin at the vehicle, not the apartment door
Walk the route as though you were arriving with a large finished cabinet. Note the drop-off point, entrance, reception desk and any change of level before the lift. A convenient visitor entrance may be different from the service entrance used for deliveries. Send photographs of the route instead of assuming the building name will tell the team everything it needs to know.
Record what you know and mark what remains uncertain. For example, you may know the loading entrance but still need management to confirm the permitted arrival window. A short message with a labelled photograph is more useful than several unconnected voice notes. Include the apartment number and a contact who can answer on the day, while keeping access codes out of public messages or social posts.
Do not promise the delivery crew a stopping place that you cannot reserve. Ask the building contact how arrival is handled and pass the answer to the installer. The aim is a workable handover from vehicle to building, with someone responsible for opening the agreed route. Changes to access can affect the delivery plan even when the room dimensions have stayed the same.
Ask building management in writing
Request written access instructions from your landlord or the building management for the proposed delivery and fitting. Describe the actual work: finished media-wall panels, a console, equipment mounting and any separately agreed associated tasks. A message about delivering an ordinary television may not explain the space or time needed for a custom joinery installation.
Keep the reply with the order information and forward the relevant instructions to the fitting contact. If management asks a question about the work, let the installer answer the technical part. Avoid interpreting a general building message as approval for a different scope. The same principle applies to a rented flat: resolve the proposed wall fixing with the landlord or management before manufacturing decisions depend on it.
This is an access checklist, not a statement of rules for every UAE tower. Working times, entrance arrangements and lift reservations are matters for the building itself. The Dubai media wall page explains our local service route, while the written conversation with your building establishes the arrangements for your address.
- 1. Building access: Confirm the route in writing
- 2. Lift and doorways: Send clear sizes and photos
- 3. Component plan: Installer reviews the route
- 4. Agreed delivery: Meet the team at arrival
Measure the clear openings along the route
Measure the usable opening, not the decorative surround. At a doorway, photograph the opening with the door in its normal fully open position. Note projecting handles, door closers and other items that reduce the space available. Tell the installer whether an entrance has a second leaf, and whether management has confirmed that it can be opened for the delivery.
For a lift, send the clear entrance dimensions and the internal dimensions you can safely measure. Photograph the door and cabin so the team can see where controls, rails or protective lining project. Do not operate service controls or remove building fittings to obtain more space. If information is unavailable, ask management or arrange for the delivery route to be inspected.
These measurements describe the route; they do not prove that a particular piece will pass through it. A long panel may need to turn between two openings, and its packaging changes its outside size. The installer must compare the route with the planned components and handling method. Do not accept a diagonal measurement alone as a guarantee of fit.
What to photograph and measure — route reference
Building entrance
- Photograph to send
- Entrance and drop-off area
- Dimension to record
- Clear door width
Lift entrance
- Photograph to send
- Door, surround and control panel
- Dimension to record
- Clear width × clear height
Lift cabin
- Photograph to send
- Internal walls, rails and ceiling
- Dimension to record
- Depth × usable floor area
Corridor and turns
- Photograph to send
- Corner approach from both sides
- Dimension to record
- Width at the tightest point
Apartment door
- Photograph to send
- Door fully open with approach visible
- Dimension to record
- Clear opening width × height
Send both the measurement and the photograph — one without the other leaves the route partially described.
Look at turns, thresholds and the final approach
The space outside the apartment door matters as much as the door itself. A narrow corridor, a corner opposite the entrance or a second door immediately inside can prevent a long component from turning. Take a wide photograph that shows both the opening and the approach. A close-up of the frame alone leaves the difficult part out of the picture.
Inside the flat, follow the route to the actual wall. Include the entrance lobby, a dining table that cannot readily move, fixed partitions and any ceiling changes. Mark the final room on a simple sketch. If the console must pass through another room first, make that clear before the finished pieces leave the workshop.
Agree who will move loose furniture and when. Keep the instruction realistic: a customer may be able to clear chairs and small tables, while a large cabinet may require a separately planned move. Do not dismantle a door or remove a railing yourself. Ask the team to review an obstruction and record any necessary additional arrangement before delivery day.
Let the route inform the manufactured pieces
Custom joinery should be planned as a set of components that can reach the room and be fitted as intended. If access is tight, raise it while the drawing can still change. The workshop can then assess the proposed divisions, joints and fitting sequence. Waiting until the vehicle arrives turns a design decision into an avoidable site problem.
Ask where the visible joins will be and whether the proposed division affects a drawer, finish pattern or backdrop. A smaller delivery component is not automatically a simpler finished design. The approved elevation should still explain the result you will see, and the fitting plan should explain how it is assembled. Keep these two questions together rather than judging the wall only from its front image.
Manufacture takes place in Sharjah, at our Al Shuwaiheen workshop; the finished joinery then travels to your home for fitting by Al Tareeq Decor’s own team. That makes early access information particularly useful. The media wall planning guide covers the room decisions that need approval alongside the delivery arrangement; neither set of measurements replaces the other.
Keep the TV, console and devices on separate lists
Write down what is arriving from whom. The joinery, television, bracket, soundbar and other devices may have different suppliers and delivery dates. A screen ordered online may arrive before the wall is ready, or after the intended fitting appointment. Name the person responsible for receiving each item and keep model details available to the installer.
Do not assume the television's packaging dimensions match its screen dimensions. Ask the seller or delivery provider for the handling information for the actual item. Leave transport and lifting to the people responsible for it, following the product instructions. This article does not provide an improvised carrying method or advise laying a television in a position its instructions do not allow.
Before the final wall drawing is approved, share the equipment details that affect the wall and the console. Read when to choose your television to understand which model details the drawing needs. If an item is still undecided, identify it as unresolved rather than allowing a guessed size to become a fabrication dimension.
Equipment and delivery — what to track separately
Joinery panels and console
- Supplier
- Al Tareeq Decor workshop
- Needed before
- Building access confirmed
Television
- Supplier
- Electronics retailer
- Needed before
- Wall drawing finalised
TV bracket
- Supplier
- Included or separate — confirm in quote
- Needed before
- Fitting appointment
Soundbar or receiver
- Supplier
- Electronics retailer or separate
- Needed before
- Device recesses on drawing
Cables and remote systems
- Supplier
- Various
- Needed before
- Before snag sign-off
Delivery dates can shift — assign a named person to receive each item.
Write a delivery responsibility sheet
Use one short table to collect the practical arrangements. A responsibility sheet is useful because each item has an answer, a person and an agreed time. It prevents a message such as “the lift is fine” from being mistaken for a confirmed reservation, and makes it easier to notice what is still missing before the workshop dispatches the work.
Use the table as a conversation aid, not a transfer of technical responsibility to the resident. The fitting team still decides whether the proposed delivery method is workable. If a route cannot be confirmed, arrange the missing inspection rather than filling the space with an optimistic answer. Keep the final version with the quotation and drawing so everyone is referring to the same address and scope.
Delivery responsibility record
Building entrance
- Information to confirm
- Actual route and arrival contact
- Who supplies it
- Resident and management
Lift
- Information to confirm
- Clear dimensions and booking arrangement
- Who supplies it
- Management, checked by installer
Apartment route
- Information to confirm
- Doors, turns and movable obstructions
- Who supplies it
- Resident and survey team
Joinery pieces
- Information to confirm
- Component sizes and handling plan
- Who supplies it
- Workshop and fitting team
Television
- Information to confirm
- Actual model and separate delivery status
- Who supplies it
- Customer and TV supplier
Confirm the date after the open questions are closed
Separate a manufacturing estimate from a confirmed building appointment. A typical order can take up to around ten days after confirmation; the design and its size determine the programme, with actual dates agreed in the quotation. Access arrangements need to fit that programme. A manufacturing estimate alone does not reserve a lift or guarantee an arrival time at a building.
When dates are being agreed, mention any separate TV delivery or room work that the fitting depends on. Be specific about what will be ready. “The living room is available” should mean the route and work area can be used as agreed, not that another contractor will probably finish that morning. Resolve dependencies before making several bookings around an uncertain assumption.
If management changes the arrival window or the route becomes unavailable, tell the fitting contact promptly. Explain what changed and ask for a revised plan. Do not instruct a driver to wait elsewhere indefinitely or suggest an unapproved alternative entrance. Changes are easiest to manage when they are discussed before the vehicle and finished components are committed to the journey.
Receive the work without rushing the final checks
Arrange for the agreed person to meet the team and make the route available. Keep children, visitors and pets away from the handling path. Let the crew manage the pieces and any temporary work zone. The person receiving the delivery should not feel obliged to help lift a panel or hold a television merely to keep the appointment moving.
Once the components reach the room, distinguish receipt from completion. The wall still needs the agreed fitting and equipment checks. Report visible transit concerns to the team before they are hidden by assembly, and keep observations factual: identify the item and location rather than deciding the cause. A clear photograph can help document what both parties are discussing.
After fitting, review the agreed wall, accessible controls and included equipment with the installer. The delivery route is only one part of a successful project. Use the quotation checklist to keep the supplied scope clear, and the cable access guide to understand how devices can be reached after the room is back in use.
Passenger lift or service lift: the answer changes the design
Many UAE towers have both a passenger lift and a service lift, and building management often decides which one a delivery may use. The two cabins are rarely the same size. A service lift is usually deeper and taller, with a wider door, and sometimes has protective lining already fitted. A passenger lift is smaller, finished to a higher standard and may be off limits for bulky items altogether. You cannot know which applies until you ask, and the answer decides how long the longest piece of your media wall can be.
What matters is not only the cabin, but the opening in front of it. A cabin may be 2,300 mm high inside and still have a door only 2,100 mm high. A panel can therefore be too tall for the door long before it is too tall for the cabin. Ask for three numbers: the clear door width, the clear door height and the interior depth and height of the cabin. Write them down together with the date and the name of the person who gave them to you.
A tall panel that cannot stand upright can sometimes travel tilted, because the diagonal of a cabin is longer than its height. That is a handling decision for the installation team on the day, since it also depends on the panel's thickness, its weight and the space the handlers need around it. The diagram uses example dimensions only, to show why the same panel can fail one test and pass another.
The practical rule is simple. Give the workshop the lift numbers before the wall is split into sections, not after the sections are made. If the passenger lift is the only option and its cabin is small, the wall can be divided into shorter pieces at the drawing stage at almost no cost. Discovering the limit at the building entrance means a delay, a second delivery slot and sometimes a rebuilt section.
Booking the lift and the loading bay: slots, deposits and who arranges them
Delivery rules differ from one building to the next, and they are set by the building, not by the workshop. Some towers ask for a lift booking a day or more ahead. Some restrict heavy deliveries to certain hours, and some do not allow them on specific days. Many ask for a refundable deposit or a fee, a copy of the tenant's or owner's details and a list of the people entering. None of this is unusual, but all of it takes time to arrange, and none of it can be guessed.
Decide early who makes the booking. In most cases the resident is the natural contact because the building knows them, and the workshop supplies the dates, the vehicle details and the team names that building management asks for. If you would rather that the workshop arranges it, say so in the delivery responsibility sheet and name the person who will approve the request.
Ask for the rules in writing: the permitted hours, the loading point, the lift that may be used, the protection the building requires and any deposit or fee. A short message from building management or the security desk is enough. It protects everyone. If the lift booking is later refused or moved, there is a record of what was agreed and who agreed it.
Treat the booking as part of the schedule, not a detail at the end. A delivery date that is fixed before the lift slot is confirmed is only a hope. Confirm the building's slot first, then confirm the workshop's delivery and installation dates around it, and keep a spare window in case a lift is out of service on the day.
Parking for the delivery vehicle is a separate question. Ask where it may stop, for how long and whether the road outside needs a permit. A van that has to circle the block while the team waits at the lift costs time that the booking cannot give back.
Walk-up buildings, stairs and landings
Not every UAE home is in a tower with a lift. Low-rise buildings, older villas with upper floors and some townhouses are reached only by stairs, and the geometry there is different. A lift limits the length of a panel. A staircase limits its length and its turn, because the piece has to pass the landing, and landings are where large pieces get stuck.
Measure the stair in three places: the clear width between the wall and the handrail, the headroom at the lowest point under the next flight, and the depth and width of every landing where the stair turns. A handrail that looks decorative can be the narrowest point on the route. So can a door at the top of the stair that opens inwards onto the landing.
A staircase route is best planned with shorter pieces. A wall that would travel in a few large panels by lift may need to be built in more, smaller sections for a stair, with a cleaner joint line designed in from the start. That is a drawing decision, and it is far easier to make before manufacture than to improvise at the foot of the stairs.
Weight matters here as well. Panels and consoles have to be carried by hand, and every landing is a place where the team has to turn, rest or re-grip. Tell the workshop how many flights there are and whether the stairs are straight, turning or spiral. The more detail you can send, the more reliably the team can plan the carry.
If you are unsure, send photographs of the stair from the bottom, from each landing and from the top, with a tape measure visible in a couple of them. That is usually enough for a first view, and the free measuring visit can confirm the numbers on site.
Protecting lift linings, corridor walls and floors
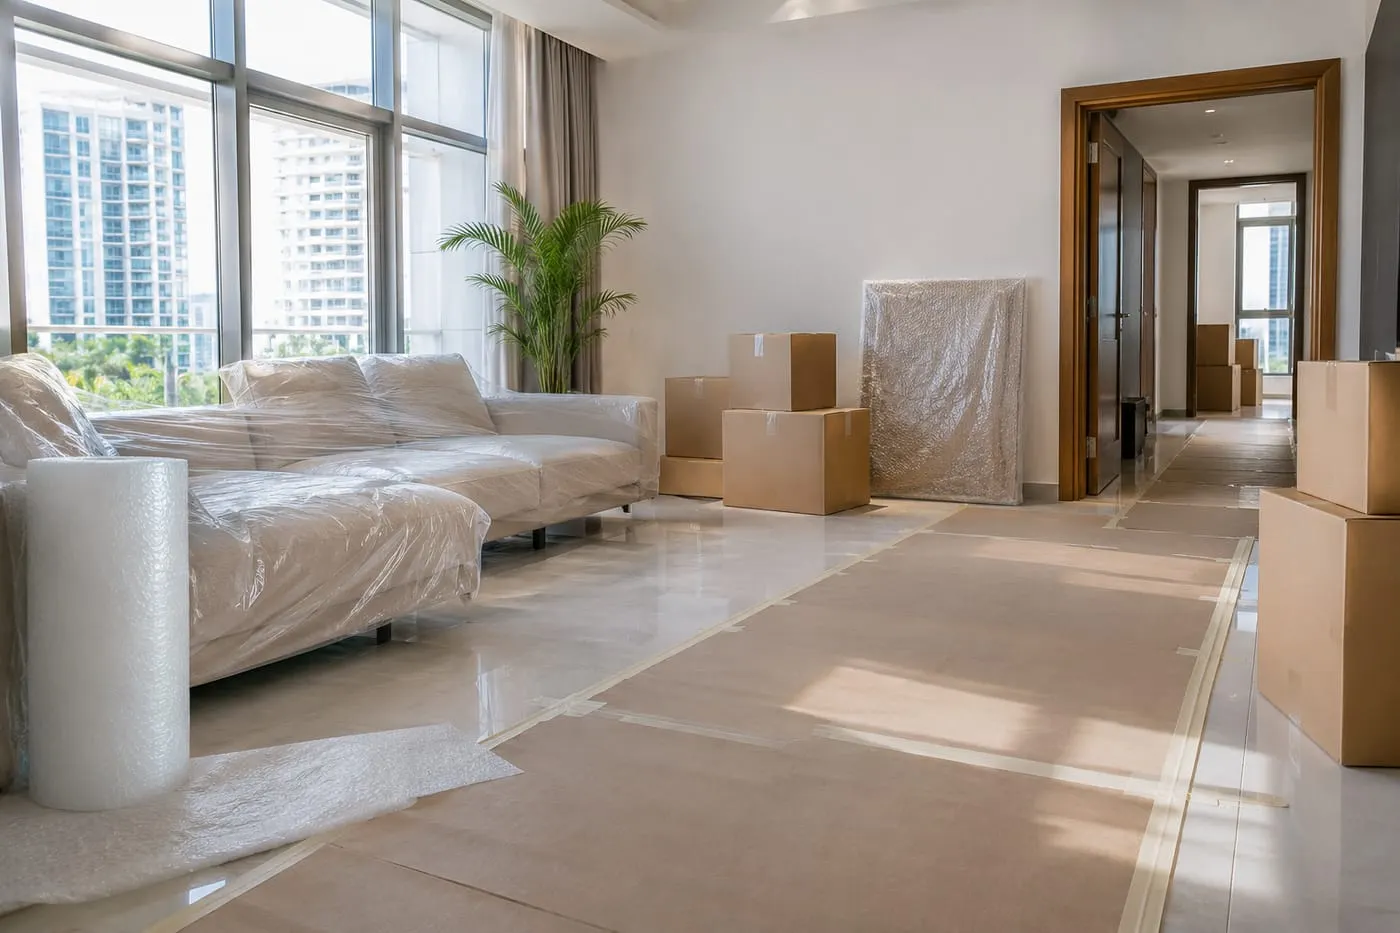
Most buildings expect the team to protect the route, and some require it. Typical protection is a covering for the lift floor and walls, corner guards at the places where long pieces swing, floor protection in the corridor and a cover for the threshold of the apartment. The materials are not exotic, but they take a few minutes to lay and they need to be on the vehicle, not found on the day.
Ask whether the building provides lift padding or expects the team to bring it. Some management offices fit their own, and some will not let a delivery proceed without it. Knowing this beforehand avoids a delay at the lift lobby while someone goes to look for what the building wants.
Inside the apartment, protect the finished floor between the door and the wall. Marble and polished porcelain are hard but they chip at the edges under a dropped corner, and a scratched floor is a more expensive repair than a day's worth of protection board. Furniture in the route should be moved by the resident or by agreement, not slid aside at the last moment.
Agree who is responsible for each part of the route. The workshop is responsible for how its team carries and installs the pieces. The building is responsible for its own fittings, and the resident for the contents of the home. Putting those lines in the delivery responsibility sheet makes the day easier, because the question is already answered if a mark appears.
Take a few photographs of the route before the delivery, with the date visible. They are not an accusation, only a record of the condition of the lift, the corridor and the floor. If there is ever a question, both sides can look at the same pictures.
Splitting a wall into sections that suit the route
A media wall is not delivered as one object. It is made as sections that are joined and fixed on site, and how those sections are divided is one of the most useful things you can influence. A good division follows two rules at once: the pieces must be able to travel the route, and the joints must fall where they are least visible in the finished room.
Those two rules sometimes pull in different directions. A tall feature panel looks best when it is a single piece, but a single piece may not pass the lift door. A division at a natural line, such as the edge of the TV recess, the top of the console or a change of material, is usually invisible once the wall is installed. A division through the middle of a plain panel needs a careful joint and a clear explanation on the drawing.
Give the workshop the route measurements before the drawing is approved. The longest piece, the heaviest piece and the widest piece can then be checked against the lift, the door and the stair. Any piece that fails the check can be shortened or divided while the drawing is still a drawing, which costs nothing.
Ask for the section list on the drawing, with the approximate size and weight of each piece, so you can see what will actually arrive. Five or six sections to carry through a building is a very different delivery from one or two, and it affects the number of people the team needs and the time the lift will be in use.
Remember that the finish has to match across every joint. Sections made in the same batch, from the same board and the same finish, fit together visually. That is another reason to settle the division early: it lets the workshop plan the cut and the grain across the whole wall rather than patching it later.
Delivery day: who stands where and what happens first
On the day itself, the work goes best when everyone knows the order. The team arrives, checks in with security, loads the lift according to the booking and brings the pieces up in a sequence that matches the installation. The resident or a representative stays available, because decisions about furniture, access and parking tend to come up in the first fifteen minutes.
Before anything is brought into the apartment, walk the route with the team leader. Point out the places you were worried about, the fragile floor, the door that sticks and the corner where the corridor narrows. A team that has looked at the route with you carries differently from one that meets it for the first time with a panel in its hands.
Open each package and check it against the section list before the first piece is moved to its final position. The aim is not to inspect the finish yet, which comes later, but to confirm that every piece has arrived and that none was damaged in the journey. If a piece is damaged, it is far better to know on the landing than after the wall is half assembled.
Keep the television and its devices on their own list, as the earlier sections suggest. The team can fix the bracket position and plan the cables, but the screen itself has its own supplier and its own handling. Mixing the two on delivery day is a common source of confusion.
At the end of the day, walk the route again. Check the lift, the corridor and the floor against the photographs you took, remove the protection together and agree the next step. The work is covered by a 24-month workmanship warranty and a 5-year limited warranty on covered wood-based boards, and a calm, documented delivery is the first step towards using them only on paper.
Send one useful message before the free visit
Start with the wall photo, TV size, room and location. Add the building access information you already have, plus photographs of any narrow turn or entrance. Say which details still need confirmation. This gives the consultation team something concrete to review without turning your first message into a measurement exercise that belongs with the installer.
Media-wall projects start from AED 3,500 for a compact panel and floating console in laminate; the final amount follows the measured design and quotation. Ask for delivery and any extra access-related scope to be clear in that quotation. Do not convert a starting project price into a promise that every possible building arrangement is included.
Send the information on WhatsApp and use the consultation photo brief to organise the room photographs. For Ajman homes, Abu Dhabi homes and Sharjah homes, the work still comes from the same Sharjah workshop. Confirming the actual route makes the plan useful for your building rather than merely your city.
Common questions
What should I send before the delivery route is checked?
Send the wall photo and TV size with pictures of the building entrance, lift and difficult turns. The installer decides what needs measuring or inspecting. Consultation photo checklist.
Does a compact media wall solve every delivery problem?
A smaller wall may still contain a long console or backdrop. Compare its actual components and room use rather than assuming the design label guarantees access. Compact or full-wall design.
Can the television arrive after the joinery?
Tell the installer before approving dates, because equipment availability affects what can be fitted and demonstrated. Confirm the actual model before dimensions are finalised. Choosing the TV before the wall.
Is every access-related task included in the starting price?
The entry price describes a compact laminate panel and floating console, not every possible building arrangement. Confirm the supplied scope in the project quotation. Media wall prices.
Where should the devices and cables be planned?
Mark them on the approved drawing before panels are manufactured. An accessible device arrangement remains important after delivery is complete. Cable and service access.
What is the best time to tell the installer about a difficult route?
Before the manufacturing divisions are approved. Component sizes can be adjusted during the drawing stage, but cannot change once cutting has begun. Media wall planning guide.
Does the installer need to visit before manufacture?
A site visit may be arranged for unusual buildings or routes. Send clear photographs and known measurements first; the team will advise whether a separate access inspection is needed. Consultation photo checklist.

Sources & specifications
Manufacturer information applies to the named products and systems. Sources reviewed on 9 November 2026.
Want this planned for your home?
Consultation and measurement are free. Tell us the rooms, location and what you need; we arrange a sample visit and define the measured quotation.