Media Walls · 30 min read · 15 September 2026
Bedroom TV unit with wardrobe UAE: layouts, sizes and integration
Compare layouts for integrating a TV unit with a bedroom wardrobe in UAE homes: wall-to-wall planning, screen height, storage proportions and what to agree before manufacture.

By Ali Haider Basra, Founder, Al Tareeq Decor · Contact our workshop
Key takeaways
- Fixing the wall width first avoids the common problem of a wardrobe and TV unit that look unrelated in the same room.
- Bed height and mattress depth determine the comfortable TV viewing angle — agree both before the screen height is drawn.
- Wardrobe and TV panel depths are different — plan the front face line before the wall is drawn.
- Matching finishes across the TV panel and wardrobe doors is straightforward when both are ordered together; it is very difficult to match later.
On this page
- Key takeaways
- Why integrate the TV and wardrobe at all
- Wall width, wardrobe depth and the front-face rule
- Screen height from the bed: the most critical measurement
- Screen height reference — from floor to screen centre
- Wardrobe layout and storage planning beside the TV
- Finish matching and the bedside question
- LED lighting and bedside lighting integration
- Overhead storage and pelmet design
- Sliding, hinged and open-front wardrobe doors
- En-suite doors and architectural constraints
- Interior wardrobe fittings: hanging, shelves and drawers
- Finish matching across the bedroom assembly
- Children's bedroom TV wall with storage
- The sight line from the pillows: why the screen angle matters
- Reading the depth budget across the bedroom
- Services by height: where power, HDMI and drivers live
- Screens, light and sleep: a bedroom wall that can go dark
- Fixing the TV bracket: block, gypsum and shared walls
- Heat, airflow and the closed bedroom
- Building in an occupied bedroom: the order of work
- Budget and what moves the price of a bedroom wall
- What to send for the consultation
- Common questions
Why integrate the TV and wardrobe at all
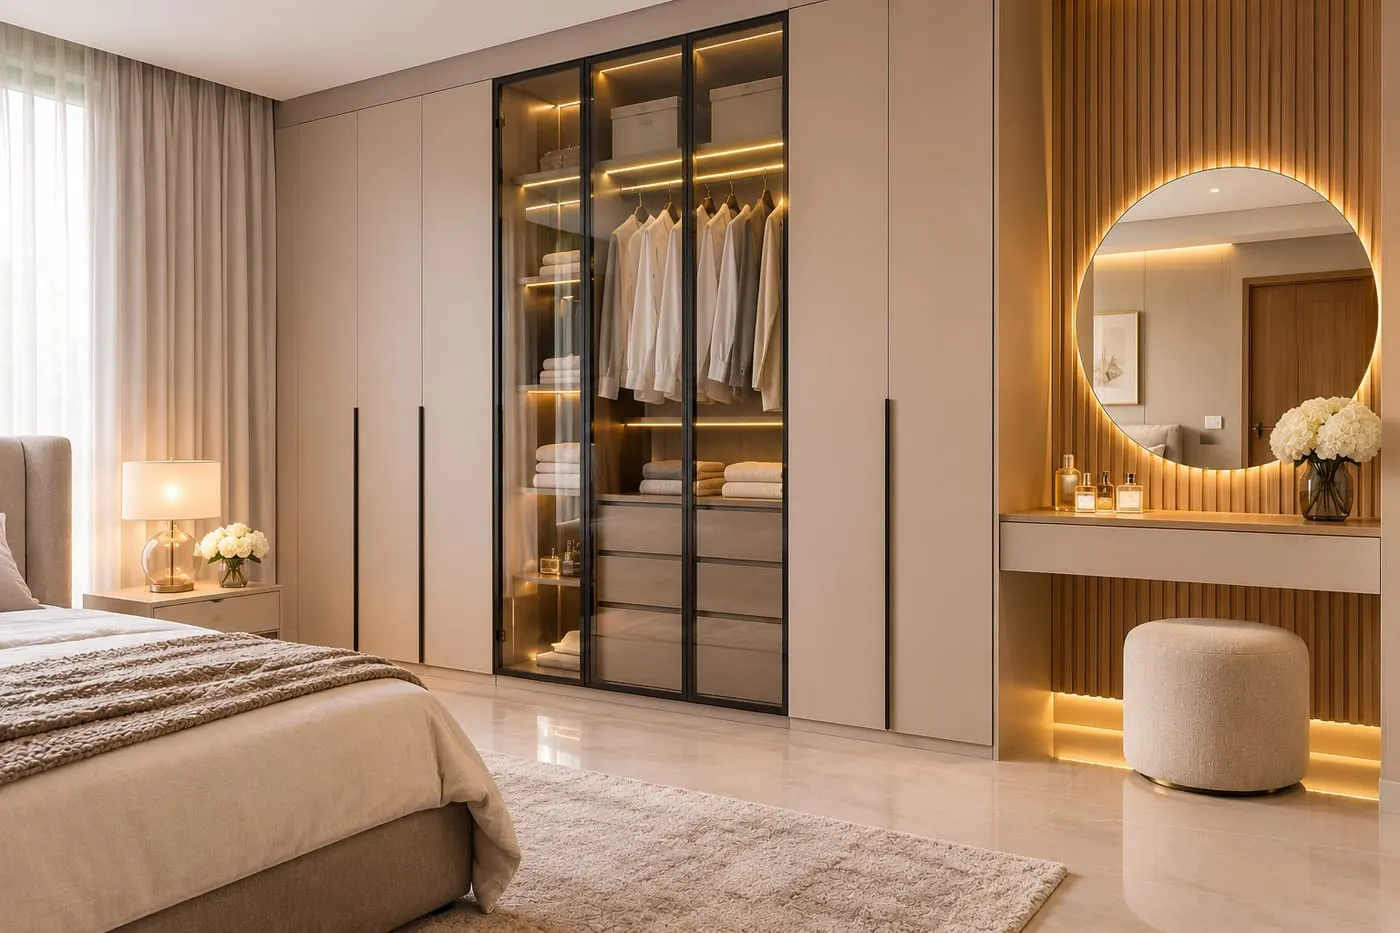
In UAE bedrooms, the television and wardrobe share the same wall in most standard layouts. When they are built separately — a freestanding wardrobe from one source and a wall-mounted TV from another — the result is usually two items that do not relate to each other visually. The wall reads as a collection of objects rather than a composed room.
Integrating the TV panel into the wardrobe wall as a designed assembly changes this. The screen sits in a planned position, the wardrobe fills the wall at a consistent depth, and the finish links both elements. The room reads clearly and the television looks intended rather than mounted on whatever wall space remained after the furniture was placed.
This article explains the practical layout decisions involved. It is not a bedroom design guide. The focus is on the information needed to draw the wall correctly: which measurements matter, what to agree before manufacture, and how the TV panel and wardrobe relate to each other structurally and visually.
Wall width, wardrobe depth and the front-face rule
The first planning decision is the full width of the wall. A wall-to-wall assembly is cleaner than a wardrobe that stops short and reveals the original wall at each end. Measure the full usable width between the flanking walls, noting any door frames, architraves or structural features that must remain. This establishes the outer dimension of the assembly.
Wardrobe depth in UAE bedrooms is typically 580–620 mm to the door face. A TV panel integrated into the same wall is shallower — a panel behind a floating console is usually 50–80 mm to the wall face, plus the console projection. If the TV panel sits at the same depth as the wardrobe, the console will project far into the room. The usual solution is to design the TV section at the wall face, with the wardrobe projecting forward to its standard depth, and to use the depth difference to create a stepped or recessed composition.
The front face of the wardrobe doors should be agreed as the reference line for the entire assembly. All other elements — panel depth, console projection, overhead storage, pelmets — are measured from that line. This prevents the common drawing error where each element has its own reference dimension and the assembly cannot be built consistently from the floor plan.
Screen height from the bed: the most critical measurement
Comfortable TV viewing from a bed requires the screen centre to be close to eye level when the viewer is propped up against pillows. This is typically 90–130 cm above the floor in UAE standard beds (platform frame height 25–30 cm plus a mattress of 20–30 cm plus a sitting-up position). The exact height depends on the bed frame, mattress and how the household actually watches television.
Measure the bed in its assembled state before drawing the TV panel. If a new bed is being ordered alongside the wall, confirm the platform height and mattress depth with the bed supplier before the TV panel height is fixed. A misalignment of 15 cm between the drawn position and the actual comfortable viewing height is uncomfortable enough to notice every evening.
The screen height also affects the wardrobe design. If the TV sits in an open recess between wardrobe sections, the recess height determines the maximum screen diagonal. If the TV floats on a panel below an overhead cabinet, the cabinet base height determines the visual ceiling above the screen. Both constraints need to be identified on the drawing before manufacture.
Screen height reference — from floor to screen centre
45–55 cm (low platform + thin mattress)
- Comfortable viewing centre (approx.)
- 95–115 cm from floor
- Note
- Confirm with the actual bed
55–65 cm (standard platform + standard mattress)
- Comfortable viewing centre (approx.)
- 105–125 cm from floor
- Note
- Most common UAE setup
65–75 cm (high frame or thick mattress)
- Comfortable viewing centre (approx.)
- 115–135 cm from floor
- Note
- Measure with the household present
Divan base (40–45 cm) + thick mattress
- Comfortable viewing centre (approx.)
- 90–110 cm from floor
- Note
- Check with mattress on the base
Measure the actual bed in position — these are starting ranges, not fixed heights. The person watching sets the target.
Wardrobe layout and storage planning beside the TV
In a typical UAE master bedroom, a 4–5 m wide wall is divided between a TV section (usually 1.2–1.8 m wide) and wardrobe sections on each side. The wardrobe sections can be walk-in, sliding door, hinged door or open shelving. Sliding doors are common because they suit the front-face rule — they do not require swing clearance in a room where the bed occupies the central space.
The interior of the wardrobe sections should be agreed before the carcass is drawn. Full-height hanging requires 1.9–2.1 m clear inside. A lower half-hanging section paired with a shelf-and-drawer section is more efficient for mixed clothing storage. Confirm which garments and items will use the space — a hanging arrangement designed for suits is different from one designed for folded items and accessories.
If the assembly includes an overhead cabinet above the TV section, its depth should match or relate clearly to the wardrobe depth above. An overhead cabinet shallower than the wardrobe tops reads as an afterthought. A matching or deliberately contrasting depth reads as a decision. Write it down — verbal descriptions of bedroom wall compositions produce the most varied interpretations of any media wall brief.
Finish matching and the bedside question
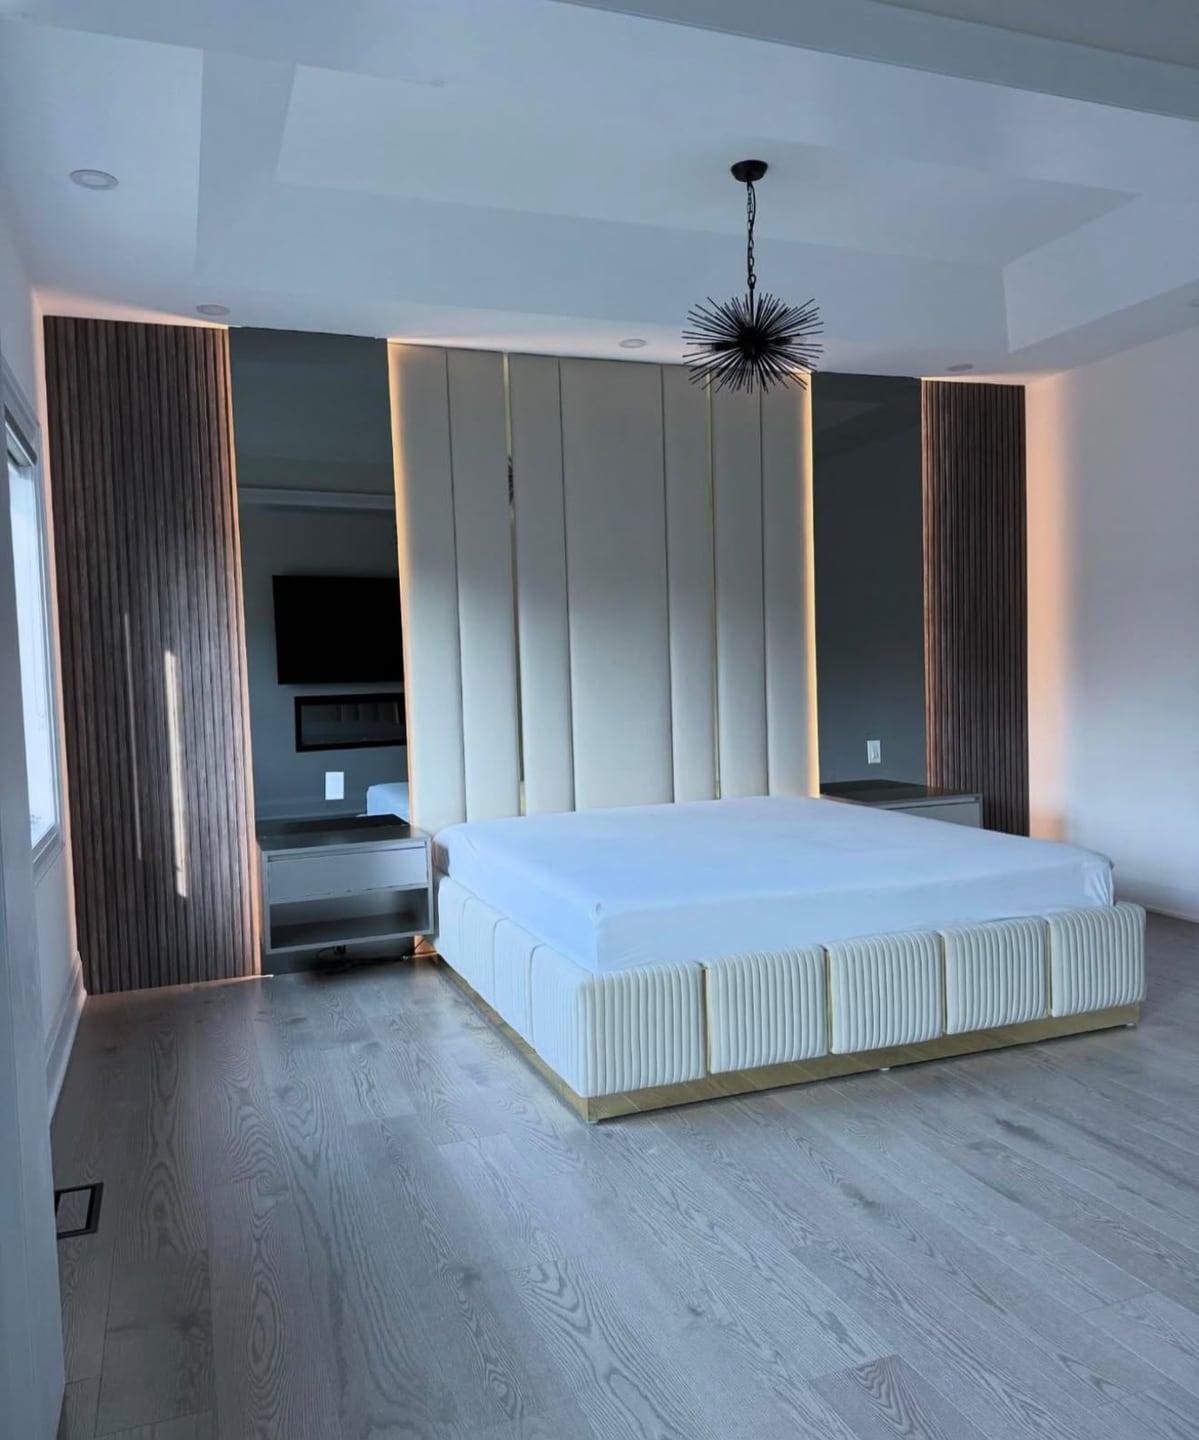
The most common regret in bedroom TV wall projects is a finish that did not match the wardrobe as closely as expected. Ordering both elements in the same project, from the same batch of material, is the only way to guarantee consistency. Matching a wardrobe door finish to a TV panel ordered six months later is very difficult — material batches change, and even the same code can vary in sheen between production runs.
Consider the bedside tables and bed frame. A wall finish that complements the bed frame creates a more composed room than one selected independently. This does not require matching the finish exactly — a coordinated palette from warm neutrals, natural wood or painted colour is usually more flexible than an exact match. Write the palette down: wardrobe finish code, TV panel finish code, bed frame colour and bedside table material.
For a bedroom with an en-suite door in the wardrobe wall, agree how the door surround integrates with the wardrobe panels before the drawing is finalised. A door sitting flush with the wardrobe face requires a different frame detail from one that projects. This is a construction detail that cannot be changed after the panels are cut.
LED lighting and bedside lighting integration
Ceiling spotlights pointing directly at a bedroom TV wall create glare on the screen at night. This is a very common issue in UAE apartments where the main ceiling light is a row of downlighters aimed at the television wall. When planning the joinery, agree the relationship between the ceiling lights and the finished wall with the electrical contractor — a small adjustment to the aim of the downlighters before fitting is easier than trying to correct it after.
An LED cove above the wardrobe-TV wall assembly is one of the most effective solutions. A recessed channel at the top of the joinery or in the ceiling above it carries a warm-white LED strip that washes soft ambient light into the room without pointing at the screen. The cove is designed into the joinery at manufacture — it is not an add-on. If ceiling access is available above the bedroom, the cove can run across the full wall width. If not, a pelmet channel at the top of the assembly serves the same function.
Bedside reading lights mounted to the wardrobe side panels are a popular addition in UAE master bedrooms. The light is positioned above the bedside table height — usually 900–1100 mm from the floor — and operated independently from the main room lighting. If the wardrobe panels are the fixture point for the bedside lights, the cable route must be planned before the carcass is built. A surface cable channel is always visible; a concealed one requires planning at construction.
Overhead storage and pelmet design
An overhead cabinet above the TV section can store bedding, luggage, spare towels and bulky items that occupy floor space in a UAE bedroom. The cabinet depth should match or deliberately differ from the wardrobe depth: a matching depth reads as one continuous overhead line; a shallower depth creates a visual setback that can make the room feel taller. Write down the intended relationship — verbal descriptions of overhead panel depths produce the most varied results on the finished wall.
Pelmet design refers to the horizontal panel at the top of a TV or wardrobe section that creates a finish line and conceals the LED cove or any internal lighting. A pelmet that overhangs the front face by 30–60 mm creates a shadow line that separates the wall zone from the ceiling zone. This detail is particularly effective in UAE apartments with 2.9 m ceilings, where the room height is not dramatic and a visual division between the wall and the ceiling adds apparent height.
If the assembly runs to the ceiling, leave a small gap — 3–5 mm — between the top of the joinery and the ceiling surface. UAE apartments experience thermal cycling from air conditioning, and a panel fixed rigid against a concrete or gypsum ceiling can transmit movement to the panel join below. A small gap reduces this risk. The gap can be filled with a neutral colour flexible sealant or left as a shadow gap, depending on the finish intent.
Sliding, hinged and open-front wardrobe doors
Sliding doors are the most common door type for UAE bedroom wardrobe walls because they require no swing clearance. In a room where the bed occupies the central floor space, a hinged door that opens towards the room may conflict with the bed surround or bedside table. Sliding doors travel within the wardrobe's own width, so the access remains contained. The trade-off is that only one door at a time is typically open — a wide wardrobe with narrow door panels requires multiple slides to access the full interior.
Hinged doors provide full access when open and are mechanically simpler than a sliding system. They suit wardrobes in alcoves or positions where the door swing does not conflict with furniture. Soft-close hinges are standard on quality joinery and should be listed in the quotation specification. Ask whether the hinge type is concealed or surface-mounted — concealed hinges are typical for a flush-door finish and appear as a small visible gap; surface-mounted hinges are visible from the front.
An open-front or frameless section is used in the TV panel zone rather than the clothing storage zone. Open display shelving beside the screen, or a frameless section for equipment storage below the console, works well visually. For clothing, a frameless open section accumulates visible dust quickly in a UAE bedroom and is typically not the first choice unless the interior is designed to be on display.
En-suite doors and architectural constraints
An en-suite door sitting within the wardrobe wall is one of the most common architectural constraints in UAE master bedroom layouts. The door must be framed flush with or recessed from the wardrobe panel face. If the door frame projects forward of the wardrobe face, it creates an awkward step in the joinery line. If it is set back, the joinery wraps around it and the reveal depth must be agreed on the drawing.
Air conditioning units above or within the bedroom wall require a clearance gap in the joinery. A cassette AC unit built into an overhead position needs unobstructed airflow above and below the face panel. Agree the clearance dimension with the AC installer before the joinery is drawn. A joinery panel that restricts airflow to an AC unit creates a persistent maintenance and performance issue.
Structural columns, beams or service ducts within the wall may limit where the wardrobe carcass can be placed or affect its depth. UAE apartments in older buildings sometimes have exposed structural elements within partition wall areas. The installer identifies these at the survey visit. If the survey reveals a structural element that changes the planned depth or position of the joinery, resolve it before manufacture — not at the fitting appointment.
Interior wardrobe fittings: hanging, shelves and drawers
The interior of a bedroom wardrobe should be agreed before the carcass dimensions are set. Full-height hanging requires a minimum of 1.9–2.1 m clear inside the carcass. A combined section — full-height hanging on one side, a double rail with shelving on the other — is more efficient for mixed clothing storage. Confirm which garments and items will use the wardrobe before the interior is designed: a hanging arrangement designed for suits is different from one designed for folded items, shoes and accessories.
Drawer boxes take more carcass depth than a shelf-and-rail arrangement. A standard 500 mm drawer needs at least 540 mm of internal carcass depth to close cleanly. If the TV panel section is shallower than the wardrobe depth, the drawer zone must be in the wardrobe section, not in the TV panel. Agree the drawer count and position before the carcass dimension is set. Retrofitting a drawer box to a carcass not designed for one requires structural modification.
Shoe racks, pull-out tie racks, internal lighting and mirror doors all require their positions and electrical routes to be planned before manufacture. A pull-out shoe rack needs a clear opening width and a specified depth. An internal LED strip needs a cable route and a switch position. A mirrored inner door needs the hinge or track selection to match the door weight. Write down each fitting and confirm whether it is in scope before the drawing is approved.
Finish matching across the bedroom assembly
Matching the TV panel finish to the wardrobe door finish is straightforward when both are ordered together from the same material batch. It is very difficult when they are ordered separately. Even within the same product range, material batches can vary in sheen and tone between production runs. The difference may not be visible on a small sample; it is usually noticeable when both surfaces are on the same wall.
To guarantee a consistent finish: order both the TV panel and the wardrobe in the same project, confirm the finish code is the same for both elements, and have both cut from the same batch of material. If the TV panel is a different profile from the wardrobe doors — a plain panel versus a fluted door — the same finish code on both creates continuity of colour while the texture difference provides visual separation.
Consider the bed frame and bedside tables in the finish decision. A warm-tone wardrobe finish that sits beside a dark walnut bed frame creates a contrast that some clients find natural and others find jarring. Test the finish code against the actual furniture before confirming. Write down the full palette: wardrobe finish code, TV panel finish code, bed frame colour and bedside material. This reference is useful if any element needs to be repaired or extended in the future.
Children's bedroom TV wall with storage
A children's bedroom TV wall and wardrobe combination follows the same design principles as an adult bedroom but scaled to current and near-future reach heights. A lower hanging rail at 900–1000 mm serves a child up to around 10 years old; a second upper rail at 1700–1800 mm handles adult-length garments. Designing both rails at construction allows the hanging arrangement to adapt without replacing the carcass.
In a shared children's bedroom, the TV wall section can double as a study or activity zone — a small floating shelf at desk height (740–760 mm), a pinboard panel behind the screen, or a storage section with accessible bins and basket shelves alongside the television. The TV height in a child's room uses the same principle as an adult bedroom: eye level when seated on the bed, measured with the actual bed in position.
Safety fixings are more important in a children's bedroom than in an adult room. All wall-mounted elements should be fixed to wall studs or structural backing, not to plasterboard alone. A floating console should not carry any load beyond what it is designed for — no child climbing on a shelf edge, no adult pulling the console for balance. Confirm the fixing method and load rating with the team and check the fixings are hidden from reach.
The sight line from the pillows: why the screen angle matters
A bedroom screen is watched from a different body position than a living room one. In the living room people sit upright and look straight ahead. In bed they lean back against pillows, the neck is relaxed and the head rests a little lower, and the eyes travel upwards to find the screen. The higher the screen centre sits above eye level, the further the neck has to tilt, and that tilt is what people notice after a long episode.
The geometry is simple enough to check on a drawing. Take the eye height when propped on pillows, subtract it from the proposed screen-centre height, and divide the difference by the distance from the pillows to the wall. In the example drawn below, eye level is 1.05 m and the bed foot is 2.4 m from the wall. A screen centre at 1.40 m gives an upward look of about 8 degrees. At 1.80 m it is about 17 degrees. Both heights can look reasonable on an elevation, but they feel very different from the mattress.
That is why a living room rule of thumb does not transfer. The household's actual bed, pillow stack and headboard height change the eye position by tens of centimetres. A thick mattress on a high platform lifts the eyes. A low divan with a tall headboard lowers them. If a new bed is being bought with the wall, agree the bed first, then set the screen centre from it.
The practical routine at the measuring visit is to ask someone to sit propped up exactly as they watch, and to mark their eye height on the wall with tape. The screen centre is then chosen from that mark, not from a catalogue figure. It costs two minutes and removes the most common bedroom complaint.
Reading the depth budget across the bedroom
A bedroom is rarely deep, and a wall that carries a wardrobe, a TV panel and a console spends that depth quickly. The depth budget is the plan-view arithmetic that shows what is left after each element is subtracted. It is worth doing on paper before any drawing is approved, because it shows problems that an elevation hides.
Start with the clear room depth from the finished wall to the opposite wall, measured at floor level, not from the original architectural plan. Subtract the wardrobe depth to the door face. Subtract the bed including its frame and any bench at the foot. What remains is the space for walking, and it is that figure which tells you whether the plan works at the end of a long day.
The example below uses a 4,200 mm room. Past the wardrobe doors, a 600 mm wardrobe and a 2,100 mm bed leave 1,500 mm to walk by. Past the TV section, where the panel and floating console together project roughly 430 mm, the walk-by grows to 1,670 mm. The interesting row is the third: with a 500 mm hinged leaf swung open, only 1,000 mm remains between the leaf and the foot of the bed. That is enough to pass, but not enough to pass comfortably while someone else is dressing at the open door.
This is the real reason sliding doors are common in compact UAE bedrooms and why hinged leaves are reserved for deeper rooms or narrower door widths. It is not a style preference. It is the same sum, done honestly. If the sum gives you less than you would accept in daily use, change the bed position, narrow the leaf, move to a slider or reduce the console projection before the wall is built.
Ask for this plan strip on the drawing set, with the measured room depth printed on it. If it is missing, ask why. A drawing that shows only the front of the wall can look perfect and still leave a room that is awkward to move through.
Services by height: where power, HDMI and drivers live
Behind a finished bedroom wall there is more than boards. A TV needs power and signal, the lighting needs drivers, the router or a streaming box needs ventilation, and every one of them needs a way to be reached later. The order in which these are planned decides whether the wall looks clean or whether cables end up visible.
A useful way to plan is by height band. In the loft above the doors, a single access hatch can hold the LED drivers and, where the household wants it, a router. Behind the screen, one flush plate carrying power, HDMI and a network point lets the TV connect without any cable crossing the visible panel. In the console cavity, a power strip and a pass-through for the box keep the equipment hidden but reachable. At the plinth, a floor-edge LED strip on its own switch gives a soft night light without turning the room on.
The heights shown are starting examples. Screen size, bracket type and the position of the bed all move them, so each point is drawn per room and per TV. What matters is that every service has a labelled place before the first panel is cut, and that the electrician is shown the same drawing the carpenter uses.
Two habits save most of the trouble. First, put drivers where heat can leave, never in a sealed box behind a solid panel. Second, give every point an access route that does not need a panel to be removed with a tool in front of the family. A hatch in the loft and a removable console back cost very little at manufacture and are expensive to add afterwards.
Screens, light and sleep: a bedroom wall that can go dark
A living room screen is meant to be seen. A bedroom screen has a second life as a dark rectangle for most of the night, and the wall around it should help that. The main sources of light at night are the standby indicator on the TV, any backlight strip left switched on, and display lights on shelves. None of these is difficult to control, but they have to be planned.
Put the TV backlight on its own circuit and dimmer so it can run low while the screen is on and be fully off afterwards. Keep shelf and niche lighting on a separate switch from the backlight. Bring a small, warm, low-level plinth light on a third circuit, because it is the one most households leave on as a night light. Three switches or three scenes sound like a lot, but each one is a decision the household would otherwise make with a cable behind the bed.
Colour temperature matters more in a bedroom than anywhere else in the home. Warm white is the usual choice, and the strips and drivers should be specified together so that dimming is smooth rather than stepped. Ask for the dimming method to be named in the quotation, and ask to see the strip lit before it is covered by the panel.
Sound is the other half. A soundbar in a bedroom does not need to be large. It does need a place to sit that does not rattle the console, and a position where it does not point straight at a shared wall. Where a bedroom shares a wall with a neighbouring flat, the wall treatment and the speaker position are worth a conversation at the measuring visit. A heavier panel build with a closed back is quieter than a light hollow box, and the carpenter can only specify it if they know the wall is shared.
If a household member needs the room very dark, tell the team at the first visit. Shutters, curtain returns and the screen backlight are easier to design together than to fix separately.
Fixing the TV bracket: block, gypsum and shared walls
The TV is the heaviest and most visible item on the wall, and the question of what it is actually fixed into is one of the least discussed. A bedroom wall in a UAE apartment can be solid block, a gypsum partition, a concrete column face or, in some buildings, a shared wall with the next unit. Each takes a different fixing, and a bracket that is secure in one can be unsafe in another.
Solid block and concrete accept mechanical anchors chosen for the load and the substrate. Gypsum partitions do not carry a TV on the board face; they need a timber or steel backing frame fixed to the structure behind, or a bracket plate that spreads the load across studs. A shared wall adds a further consideration, because drilling depth and vibration can matter to the neighbour and to the building rules.
The responsible way to handle this is simple. Identify the wall type at the measuring visit, before the drawing sets the bracket height. Confirm that the screen and its bracket are within the limits of the fixing. Where the substrate is weak, specify a backing frame inside the panel build rather than hoping the board will hold. For a fuller comparison of the two main wall types, our guide to block and gypsum walls for a TV sets out the differences.
Do not accept a drawing that shows the TV centred and level without saying what it is fixed to. It is a one-line note, and it is the line that matters if the screen is ever replaced with a heavier one. If the household plans to upgrade to a larger screen in a few years, say so now and size the backing for it. The extra cost at the start is small and the alternative is opening the panel later.
Finally, ask who is responsible for the final TV mounting. Some households want the carpenter to hang the screen, others prefer to use their own installer. Either is fine, but it should be written down, because a screen mounted by someone who has not seen the backing drawing is the usual start of a poorly seated bracket.
Heat, airflow and the closed bedroom
A bedroom TV bay is usually closer to a sealed box than a living room one. The doors are shut at night, the air conditioning cycles, and the wardrobe beside the screen holds clothes that should not sit in warm air. Heat from the TV, from LED drivers and from any streaming box has to go somewhere, and the design should decide where before it decides the finish.
The rule of airflow is that cool air must be able to enter low and warm air must be able to leave high. Behind the TV, the panel build should leave a gap around the back of the screen and an escape route at the top. The console cavity should have a vented back or a slot, so a box does not sit in still air. Drivers belong in the loft hatch, where heat can disperse, not behind a solid face.
Beside the screen, the wardrobe has its own airflow needs. Doors that fit tightly look good, but a sealed wardrobe next to a warm TV bay encourages damp. Small, discreet ventilation slots at the base and top of the wardrobe section, and a gap between the wardrobe side and the TV bay, let the air move without any visible change to the front.
Our guide on TV ventilation in a media wall explains the clearances in more detail, and the humidity article on MDF in UAE homes covers why a closed, cool bedroom still needs a plan for moisture. If the apartment has a variable-speed fan or a thermostat that sets the room unusually cold, mention it. A cold bedroom meets warm outdoor air whenever a balcony door opens, and the wall will feel that.
None of this is visible in the finished room, which is exactly the point. The test of good ventilation is that nobody ever thinks about it.
Building in an occupied bedroom: the order of work
Most bedroom walls are built in a home that is already being lived in, and that changes how the work should be sequenced. The household still needs to sleep, dress and keep clothes accessible while the wall is made and fitted. A clear order of work protects both the finished room and the household's routine.
The workshop work comes first. Panels, wardrobe carcasses, doors and the console are prepared off site from the approved drawing, so the time in the room is spent fitting rather than cutting. Before installation, the room is cleared enough to move the bed, the wardrobe contents and any furniture away from the wall, and floors are protected, because boards and doors are heavy and corners mark tile.
On site, the sequence usually runs from structure to finish: confirm the wall and the backing; fix the frame and any electrical first-fix points; hang the carcasses and panels; fit doors and drawers; connect the lighting; mount and connect the TV last. The electrician and the carpenter should agree before the day who is responsible for which connection. A final walk-through, with the household present, checks the doors, the lights and the cable positions.
Because wardrobe contents are moved, plan the day around them. If clothes need to be out of the room, agree where they will be stored and how long they will be there. Pets and children are worth considering too, because an open wall with tools and panels is not a safe place to wander.
Building rules for working hours and delivery access vary by community and tower, and the household or the building manager normally confirms them. Our article on delivery and access for apartment media walls lists the points to check. The timetable for your project is confirmed in the written quotation, not assumed from a general figure.
Budget and what moves the price of a bedroom wall
A bedroom TV wall with a wardrobe costs more than a simple TV panel because it includes more joinery, more doors and usually more lighting. At Al Tareeq Decor, media walls start from AED 3,500 for an entry specification, and the starting figure is only a starting point. The final price comes from the measured wall, the drawing you approve and the materials you choose.
The main drivers are easy to list. The width and height of the full assembly, and whether it runs to the ceiling. The number and type of wardrobe doors, and whether they slide or swing. The finish, with laminate at one end and veneer or lacquer at the other. The amount and complexity of lighting. Interior fittings such as drawers, shelves and hanging rails. And access, because a high floor or a long carry adds time.
The most useful habit is to ask for the quotation line by line, so the cost of the wardrobe, the TV panel, the console, the lighting and the installation can be read separately. That makes it possible to simplify one part, such as choosing laminate inside the wardrobe and a premium finish only on the visible faces, without redrawing the whole wall.
Our work carries a 24-month workmanship warranty and a 5-year limited warranty on covered wood-based boards, and the written terms should be requested at handover rather than assumed. If a particular finish or component has its own manufacturer's terms, ask for them to be listed.
To begin, send photos of the bedroom and the wall, the room dimensions, the TV size and a note on how the household watches in bed. The measuring visit then turns those answers into a drawing, and the drawing into a price you can read.
What to send for the consultation
For a bedroom TV wall consultation, send: a wide photograph of the full wall including the ceiling line, a photograph of the bed in its current position, the wall width and ceiling height (measured if possible), the television size you plan to install, and any reference photographs of the composition style you have in mind.
Including the bed frame and mattress height in your message allows the team to advise on the screen height at the first visit rather than returning to adjust it. If a new bed or mattress is being ordered, include the platform height and mattress depth from the supplier specification. Bedroom TV walls in Dubai, Abu Dhabi and across the UAE are delivered from our Sharjah workshop.
Common questions
What is the best screen height for watching TV from a bed?
The screen centre should be close to eye level when the viewer is propped up. For most UAE standard beds, this is 105–125 cm above the floor. Measure the actual bed and mattress depth in position before fixing the TV height on the drawing. The range varies by bed platform height and personal preference.
Can the TV section and wardrobe be different depths?
Yes — the TV panel is typically shallower than the wardrobe. A stepped front-face composition, where the wardrobe projects forward to its full depth and the TV panel sits flush with the wall, is a common solution. Agree the depth relationship and the console projection before manufacture. Media wall planning guide.
How wide should the TV section be?
A 65-inch TV screen is approximately 145 cm wide. A section 150–180 cm wide leaves modest space each side of the screen. A narrower section works if the TV sits on a floating console rather than in an open recess. Confirm the actual TV diagonal before drawing the section width. Choosing TV before wall.
Can sliding doors be used on a bedroom wardrobe wall?
Yes. Sliding doors are a common choice because they suit the front-face rule and do not require swing clearance in a room occupied by a bed. Confirm the sliding door width against the total opening required for the wardrobe contents — a wide wardrobe with narrow door panels is slower to access.
How do I match the TV panel finish to the wardrobe doors?
Order both in the same project from the same material batch. This is the only reliable way to guarantee a consistent finish. Matching a later order to an installed wardrobe is difficult because material batches vary in sheen and tone between production runs. Finish sample approval.
Does an integrated bedroom wall cost more than separate furniture?
A designed, custom-built bedroom wall costs more than freestanding furniture from a retail catalogue. The result is a composed room where every element is proportioned to the space and ordered together. Entry projects start from AED 3,500; a full bedroom wall with integrated wardrobe is a mid-to-upper-range project. Confirm in the quotation. Media wall prices.
What do I need to send for a bedroom wall consultation?
A wide photograph of the full wall, the wall width and ceiling height, the TV size, the bed frame height and mattress depth, and any reference images you have. The more practical detail you include, the more useful the first consultation will be. Consultation photo guide.

Sources & specifications
Manufacturer information applies to the named products and systems. Sources reviewed on 10 November 2026.
Want this planned for your home?
Consultation and measurement are free. Tell us the rooms, location and what you need; we arrange a sample visit and define the measured quotation.