Wardrobes · 16 min read · 25 May 2026
Wardrobe lighting: sensor strips, rail lights and what to wire in
How to light a wardrobe: layers of strips, door switch or sensor, battery or mains, aluminium profiles, lit rails, colour temperature and where the driver and switch go.

By Ali Haider Basra, Founder, Al Tareeq Decor · Contact our workshop
Key takeaways
- Light a wardrobe from inside in layers: a strip at the front of each section, one under each shelf, an optional lit rail and a plinth light.
- Use a door switch for any section with a door, and a PIR sensor with a timeout of a few minutes for open sections and walk-ins.
- Battery strips suit a rented home or an existing wardrobe; a wardrobe built to stay should be wired to a driver inside the unit.
- Use one warm colour, 3000 K, with CRI 90 or more, on every layer; choose 4000 K only for a daylight-filled dressing room, and wardrobe colour combinations weighs the door colour against that light.
- Size the driver with 20% spare, and put it behind a removable panel on the drawing so it can be reached later.
On this page
- Key takeaways
- How to light a wardrobe: the short answer
- Why a bright room still leaves the wardrobe dark
- The four layers of wardrobe lighting
- Door switch or motion sensor: which one to wire in
- Battery or mains: why we wire the light into the unit
- Aluminium profiles and diffusers: a clean line instead of dots
- Lit rails and plinth lights: when they earn their place
- Colour temperature and CRI: how your clothes will look
- Colour temperature for a wardrobe: what to expect
- Drivers, power and where to put the switch
- What to put on the drawing and what we do
- Common questions
How to light a wardrobe: the short answer
Light a wardrobe from inside, in layers, and switch it with the door. The usual best set-up is a slim aluminium profile along the front edge of each hanging section, a second strip under each shelf, an optional lit rail, and a plinth light, all on one driver, all the same warm white, all switched on when a door opens. The driver sits somewhere you can reach without cutting into the joinery.
That one sentence covers most of what you need to decide, and each part is explained below: which switch, which power, which profile and diffuser, which colour, and where the driver and the wall switch go. Our guide to the inside of a wardrobe explains what goes where, and for a walk-in as a whole room, dressing room design covers the ceiling layers. This guide is about the hardware that makes the light work.
The wiring is a drawing-stage decision. A strip can be stuck on afterwards, but a driver, a cable route, a switch and a neat slot in the side panel cannot, so they have to be on the drawing before a single board is cut. We fit the lighting into the wardrobes we build, with our own team, and it appears on the quotation separately.
Why a bright room still leaves the wardrobe dark
A wardrobe is a box 60 cm deep with a door in front. Hanging clothes face the door, and they are hit by whatever light gets past you. Stand at the open door and your own body fills the opening, so the clothes you came to choose from sit in your shadow. The back corners and the lower shelves are in a worse position still, because nothing in the room points at them.
In a glass-fronted wardrobe the problem is the opposite: light sits behind a clear door, and everyone in the room sees every shelf. That is a reason to plan the lighting as part of the furniture rather than treat it as an afterthought. A lit glass front is a feature, and an unlit one is a dark box behind a window; open wardrobe or closed doors covers what changes when a bay has no door at all.
The fix is light that comes from the front and the top of each section, close to the clothes, so it falls on the garment faces instead of behind your shoulders. That is why the strips go on the front edge of the top panel and under the shelves, not on the back wall. In a small bedroom the same light has to serve a shallower wardrobe, which our small bedroom wardrobe ideas take into account.
The four layers of wardrobe lighting
The drawing below follows one wardrobe section as its door opens. The door switch releases, and four layers come on in turn, each brightening the clothes a step: a strip at the front of the top panel, a strip under the shelf, a lit rail and a strip in the plinth. Beside the wardrobe, a readout lists each layer with its beam angle and colour temperature; at the bottom, a scale slides a marker to the colour we use by default.
Each layer does a different job. The top-front strip lights the hanging clothes from above and in front, so it is the one that matters most. The under-shelf strip lights what sits below a shelf, such as folded stacks and shoe boxes, which a top light cannot reach. The lit rail puts light right on the hangers, which helps in a deep or two-rail section. The plinth strip lights the floor in front of the wardrobe and makes a tall piece look as though it floats.
You do not need all four everywhere. A small wardrobe with one rail is well served by the top-front strip and the under-shelf strip. A tall walk-in section with two rails gains from the lit rail. The plinth strip is a finishing touch, and the first item to drop when the budget needs trimming.
- 1. Top-front strip: lights the hanging clothes from above and in front
- 2. Under-shelf strip: reaches the folded stacks and boxes the top light cannot
- 3. Lit rail: puts light right on the hangers in deep or two-rail sections
- 4. Plinth strip: lights the floor in front and lifts the wardrobe off it
- 5. Colour scale: warm 3000 K is our default; a dressing room by a window may go to 4000 K
Door switch or motion sensor: which one to wire in
The two common ways to switch a wardrobe light are a door switch and a motion sensor, and they behave differently. A door switch is a small contact, a plunger or a magnet and reed pair, that closes when the door opens. The light is on exactly as long as the door is open, and goes off the moment it shuts. It has no delay to set and no way to switch on by accident.
A PIR sensor reacts to movement and body heat, and keeps the light on for a timeout after the last movement. It works with doors of any kind, or none, which is why it is the one for open sections, drawers and walk-ins. The drawbacks are the timeout, which is short on cheap units and annoying when you are standing still choosing a shirt, and false triggers from someone walking past a glass-fronted section.
Our recommendation is simple. Use a door switch for any section with a door, hinged or sliding, and a PIR sensor for open sections and for a walk-in without doors. Choose a unit whose timeout you can set to a few minutes, and place its sensor where it sees the doorway rather than the whole room. The IKEA ÖVERSIDAN wardrobe strip, a typical retail example, has a built-in sensor and is sold as a strip for under a shelf, under the top panel or inside a sliding wardrobe, but the listing does not say what triggers it, which is a reminder to ask before you buy.
Sliding doors change the contact. A magnet or plunger on a sliding leaf has to meet its partner at the right moment, and the leaf may open only half the section. Hinged or sliding wardrobe doors explains how each door type opens, so you know which section needs the switch where. The video below shows how a magnetic door switch is fitted for cabinet LED lighting, so the light is on exactly as long as the door is open.
Battery or mains: why we wire the light into the unit
Battery lights are the quick fix. A strip with its own sensor and a few cells stuck inside an existing wardrobe lights it in ten minutes, with no electrician and no holes. For a rented home or a wardrobe you already own, that is the right answer. Their weak spots are plain: batteries run out, usually just when you need them, a sensor that is always listening draws a little current all the time, and the strips are short and dim compared with a mains strip.
Mains is what you want in a wardrobe that is built to stay. The light is brighter, the sensor never needs a battery, and the strip can run the full height of a tall section. Even the retail kits make this point: the ÖVERSIDAN strip from IKEA is sold without its driver and cord, which are listed as separate purchases, so a "plug-in" wardrobe light is still a mains light with a transformer somewhere.
That is the reason we wire the lights into the unit. A built-in wardrobe has a cavity above it or beside it where the driver can live, and a cable route that is drawn before the panels are fixed. Retrofitting that into a finished wardrobe is the expensive way to do it, and a battery strip is the cheap way. If you are not sure which is right, the question to ask is how long you will keep the wardrobe: a few years in a rental, battery; many years in your own home, mains.
Aluminium profiles and diffusers: a clean line instead of dots
A bare LED strip stuck to a board shows its dots: a row of bright points with dark gaps, and a reflection of each one in any glass in front of it. A profile cures that. It is a slim aluminium channel with a diffuser cover, and it gives a smooth, continuous line of light. The aluminium also helps carry heat away from the strip, which helps it last; a bare strip stuck to a board gets no help.
Pick the diffuser for the way the profile is seen. Opal or milky covers are the safe choice wherever you can see the profile directly, because they blend the dots into a single line. Clear covers give a crisper, brighter line but can show the dots, so they suit a profile hidden behind a lip or recessed into a panel. Depth matters as much as the cover: the deeper the channel between the strip and the diffuser, the smoother the light, so a slim recessed profile and a deeper surface one will not look the same even with the same strip.
Profiles also come surface-mounted, recessed into a rebate and as corner pieces that sit at the junction of a shelf and a side panel. For a wardrobe, recessed is the neat option, since the profile disappears into the board and only the lit line shows, but it needs a groove cut at the workshop, so it is another decision for the drawing. Ask the maker to show you a lit sample of the profile you are paying for before it goes on every section. The short video below is a fitter's overview of strips, profiles and accessories for fitted furniture.
Lit rails and plinth lights: when they earn their place
A lit rail puts a row of small lights right at the hanging rod, so they shine on the hangers and the shoulders of the clothes. In a section with two rails the lower rail is the dark one, and a lit rail there solves a problem that a strip along the top cannot. It is also the neat answer in a wardrobe where the top is closed in and no strip fits on the front edge.
Its limits are practical: the lights are close to the clothes, so they must be cool-running LEDs, with no halogen, and the wiring runs inside or along the rod, so it needs a service route. A lit rail is a premium line, so ask for it where it does real work, usually the tallest and the deepest sections. We list LED rail lighting among the upgrades that are priced from the drawing, rather than with a flat figure.
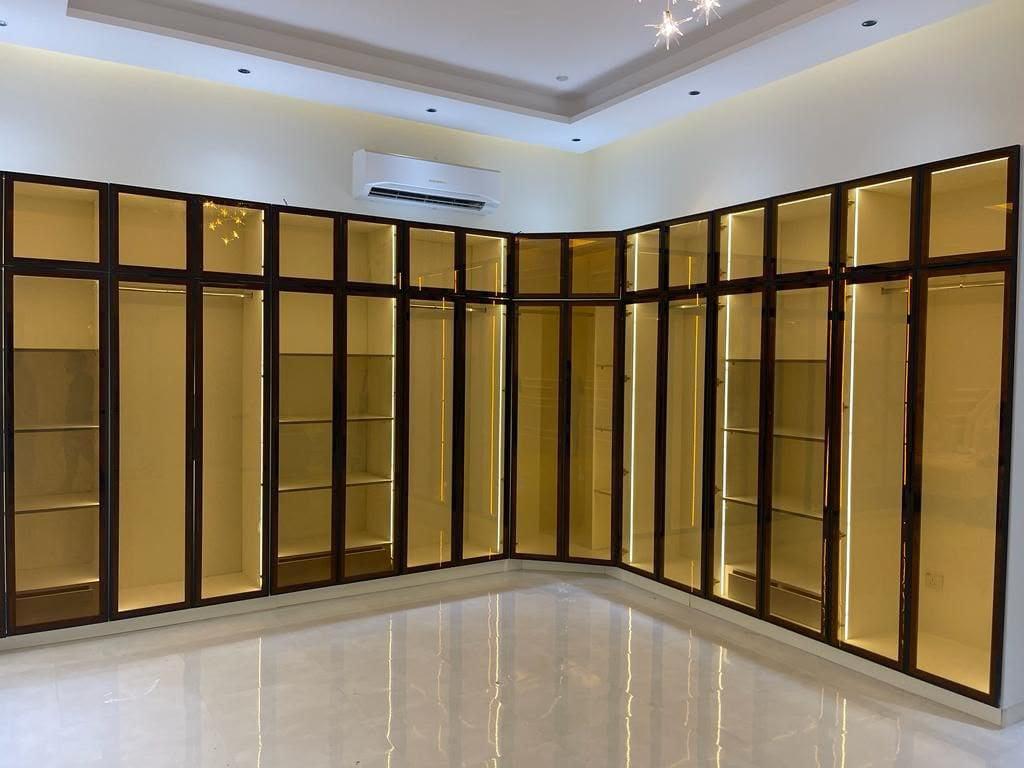
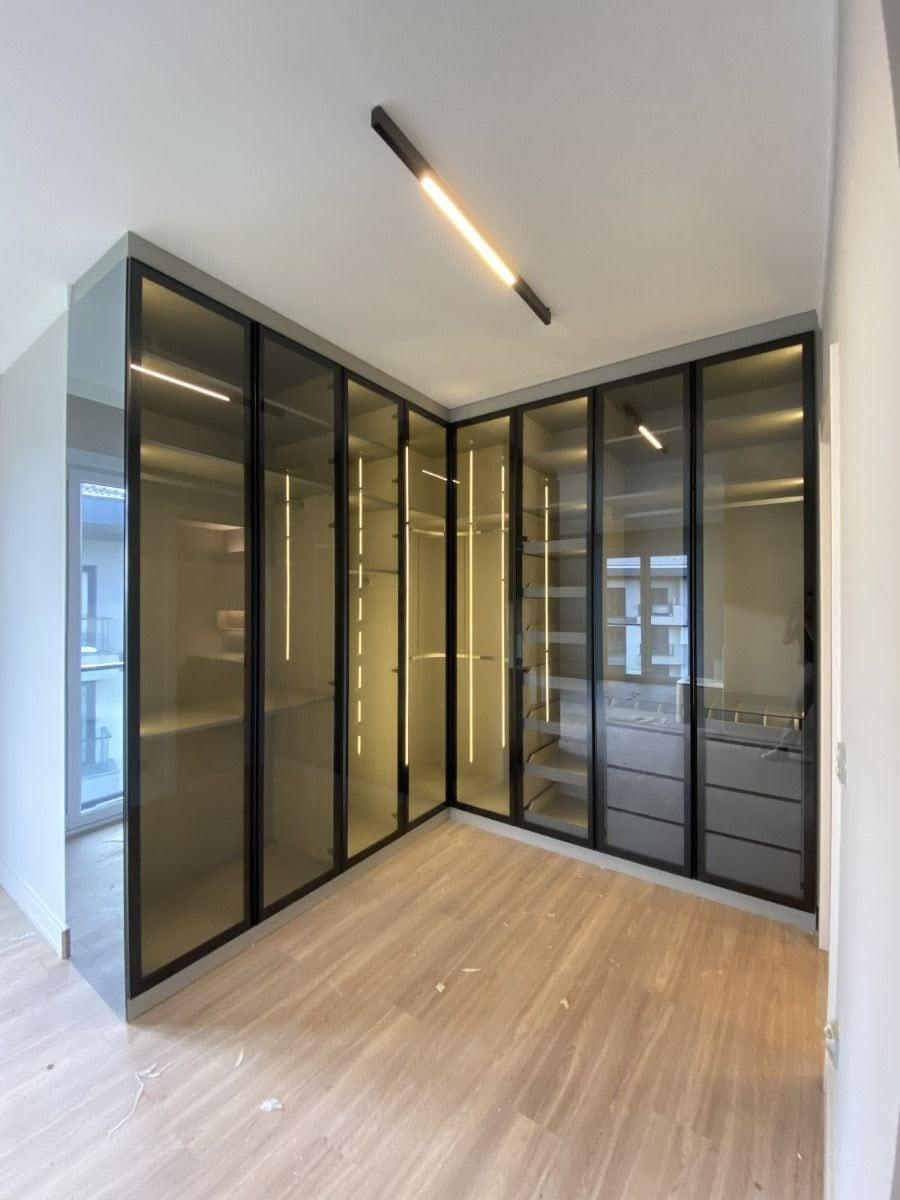
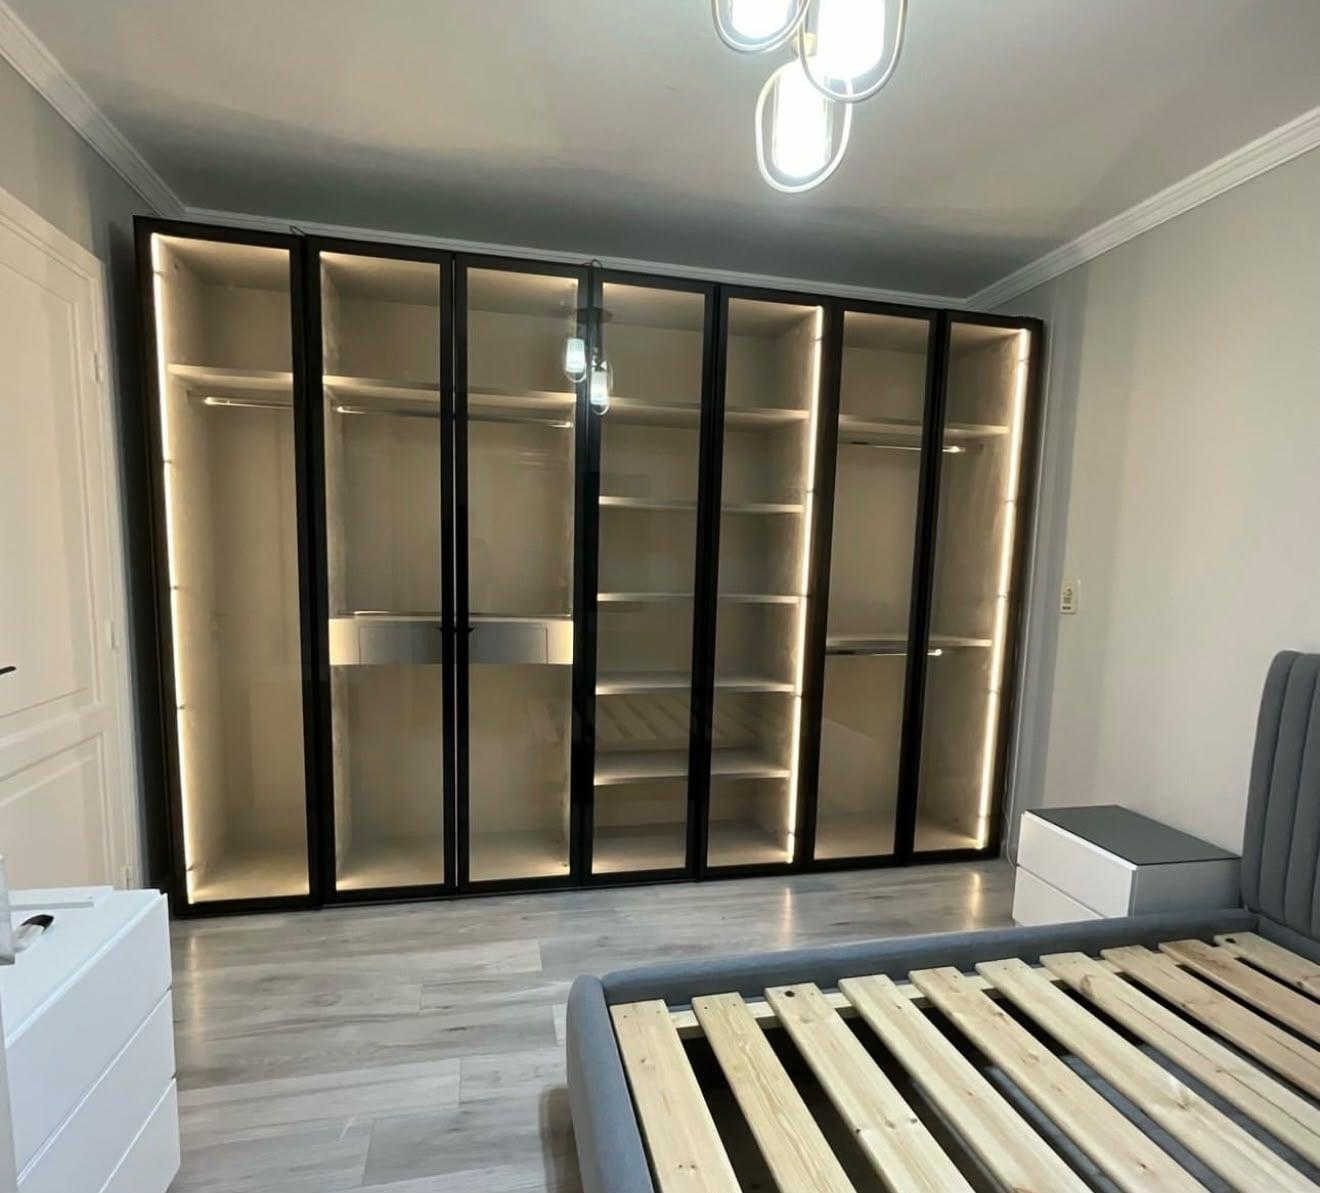
A plinth light is the opposite kind of detail: a strip at the foot of the wardrobe, shining on the floor, with no job except to make the piece look lighter and to act as a night light for a walk to the bathroom. It costs little and it is the first line to remove when trimming a budget. In the photograph below, thin vertical strips at the frame edges and a lit rail in each section turn a black-framed glass wardrobe into the main feature of the room. If you want light inside, LED strip versus profile for wardrobe lighting explains the difference before you ask for a quotation.
Colour temperature and CRI: how your clothes will look
Two numbers decide how clothes look under LED. Colour temperature, in kelvin (K), says how warm or cool the light is: lower numbers are warmer, yellower light, and higher ones are whiter and bluer. The colour rendering index, CRI, says how faithfully the light shows colours. It tops out at 100; typical white LEDs score 80 or more, and good ones reach about 95 to 99. A weakness of the scale is that it averages eight sample colours and leaves out a strong red, called R9, so a light can score well and still make reds look flat.
For a wardrobe we use 3000 K as the starting point. It matches the warm white lamps commonly used in bedrooms, so the wardrobe does not glow blue next to the room, and it keeps cream and white shirts looking cream and white. Ask for CRI 90 or more: it is what keeps a navy shirt from collapsing into the black one beside it. The 4000 K step suits a dressing room with a lot of daylight or cool ceiling light, where a warmer wardrobe would look yellow by comparison. The table gives the rule of thumb.
Whatever you choose, use the same colour on every layer and in every section. A mix of warm and cool strips along one run makes the wardrobe look patchy, and clothes seem to change colour as you move along. The best check is also the cheapest: before sign-off, look at the two or three garments you wear most under a sample of the light, at the hour you usually dress. The same rule runs through our media wall lighting ideas, which helps when a wardrobe and a TV wall share one room.
Colour temperature for a wardrobe: what to expect
2700 K
- How it looks
- Very warm, close to an old bulb
- Good for
- A cosy bedroom wardrobe with wood tones
- Watch for
- Whites and creams turn yellow; navy goes muddy
3000 K
- How it looks
- Warm white
- Good for
- Our default for a wardrobe in a bedroom
- Watch for
- Slightly warm against a room lit very cool
4000 K
- How it looks
- Neutral white
- Good for
- A dressing room with daylight or cool ceiling light
- Watch for
- Can feel clinical in a warm bedroom
5000 K and up
- How it looks
- Cool, daylight-like
- Good for
- Rarely right in a wardrobe
- Watch for
- Makes the inside of the wardrobe look cold and blue
CRI is separate from colour temperature: ask for 90 or more whichever colour you choose. Our own recommendation, drawn from the way these lights behave in UAE bedrooms.
Drivers, power and where to put the switch
Every LED strip is fed by a driver, a small power supply that converts mains into the safe low-voltage current each strip is rated for. Size it from the strip: multiply the watts per metre by the metres on the run, then add at least 20% so the driver never works at its limit. Futurelight, a lighting supplier, gives the example of 10 W per metre over 6 m, which is 60 W, so a driver of about 72 W. The same logic applies to a retail kit: IKEA sells its wardrobe strip without a driver, so the strip's load has to be matched to whichever driver you add.
Long runs lose voltage along the strip, so the far end looks dimmer. Higher-voltage 24 V strips suffer less, and feeding a strip from both ends or splitting it into sections also helps. Across one wardrobe section the effect is usually small, but on a run that crosses several sections it can show.
The driver gets hot and sometimes fails, so it must be reachable. Put it above the wardrobe behind a removable panel, or in a cupboard beside it, and never inside a sealed carcass. Futurelight says the same: drivers need service access, especially in fitted furniture. Draw it with the cable route so a future electrician can swap it without taking the wardrobe apart. Planning ceilings and lights together covers the same principle for ceiling fittings.
Put the wall switch where you will reach for it: just inside the room's door, with the wardrobe lights on their own switch, separate from the ceiling. If you use door switches, a second switch on the wardrobe's side lets you leave the light on while you tidy or clean. A dimmer is worth having where you wake others, such as a bedroom shared with a sleeping partner, and the strips, driver and dimmer must be compatible as a set.
What to put on the drawing and what we do
Before we build, the drawing should show every light, the switch for each section, the driver and the way to reach it, and the power point it plugs into. The wiring and the lighting are done by our own team, and a socket or switch that has to move for the layout is moved as part of the job, each on a separate line; the free wardrobe measuring visit guide shows which photos of sockets and switches to send first. Wardrobe fronts start at AED 550 per m² fitted (entry spec); LED rail lighting, glass fronts and other additions are priced from the drawing, and the wardrobe quotation checklist shows how to read each of those lines. The workshop in Sharjah makes the panels, and we normally finish up to about 10 days from confirmation. Our written warranty runs 24 months and covers the workmanship. Separately, the wood-based boards carry a 5-year limited warranty, subject to terms; hinges, tracks, runners, rollers and other moving hardware are not covered, and the final terms are in the written warranty.
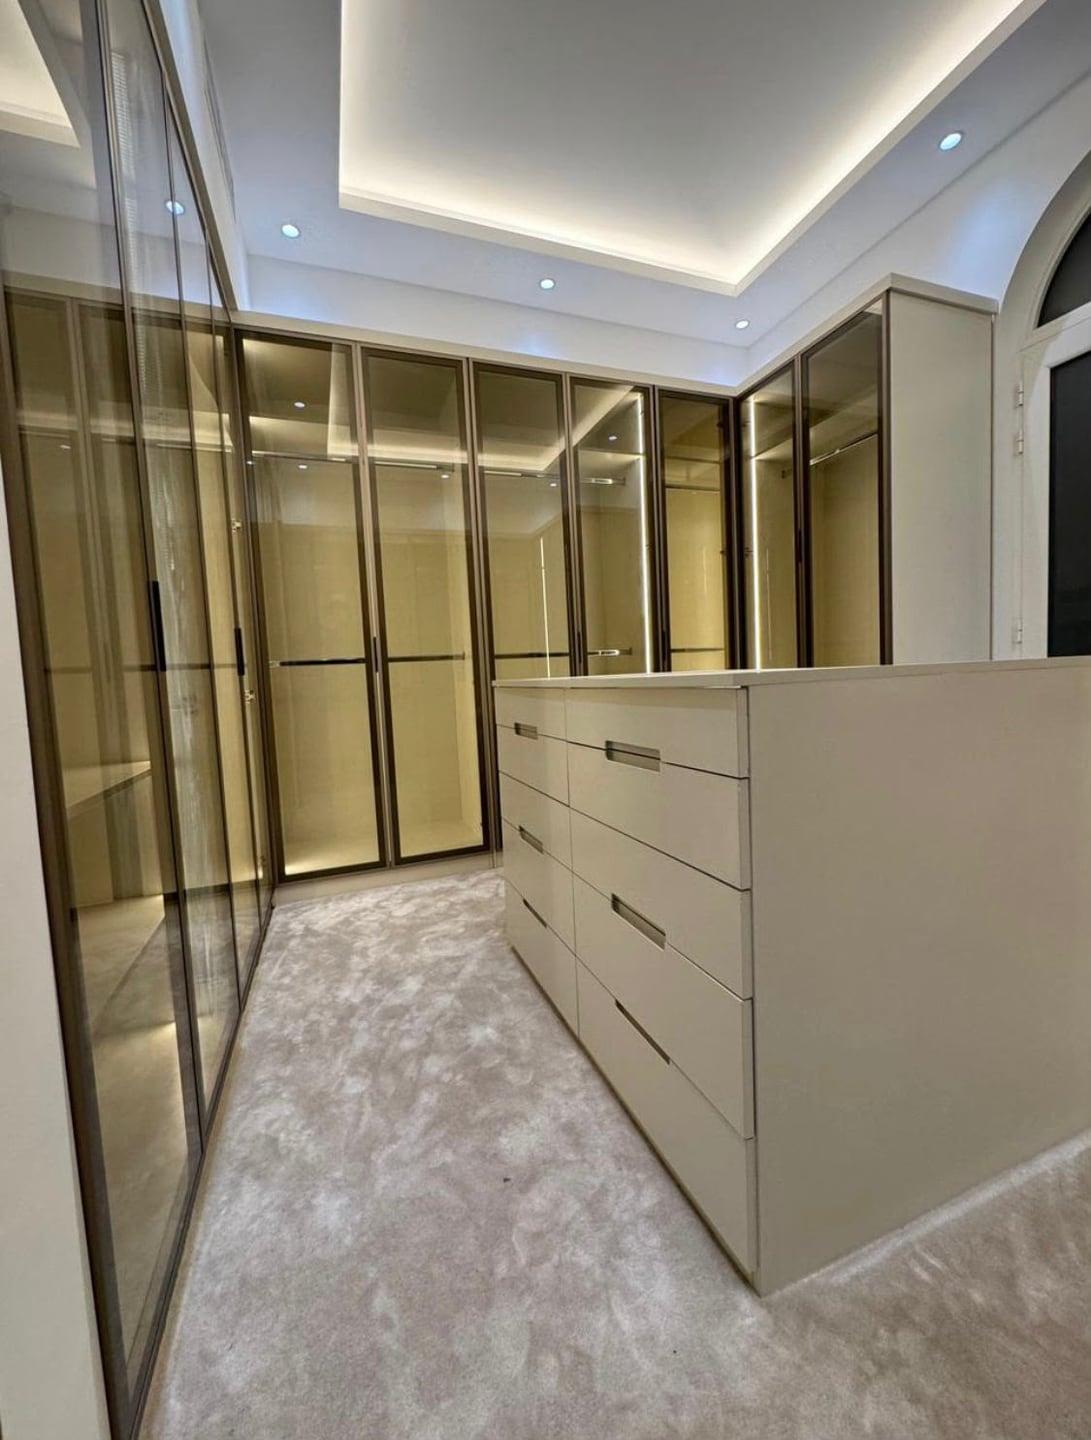
To see what lit wardrobes look like, browse our lit glass-front wardrobes and the walk-in closets and dressing rooms. The custom wardrobes service shows what we build, and we fit locally in Sharjah and across the UAE. For what each option costs, read custom closet and wardrobe prices, and for the boards the strips are fixed into, wardrobe materials and hardware. If the wardrobe sits in a dressing room with a mirror, plan that light with dressing mirror lighting. If one bay of the run will hold a screen, read bedroom wardrobe with a TV unit before the lights are placed.
Check a lighting plan against these points before you sign it off: For a wardrobe that runs the full height of the wall, see how to plan a floor-to-ceiling wardrobe.
- Each hanging section has a top-front strip, and each shelf has a strip beneath it.
- Doored sections have a door switch; open sections and walk-ins have a PIR sensor with a timeout of a few minutes.
- Every strip is the same colour temperature, 3000 K by default, and CRI 90 or more.
- Profiles have opal diffusers wherever they are seen directly, and a lit sample has been shown.
- The driver is sized with 20% spare, sits behind a removable panel and is drawn with its cable route.
- The wardrobe lights have their own switch, placed where you reach for it.
Common questions
How do you light a wardrobe?
From inside, in layers: a strip along the front edge of every hanging section, one under each shelf, and a lit rail or plinth light where it helps. Switch them with the door. Wardrobe interior layout guide.
Is a door switch or a motion sensor better in a wardrobe?
A door switch for sections with doors, since it is on exactly while the door is open. A PIR sensor for open sections and walk-ins, with a timeout of a few minutes. Hinged or sliding wardrobe doors.
Are battery or mains wardrobe lights better?
Battery for a rented home or an existing wardrobe; mains for one built to stay, because it is brighter and the sensor never needs cells. Lit glass-front wardrobes.
What colour light is best for a wardrobe?
We use warm white, 3000 K, with CRI 90 or more, the same on every layer. Go to 4000 K only in a dressing room with a lot of daylight. Dressing room design.
How do you light a walk-in wardrobe?
Add ceiling light, strips in each section and a PIR sensor at the doorway, each on its own switch. Plan the mirror light separately. Dressing mirror lighting.
Where does the LED driver go in a wardrobe?
Above or beside the wardrobe behind a removable panel, with a cable route drawn before the boards are cut, never sealed in. Custom wardrobes service.
How much does wardrobe lighting cost?
Our wardrobe fronts start at AED 550 per m², and LED rail and strip lighting are priced from the drawing as their own lines. Custom closet and wardrobe prices.

Sources & specifications
Manufacturer information applies to the named products and systems. Sources reviewed on 28 October 2026.
- IKEA: ÖVERSIDAN LED wardrobe lighting strip with sensor (lengths, mounting fittings, driver and cord sold separately)ikea.com(opens in a new tab)
- Futurelight: LED profile diffusers and drivers, what to specify before you buy (20% driver headroom, opal against clear, service access)futurelight.co.za(opens in a new tab)
- Wikipedia: colour rendering index (scale to 100, typical LEDs 80 or more, the R9 limitation)en.wikipedia.org(opens in a new tab)
Want this planned for your home?
Consultation and measurement are free. Tell us the rooms, location and what you need; we arrange a sample visit and define the measured quotation.