Wardrobes · 16 min read · 17 July 2026
Wardrobe LED strip or aluminium profile? Where the light goes
For a wardrobe used every day, put the LED strip in an aluminium profile with an opal cover where the light is visible and use a bare strip only where it is hidden. Where the light goes, warm against neutral, sensor options and what to ask for in the quotation.

By Ali Haider Basra, Founder, Al Tareeq Decor · Contact our workshop
Key takeaways
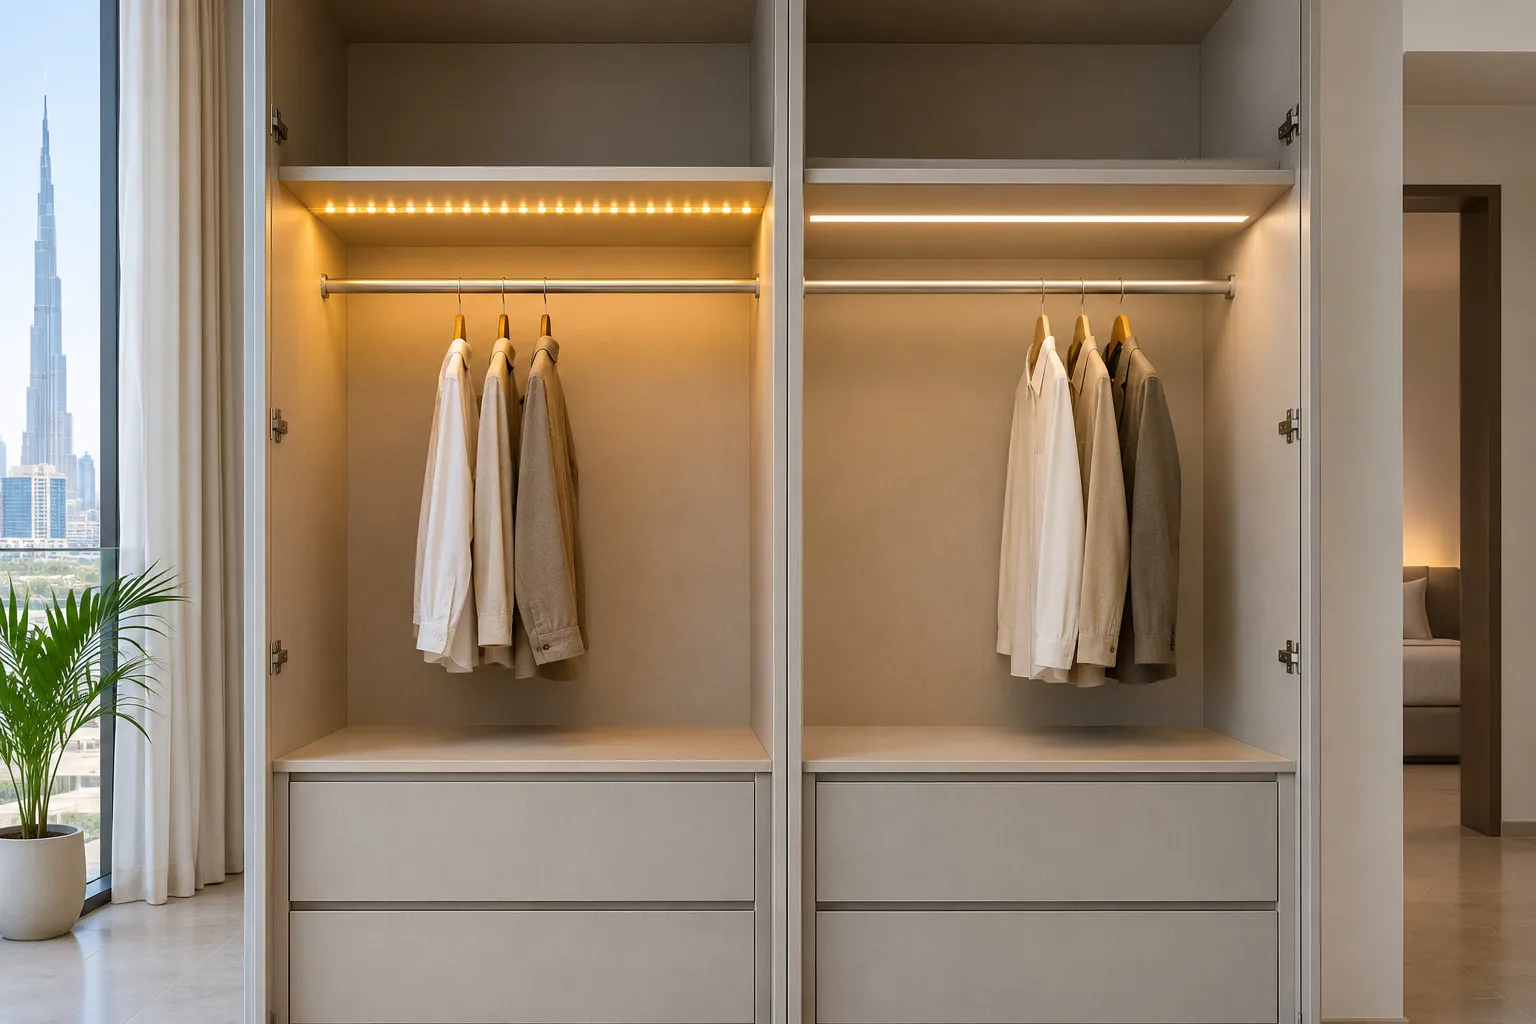
- Use a profile with an opal cover where the light can be seen (door side, shelf fronts, above the rail) and a bare strip only where it is hidden, such as inside a drawer.
- Plan four zones: the door-side edge, above the rail, under the shelves and over the drawers. Not every wardrobe needs all four.
- Choose one colour for the whole wardrobe. Warm suits bedrooms and wood; neutral helps when you judge colours; wardrobe colour combinations for bedrooms covers the door colour under that light. Ask for the kelvin value, because makers use the words differently.
- A door switch or a sensor is possible where feasible; it depends on the door type and is confirmed on the drawing. Heat and cable routes are installer decisions: ask, do not guess.
- Ask the quotation to state each lit zone, strip or profile, colour, switching and the lighting warranty. Häfele Loox5 exists as a premium system, but it is not our confirmed supplier.
On this page
- Key takeaways
- LED strip or profile: the short answer
- Bare LED strip or strip in a profile, side by side
- What a bare strip and a profile actually are
- Where the light goes: door side, above the rail, under shelves, drawers
- See it in a finished wardrobe
- Warm or neutral: which colour for the clothes
- Sensor or door switch: what we can fit where feasible
- Heat and cable tidiness at planning level
- Häfele Loox5: a premium system that exists
- What to ask for in the quotation
- Lighting lines for a wardrobe quotation
- What we do about it
- Common questions
LED strip or profile: the short answer
For a wardrobe you will use every day, put the strip in an aluminium profile with an opal (milky) cover wherever the light can be seen, and use a bare strip only where it is hidden, such as behind a lip or inside a drawer. A bare strip is cheaper and thinner, but its dots can show; a profile gives an even line, protects the strip and helps carry its heat away. The choice changes the look more than the brightness, and it is cheapest to make on the drawing, before the boards are cut.
This guide goes deeper on that one choice. Our older guide to wardrobe lighting ideas covers the whole system: door switch against motion sensor, battery against mains, lit rails and the plinth. Here we look at what a bare strip and a profile each do, where the light should go inside the wardrobe, warm against neutral colour, and the questions that belong on the quotation. Nothing here is a wiring instruction: how the light is connected is for our installers to decide and write on the drawing.
Bare LED strip or strip in a profile, side by side
Look
- Bare strip
- A thin line of light; the individual dots can show
- Strip in an aluminium profile
- An even band when an opal cover is fitted; a clear cover can still show dots
Where it suits
- Bare strip
- Hidden spots: behind a lip, inside a drawer, a niche you never look into
- Strip in an aluminium profile
- Visible edges: shelf fronts, the door-side edge, above the rail
Protection
- Bare strip
- The strip is exposed to knocks, dust and hangers
- Strip in an aluminium profile
- The channel shields the strip on three sides
Heat
- Bare strip
- Heat goes into whatever the strip is stuck to
- Strip in an aluminium profile
- The aluminium acts as a heat sink for the strip, per one maker's guide
Neatness
- Bare strip
- Depends on how straight it is laid; any joint shows
- Strip in an aluminium profile
- A straight, rigid line; the cover hides joins and the strip
Extra work
- Bare strip
- Almost none
- Strip in an aluminium profile
- A groove or surface fixing in the board, a cover and end caps; recessed profiles need an exact cut-out
Cost
- Bare strip
- Lowest part cost
- Strip in an aluminium profile
- Higher: a profile and a cover on top of the strip; ask for it as a line
Our summary of one maker's guide (Signlite LED) and of how joinery is usually planned. It is not a test of any product; ask for the datasheet of the strip and profile you are quoted.
What a bare strip and a profile actually are
A bare strip is a flexible printed strip with a row of small LEDs, usually bought on a reel and cut to length. Stuck straight on a board it throws a line of bright dots. A profile is a channel of extruded aluminium that the strip sits inside, normally closed by a cover called a diffuser. It can be surface-mounted on the face of a board, or recessed into a groove cut in it.
The reasons to add a profile come from one maker's guide, Signlite LED, which we opened for this page. It describes aluminium profiles as passive heat sinks that move heat from the strip's circuit board into the air, notes that a clear cover leaves LED hotspots visible, and says an opal or milky cover gives smooth, hotspot-free light. It also says a surface-mounted profile may need thermal tape on wood, and that a recessed one needs a precise cut-out and may reduce airflow. Those are one maker's statements, so we do not turn them into a rule for every wardrobe; they are a reason to ask which profile, which cover and how it is fixed.
In a wardrobe the two things that matter most are what you see and what touches the clothes. A glass-fronted or open wardrobe shows its light to the whole room, so the line should be even; a closed wardrobe shows it only when the door opens, and then you are standing right in front of it, which is when dots become noticeable. The heat question is simply to keep the light fitting away from cloth and to make sure the strip is mounted as its maker intends, which is another reason to settle the profile on the drawing. The materials and hardware around it are in our wardrobe materials and hardware guide.
Where the light goes: door side, above the rail, under shelves, drawers
Think of the wardrobe as four zones, each with a different job. The drawing below switches them on one at a time on one wardrobe front; the order is the order you would plan them in.
Vertical, at the door side.A strip running up the inner edge of the opening lights the faces of the clothes from the side, so nothing hides in your shadow. It is the line you see in a glass-fronted wardrobe, and it is the zone where an even line matters most, which is why it normally sits in a profile. In a hinged wardrobe, the hinge position and the door swing decide which edge it can sit on, so settle both together. The handle sits on the same face, and our wardrobe handles guide covers types, height and finishes.
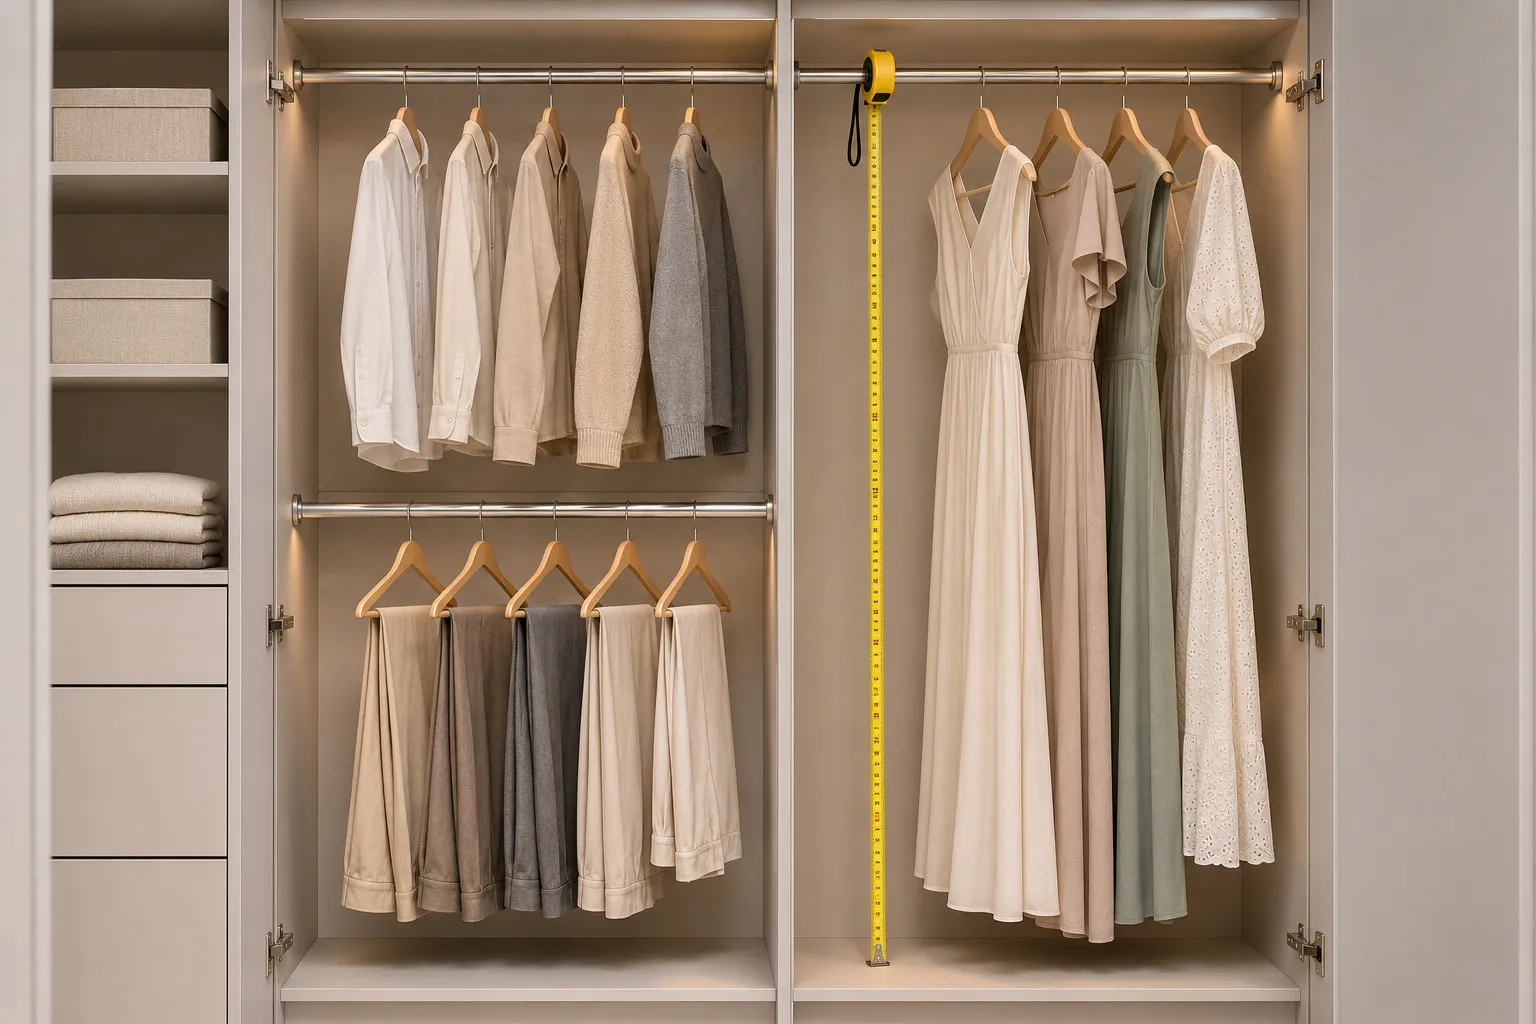
Above the rail.A strip fixed under the top panel or the shelf above the rail lights the hangers and shoulders. How high the rail goes decides how far the light has to travel, and our wardrobe hanging heights guide sets those heights, so light and rail should be drawn together. For long garments see our abaya and kandura storage guide: a tall hanging bay needs its light high and in front.
Under the shelves.A strip under the front edge of a shelf lights the stack below it, so the folded clothes you reach for are visible. Shelves are exposed to hands, which is a good reason for a profile here too; the cover is a harder surface than a bare strip. How the shelves are spaced is covered in the wardrobe layout guide, and shelves for shoes are covered in shoe wardrobe design.
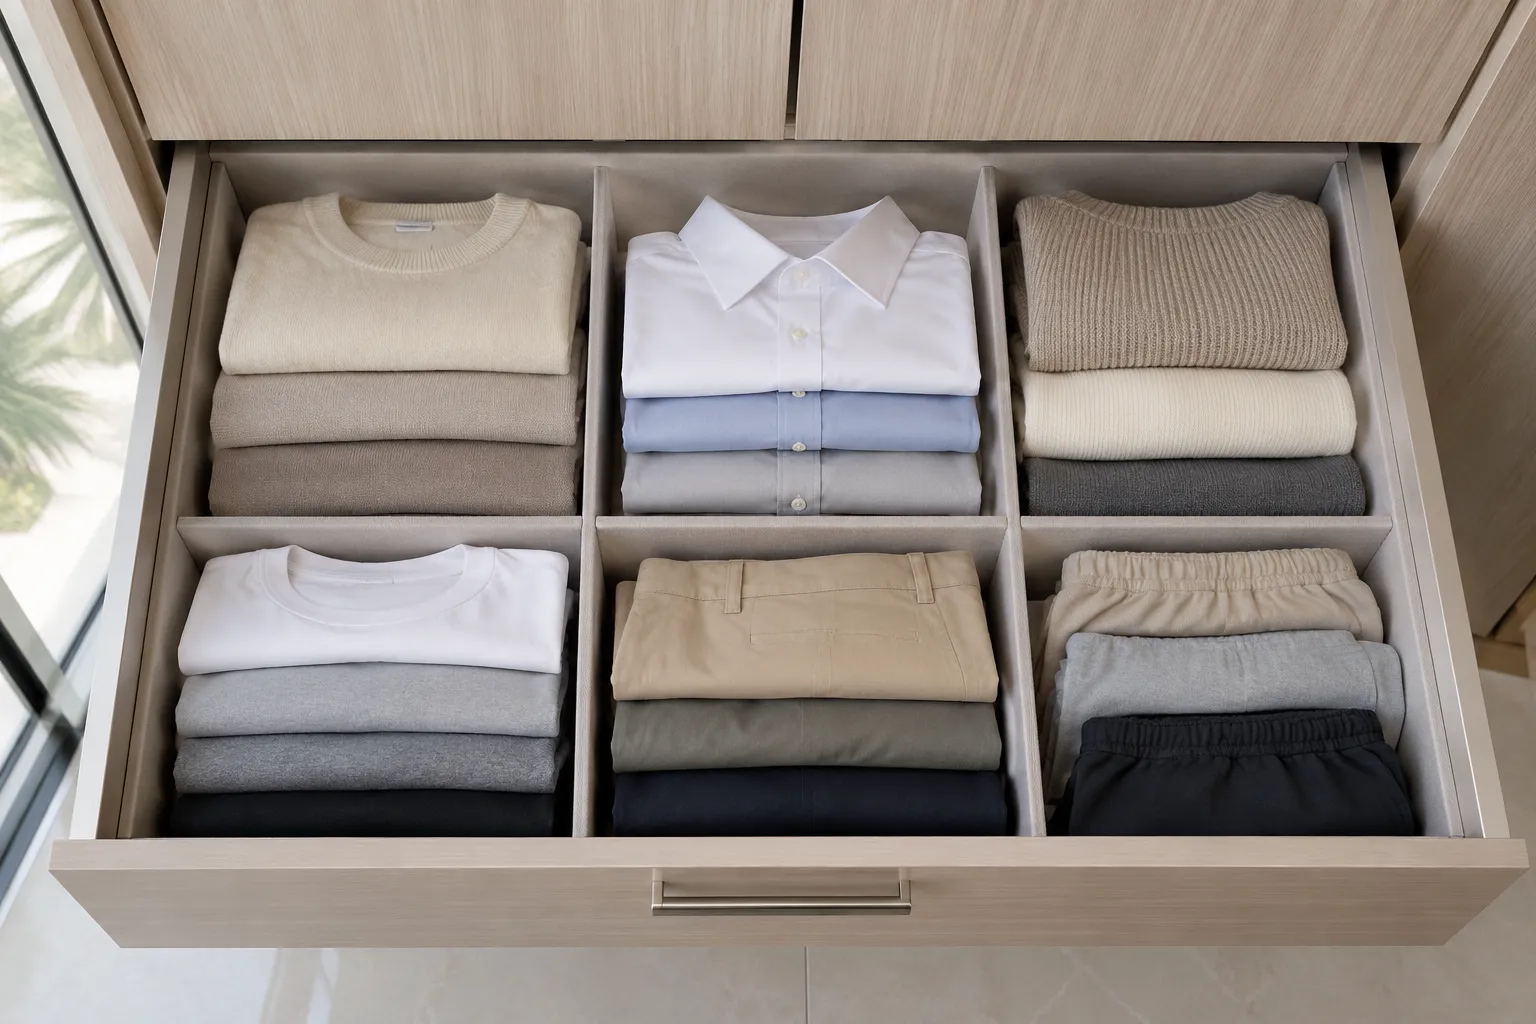
Over the drawers.A strip at the back of a drawer bay, or a short one inside a drawer, lights what is in it when it opens. This is the one place where a bare strip is often right, because it is hidden, but it should be planned with the runner and the drawer depth; see our wardrobe drawers and organisers guide, and the depth guide for how deep the box really is. For the space above the doors, see luggage and seasonal storage in a wardrobe.
- 1. Vertical, door side: lights the faces of the clothes from the side; an even line matters most here
- 2. Above the rail: lights hangers and shoulders; draw it with the rail height
- 3. Under the shelves: lights the stack below; the cover protects the strip from hands
- 4. Over the drawers: often hidden, so a bare strip can be enough; plan it with the runner
- 5. Bare strip or profile: dots can show on a bare strip; an opal cover gives an even line (Signlite LED)
See it in a finished wardrobe
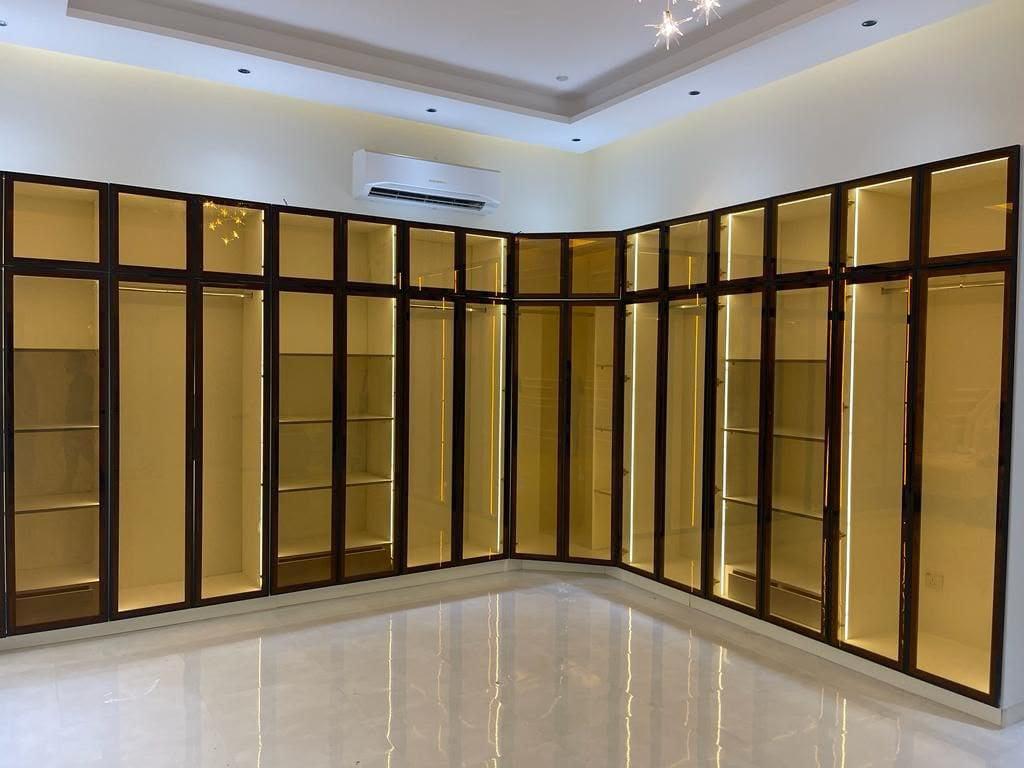
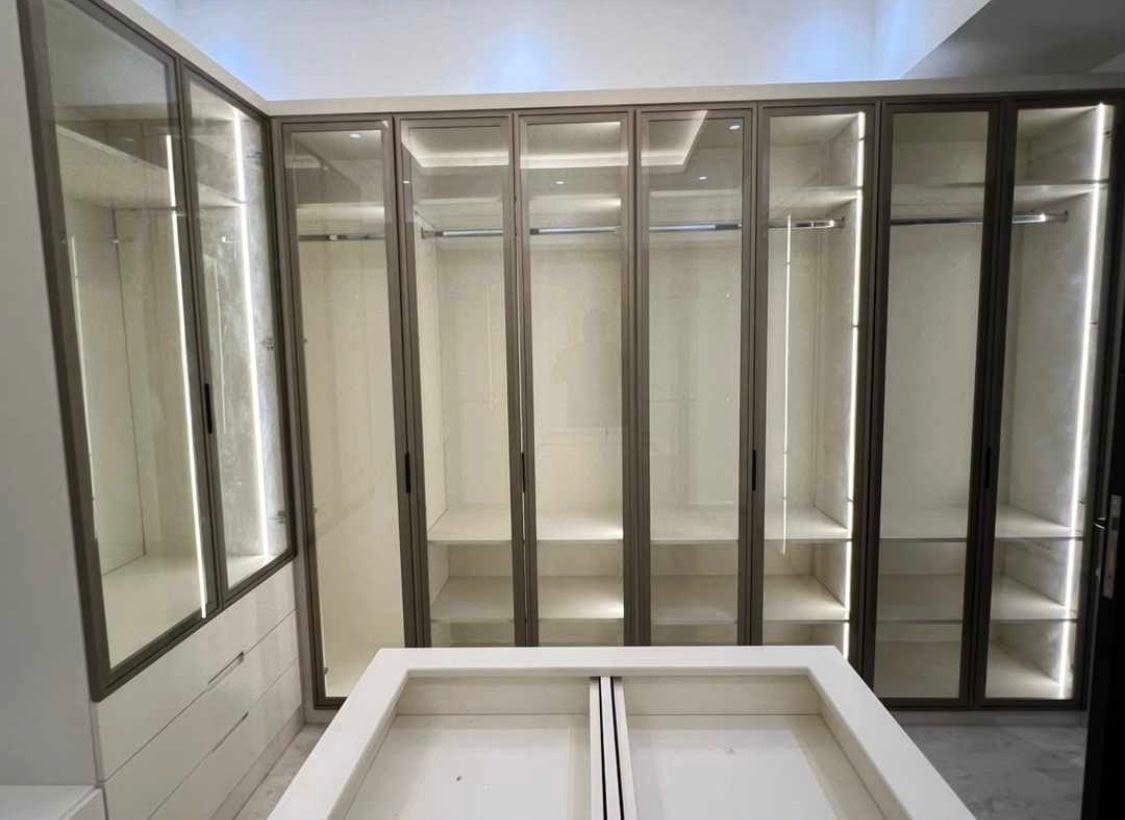
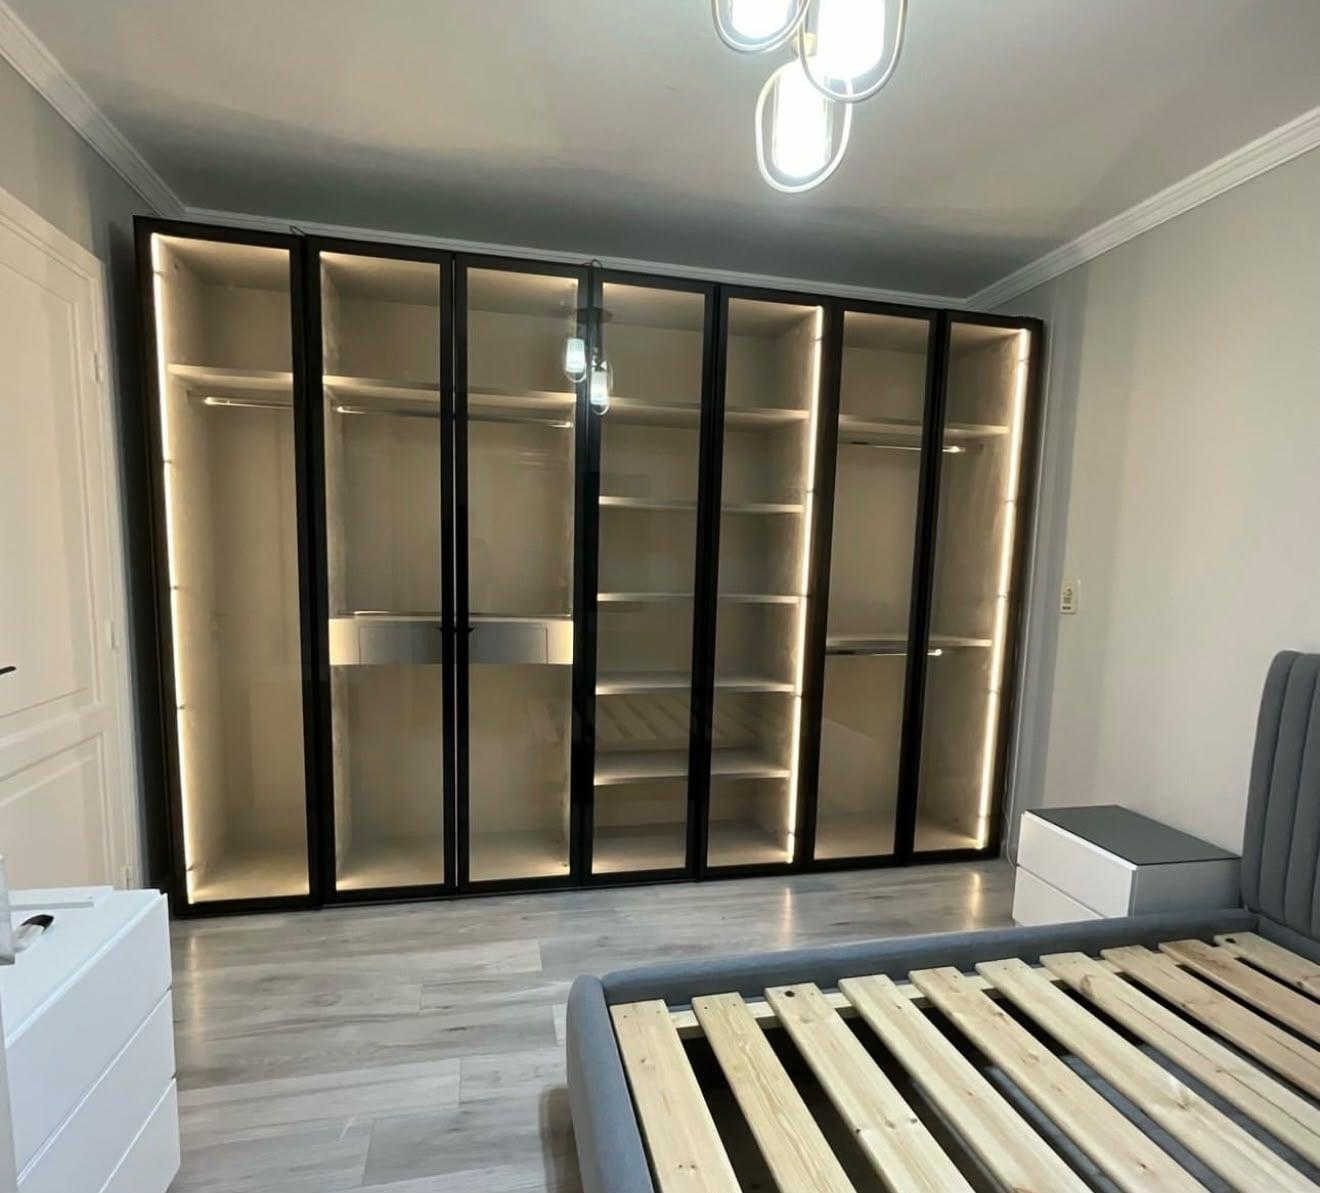
The photo shows one of our installed glass-fronted wardrobes, seven bays behind black-framed glass. The light runs up the inner edges of the bays at the door side, and the shelves in the centre bays have their own lines. We do not decide from a photo whether a given line is a bare strip or a profile, so look at the evenness: a continuous line with no dots is the effect a cover gives. For the doors themselves see mirror wardrobe doors, and for glass and lacquer fronts our wardrobe door finishes compared.
Warm or neutral: which colour for the clothes
The colour of LED light is given as a temperature in kelvin: the lower the number, the more red and warm the light, and the higher, the bluer and cooler. We offer warm or neutral for the lighting inside a wardrobe. LEDVANCE, a lighting maker, describes 2700K as a warm, soft glow like a traditional bulb that emphasises warm tones such as wood and beige, and 3000K as a balanced warm white with less yellow and orange; its other page calls 3000K to 3500K neutral white and 4000K to 4500K cool white. So makers use the words warm, neutral and cool for different numbers, and the sensible habit is to ask for the stated kelvin value in the quotation, not the word.
Our advice: choose warm for a bedroom wardrobe, where the room's own lamps are warm and you want the clothes to look the same inside and outside the wardrobe. Choose neutral if you mostly judge colour, such as navy against black, or if the wardrobe sits in a dressing room with a window and cool walls. Whichever you choose, use one colour for the whole wardrobe: a warm strip on one shelf and a neutral strip on the next looks patchy, and it is cheap to avoid on the drawing. The mirror needs its own thought; see dressing mirror task lighting.
Two cautions. Light colour interacts with the finish: a glossy or pale wardrobe interior bounces light and looks brighter and a dark one absorbs it, so look at your finish before you decide; our door finishes comparison lists them. And ask to see the strip lit next to a piece of your own clothing, if it can be arranged, because a datasheet number does not replace a look. Ask what the warranty on a wardrobe actually covers before you sign; that guide lists the questions to put in writing.
Sensor or door switch: what we can fit where feasible
A door switch turns the light on when a door opens and off when it shuts; a motion sensor turns it on when it sees movement and off after a pause. Both are choices we can discuss for a wardrobe we build, where feasible: whether one works depends on the door type, the board layout and where the parts can be placed, and our team confirms it on the drawing. Our wardrobe lighting ideas guide compares the two switches in detail.
As a rule of thumb, a hinged door suits a door switch because the door opens clearly, while an open section, a glass front, a drawer bay or a walk-in is more naturally served by a sensor. On a sliding door the door moves sideways, which may make a door switch harder to place, so ask which is workable. If you have a shared wardrobe, ask for a separate switch or sensor for each person's side, so one person's light does not wake the other.
Ready-made products show what a sensor strip looks like: IKEA's ÖVERSIDAN is a light strip with a built-in sensor made for its PAX wardrobes, fixed at the top or under a shelf with the fittings supplied. That is an example of a ready-made product, not what we supply; for a wardrobe we build, the sensor is part of the quotation and the drawing. How much floor a swinging leaf needs is worked through in our wardrobe door clearance guide, with a masking-tape test you can do before ordering. Ready-made products like that are one side of the choice, and custom or ready-made wardrobe compares where each wins.
Heat and cable tidiness at planning level
Two worries sit behind most questions about wardrobe lighting: will it get hot, and will the cables show. Neither is a reason to avoid internal LED lighting; both are reasons to ask. On heat, the useful points at planning level are the ones the maker's guide raises: that the strip is mounted as its maker intends, that a profile is part of how heat leaves the strip, and that a recessed profile may leave less airflow than a surface one. Ask for the strip's and profile's datasheet, and keep the light fitting away from where clothes will touch it; that is a drawing question about where the strip sits relative to the rail and the shelf. If the wardrobe backs onto a bathroom or outside wall, read what to check first for a wardrobe against a bathroom or outside wall before wiring is planned.
On cables, the question is where they run and where the power unit sits, so the wardrobe looks clean and the unit can be reached if it ever needs attention. Do not try to answer that yourself: it is the installer's decision and belongs on the drawing. Tell us at the visit which wall the wardrobe sits on and where your sockets are, and we will mark how the lighting is connected on the drawing for you to approve. If the wardrobe is a built-in one with cove or ceiling features, the interior lighting ideas guide shows how the room's light and the wardrobe's light fit together.
A note on scope: we install the internal lighting of wardrobes we build, with our own team, so you do not need to hire an electrician for the lighting in our agreed scope. We do not take standalone lighting or socket jobs. Both of those are limits to keep in mind when you compare quotations. If the plan runs up to the slab, our guide to a floor-to-ceiling wardrobe explains how to measure the ceiling and close the gap at the top.
Häfele Loox5: a premium system that exists
If you want to know what a complete furniture lighting system looks like, Häfele's Loox5 is one we recommend looking at as a premium option. In its May 2020 launch release, Häfele describes narrower LED strips with a stated lifetime of 50,000 hours, profiles for recess and surface mounting in a variety of designs and finishes, and drivers designed for 24/7 continuous operation. That describes Häfele's own system.
It is not something we have confirmed as our supplier, so do not read this as a promise that your wardrobe will use it. If you want a named system, say so at the visit and ask what is actually specified in your quotation, in writing. For the rest of the hardware, our wardrobe hinges guide asks the same question about brands. A rented apartment wardrobe has a different checklist: permission, what can be taken apart and a move-out routine.
What to ask for in the quotation
Lighting is easy to lose in a quotation because it is a small line that depends on many choices. Ask for each of the items below in writing; the general list is our wardrobe quotation checklist, and the pricing guide shows how a quotation is built from the measured wall. For a sliding door that has slipped its rail, see what to do when a wardrobe door comes off its track.
Lighting lines for a wardrobe quotation
Which zones are lit
- Why it matters
- Door side, above the rail, under shelves and drawers cost differently
- A clear answer looks like
- A list of zones on the drawing, with the length of each line
Bare strip or profile, per zone
- Why it matters
- It sets the look and the heat path
- A clear answer looks like
- 'Profile with opal cover' or 'bare strip, hidden', for each zone
Colour, in kelvin
- Why it matters
- Makers use 'warm' and 'neutral' for different numbers
- A clear answer looks like
- One stated kelvin value for the whole wardrobe
Switching
- Why it matters
- Door switch or sensor depends on the door type
- A clear answer looks like
- The switch type for each section, or 'not feasible' in writing
Where the power unit sits
- Why it matters
- It must be reachable and out of sight
- A clear answer looks like
- A position marked on the drawing
Brand and model
- Why it matters
- We have not published ours; a named system must be written down
- A clear answer looks like
- The strip, profile and system named, or 'not specified' in writing
Warranty on the lighting
- Why it matters
- The board warranty does not cover moving hardware or, by itself, lighting
- A clear answer looks like
- The warranty for the lighting in writing
Price
- Why it matters
- Lighting adds to the entry price
- A clear answer looks like
- A separate line, not folded into the wardrobe
Our entry price is from AED 550 per sqm for MDF laminate with hinged doors, installed; lighting is an added option and its price is in the quotation.
What we do about it
At the free measuring visit we measure the wall, show finish samples and talk through where light should go. Then we send a drawing and an itemised price, and nothing is made until you approve them. The lighting zones, whether each is a strip or a profile, the colour and the switching are on that drawing, so you can compare it with the table above before production starts, and matt versus gloss wardrobe doors looks at how those two finishes treat light.
Our team installs the internal lighting of wardrobes we build, and the options we offer are an integrated strip, a shelf or compartment light, a sensor where feasible, and a warm or neutral colour. After the measurements and details are agreed, a 60% advance is paid and production starts once it is received; the remaining payment stage is agreed with you. Our entry price is from AED 550 per sqm of wardrobe front, installed, for MDF laminate with hinged doors; lighting, sliding doors, glass and other options raise it, and the figure for your wall is in the quotation. Time is up to about 10 days, depending on size and design, and the 24-month written workmanship warranty is in the written terms. The wood-based boards carry a 5-year limited warranty, subject to terms; hinges, tracks, runners, rollers, moving hardware and labour are not covered.
Start with the free wardrobe measuring visit to see what to prepare, then book through the consultation form. Our custom wardrobes service lists what we make, the lit glass-front wardrobes page shows lit finished runs, and the built-in wardrobes and walk-in wardrobes pages cover the other types.
More on the surrounding choices: the master bedroom wardrobe design and studio apartment wardrobe guides show lighting in two very different rooms, and small bedroom wardrobe ideas show how a shallow wardrobe changes it. A TV and a wardrobe on one wall are in bedroom wardrobe with a TV unit; a dressing room and a kids' wardrobe need their own light. A corner or L-shaped wardrobe turns the door-side strip into a corner problem.
If you are replacing a tired wardrobe, our wardrobe door replacement and renovate or replace guides explain what can be kept. Board choice for damp rooms is in moisture-resistant wardrobe boards. Prices are in custom closets and wardrobe prices and the wardrobe dimensions guide lists sizes. Choose between hinged and sliding doors with light in mind, and see handleless wardrobes if the door edge is where the light goes. Installation covers the whole UAE: the Sharjah page has the workshop and the Dubai page covers visits there; the warranty and aftercare guide explains the cover. Whether a walk-in wardrobe or a reach-in wall suits the room is a choice that comes before most details, and that guide gives a simple floor test for it. A damp smell inside the wardrobe is a separate question, answered in why a wardrobe smells musty. If a hinged door has begun to catch, fixing a wardrobe door that is sticking or rubbing has the checks.
Lighting is a late decision; the planning order for a whole wardrobe shows which choices come before it.
Common questions
Do I need an aluminium profile for LED strips in a wardrobe?
Not everywhere. A profile gives an even line, protects the strip and, per one maker's guide, acts as a heat sink, so we suggest it where the light is visible. A bare strip can be fine where it is hidden. See our wardrobe lighting ideas.
Where should LED lights go inside a wardrobe?
In four zones: the door-side edge, above the rail, under the shelves and over the drawers. You do not need all four; a small wardrobe is often served by two. Draw them with the rail height. See our wardrobe hanging heights guide.
Should wardrobe lights be warm or neutral?
Warm suits a bedroom and wood or beige finishes; neutral helps when you judge colours such as navy and black. Use one colour for the whole wardrobe, and ask for the kelvin value because makers use the words for different numbers. See our door finishes compared.
Can a wardrobe light switch on by sensor or when the door opens?
Where feasible, yes: a door switch suits a hinged door and a sensor suits open sections, glass fronts, drawers and walk-ins, and glass doors and privacy shows how light inside changes what a glass front reveals. We confirm which works on the drawing. See our sliding door systems guide for the doors that move sideways.
Do LED strips get hot inside a wardrobe?
They give off some heat, which is why one maker's guide says a profile helps carry it away and a recessed one may leave less airflow. Ask for the strip's and profile's datasheet and keep the light away from cloth. See our wardrobe materials and hardware guide.
Do I need an electrician for wardrobe lighting?
Not for the lighting in our agreed scope: our own team installs the internal LED lighting of wardrobes we build. We do not take standalone lighting or socket jobs. See our free measuring visit guide.
What should the quotation say about wardrobe lighting?
Each lit zone, strip or profile for each, the colour in kelvin, the switching, where the power unit sits, the brand or 'not specified', the warranty and a separate price line. See our wardrobe quotation checklist.

Sources & specifications
Manufacturer information applies to the named products and systems. Sources reviewed on 3 November 2026.
- Signlite LED, best aluminium profiles for LED strip lights: profiles as passive heat sinks, clear covers leave hotspots visible, opal covers smooth, surface and recessed profilessignliteled.com(opens in a new tab)
- Häfele America press release, Loox5 LED lighting unveiling (6 May 2020): narrower strips with a stated 50,000-hour lifetime, profiles for recess and surface mounting, drivers for 24/7 operationhafele.com(opens in a new tab)
- LEDVANCE, 2700K vs 3000K: 2700K a warm soft glow that emphasises wood and beige, 3000K a balanced warm whiteledvance.com(opens in a new tab)
- LEDVANCE, correlated colour temperature guide: the lower the Kelvin value, the more red the light; neutral white 3000K to 3500Kledvance.com(opens in a new tab)
- IKEA, ÖVERSIDAN LED wardrobe lighting strip with sensor, customised for PAX wardrobes, fixed at the top or under a shelfikea.com(opens in a new tab)
Want this planned for your home?
Consultation and measurement are free. Tell us the rooms, location and what you need; we arrange a sample visit and define the measured quotation.