Media Walls · 23 min read · 19 October 2026
Porcelain or sintered-stone TV wall in the UAE: slab sizes, seams, cut-outs and fixing
A large porcelain or sintered-stone slab for a TV wall in the UAE: what the words mean, standard slab sizes, where seams fall, thickness on a board, cut-outs, edges and getting a long slab in.

By Ali Haider Basra, Founder, Al Tareeq Decor · Contact our workshop
Key takeaways
- Porcelain is defined by water absorption below 0.5%; 'sintered stone' is a trade term, so buy the data sheet, not the word.
- The wall is drawn around the slab: with 120 cm wide slabs, a 50-inch screen sits between seams but a 65-inch screen has a seam behind it.
- A thin slab is carried by a thick board and a flat, solid wall; ask for weight, the maker's fixing method and the substrate's flatness in writing.
- Niches, sockets and brackets need margins from edges and seams, and a 2.8 m slab must be checked against your lift and corridor.
- Keep offcuts and the batch number: a damaged slab is replaced, not refinished. Media walls start from AED 3,500 per project, with marble-effect panels priced in the quotation.
On this page
- Key takeaways
- Three words for one look: porcelain, sintered stone and marble
- What the words mean, and what they do not
- Slab sizes: the wall is drawn around the slab
- Seams are a design decision, not an accident
- Thin slab, thick board: what carries what
- Cutting niches, sockets and brackets in a hard thin slab
- Edges, corners and where the slab ends
- Getting a 2.8 metre slab into the building
- Fixing to the wall: what the structure must do
- Surface, cleaning and everyday wear
- Judging a slab sample in your own room
- Returns, corners and slabs that turn a corner
- If a slab cracks: repair, replacement and offcuts
- Porcelain slab, stone-print laminate or real marble?
- Three routes to a marble look, on the questions that matter here
- What the price does, in direction only
- Questions to put to any supplier of slabs
- Our slab walls, and the WhatsApp message to send
- Common questions
Three words for one look: porcelain, sintered stone and marble
Ask for a marble-look TV wall in the UAE and you will hear three materials named almost interchangeably: porcelain, sintered stone and marble. They are not the same, and the differences decide how the wall is built, how it is cut, how it arrives, what it costs and what happens if it is damaged. Our earlier guides cover marble in depth: marble TV walls explains weight, joints and mounting a TV on stone, and marble TV wall options compares the routes to the look.
This guide answers a narrower question that has become common: you have decided on a large thin porcelain or sintered slab, and you want to know how it behaves as a wall. How big are the slabs? Where do the seams fall? How thin can they be and what carries them? How are niches and sockets cut? Can a 2.8 metre slab even get into your building? And when is a slab the wrong choice and a marble-effect laminate the better one?
We keep the claims tight. Where a figure comes from a maker or a reference, we say which. Where it is our workshop practice, we say that. Where a matter is the supplier's to answer, such as weight per square metre or breaking strength, we tell you to ask for the data sheet, because those numbers differ by product.
What the words mean, and what they do not
Porcelain tile has a definition that is worth knowing. Wikipedia describes porcelain tiles as dense, vitrified ceramic tiles with a water absorption below 0.5 per cent, and cites ISO 13006 and BS EN 14411 as the modern standards. The process is dust-pressing: raw materials are wet-milled, the slurry is spray-dried into granules and pressed, and the tiles are fired in a roller kiln at peak temperatures around 1,200 °C. The very low water absorption is what makes porcelain suitable where moisture is a concern, and the large slabs on the market today are made on the same principle, only bigger and thinner.
'Sintered stone' is a trade term for large ultra-compact slabs. Neolith's home page calls its products sintered stone surfaces, while Laminam describes ceramic slabs that challenge the traditional uses of the material by creating large, minimum-thickness surfaces, and Marca Corona and Optimum Surfaces sell the same kind of product as large porcelain stoneware slabs. The vocabulary overlaps because the products are close cousins: mineral-based slabs, pressed and fired, made very large and very thin.
So we do not tell you to buy a word. We tell you to buy a data sheet. Ask the supplier for the exact product's thickness, sizes, water absorption, breaking strength, surface finish (polished, matt or textured), edge type and recommended fixing method. Two slabs described as 'sintered stone' can differ in all of those. The drawing below shows the shared steps, and the 0.5 per cent line that defines porcelain. Anything the supplier claims beyond that should be on its paper.
- 1. Clay and minerals are milled, spray-dried and pressed
- 2. The pressed slab is fired in a roller kiln at a peak of about 1,200 °C
- 3. Porcelain is defined by water absorption below 0.5%
- 4. Formats reach 1,600 × 3,200 mm, and specialist makers go slightly larger
Slab sizes: the wall is drawn around the slab
Marble-look panels in a media wall are drawn around the slab, not the other way round. Marca Corona lists two main sizes for its large porcelain stoneware slabs: 120 × 278 cm and 120 × 120 cm, in thicknesses of 6 mm and 9 mm respectively, and says the 120 × 278 cm slab in 6 mm is the one it most recommends for wall tiling. Optimum Surfaces shows slabs of 1840 × 3300 mm, with a 20 mm-thick version as well. Wikipedia notes that modern porcelain slabs can reach 1,600 × 3,200 mm, with specialist makers going larger. These are the makers' sizes; the range you are offered depends on your supplier.
A 278 cm slab is nearly full-height for a typical living room, which is why a full-height slab behind a TV is the picture people have in mind. It also means the slab is long, and long things are awkward to carry, as a later section explains. A 120 cm width is narrower than the screen of a large TV, which creates the question that decides the look of the wall: where do the seams fall?
Worked example. Take a wall 360 cm wide and 270 cm high, and a 16:9 TV. A 50-inch screen is about 111 cm wide (the diagonal times 0.8716), so centred on the wall it sits inside the middle slab, and the two seams at 120 cm and 240 cm both fall beside the screen. A 65-inch screen is about 144 cm wide, wider than a slab, so a seam passes behind the screen whichever way you lay it out. On a wall 400 cm wide, three slabs leave a 40 cm strip at one end, and the seam at 240 cm runs behind the 65-inch screen. None of that is wrong; it is simply what the numbers do, and the drawing should show it before anything is ordered.
- 1. 360 cm wall, 50-inch TV: two seams, both beside the screen
- 2. 400 cm wall, 65-inch TV: a seam runs behind the screen, and a 40 cm strip ends the wall
- 3. A 278 cm slab is cut to the wall height; the drawing fixes the real seams
Seams are a design decision, not an accident
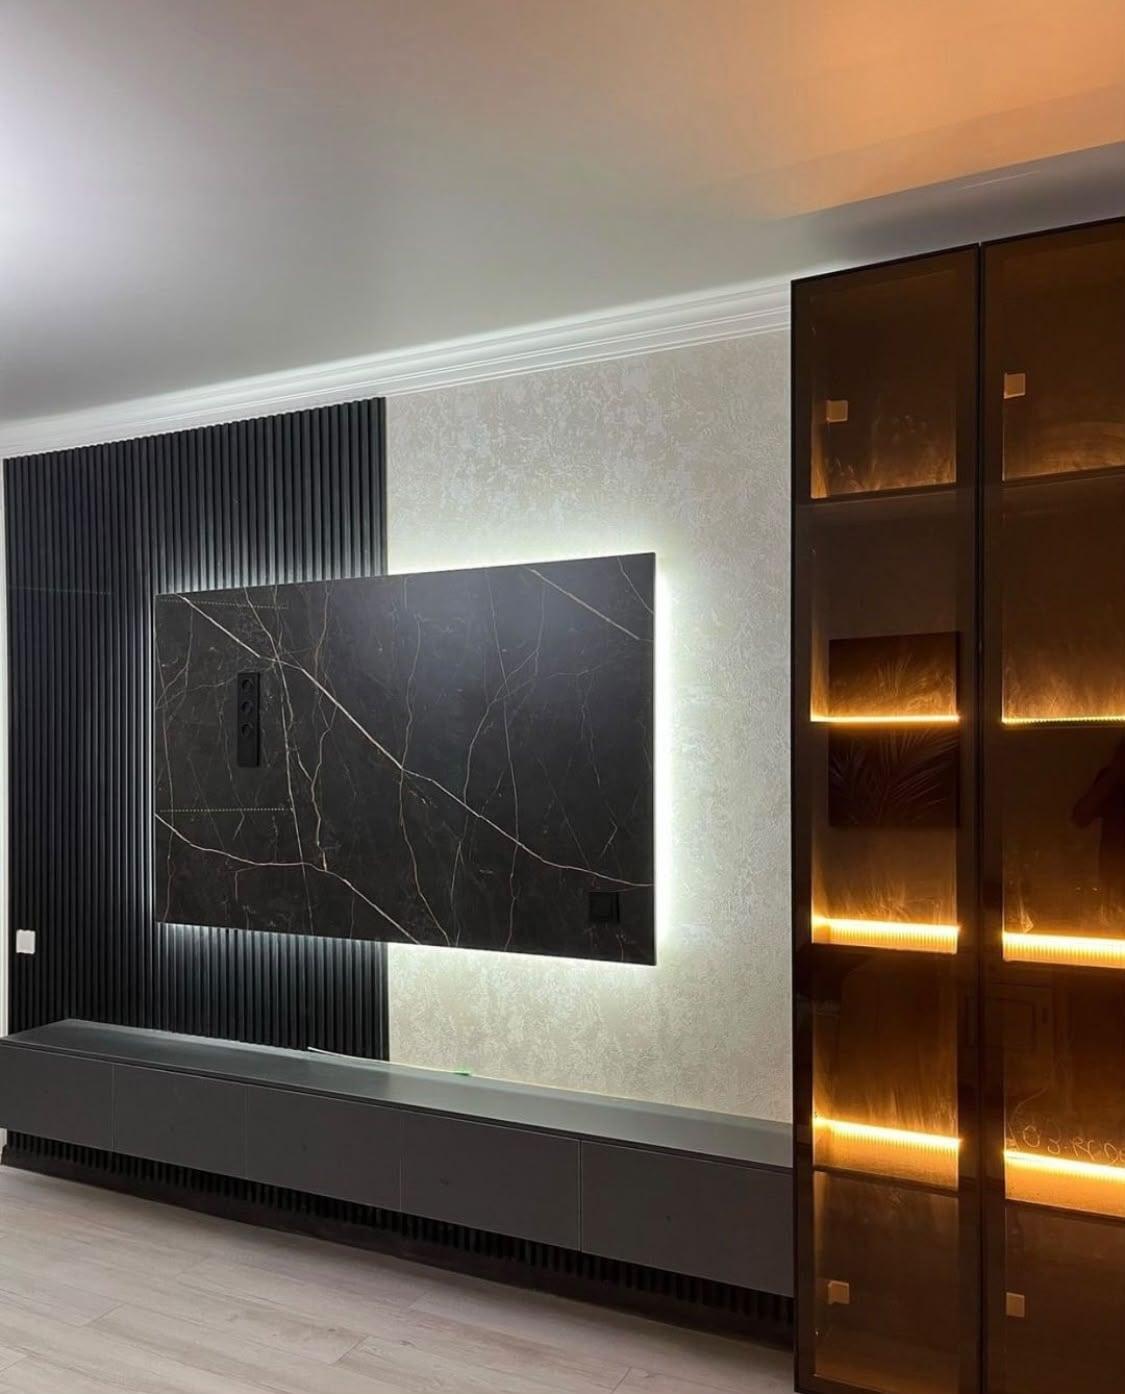
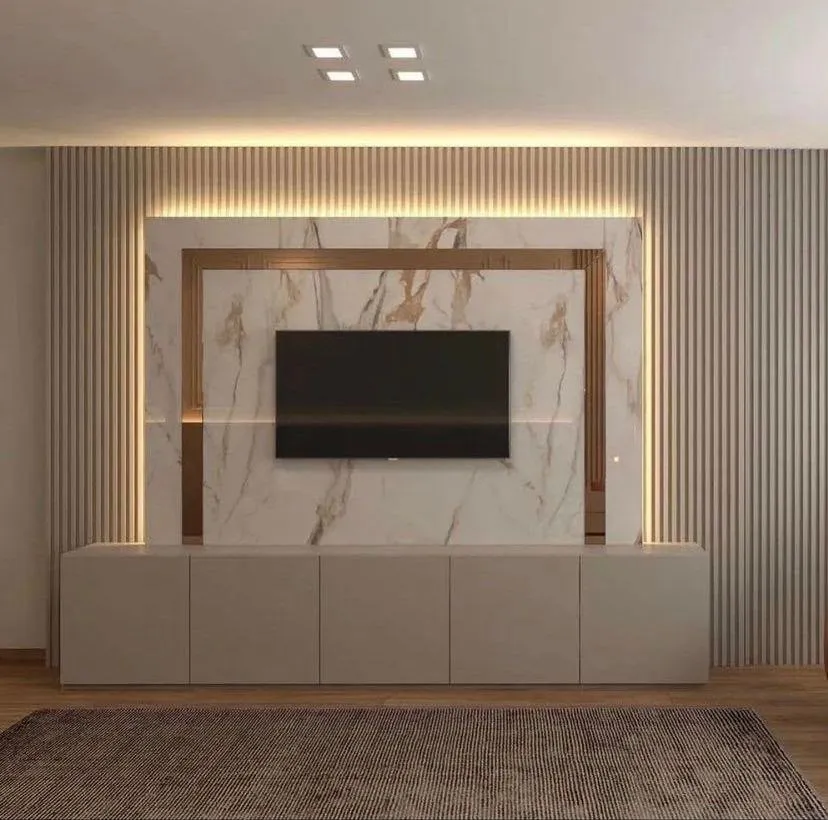
A seam can be hidden, stressed or celebrated. Hiding it means placing it where the eye does not land, such as behind the screen or at an inside corner, and closing it with a very fine joint. Celebrating it means putting a trim along it: a slim metal profile, a lit channel or a strip of a contrasting stone-look, as in our own walls where a thin gold line follows a joint between two large marble-look sheets. The hero photograph of this article shows that approach.
What you should avoid is a seam that lands at an awkward place by default: through the middle of a niche, across a socket, one centimetre from a screen edge, or in line with a lamp. These are the spots where the eye catches a line that was not meant to be there. A good drawing places seams on purpose, and a good workshop will move them if the room needs it.
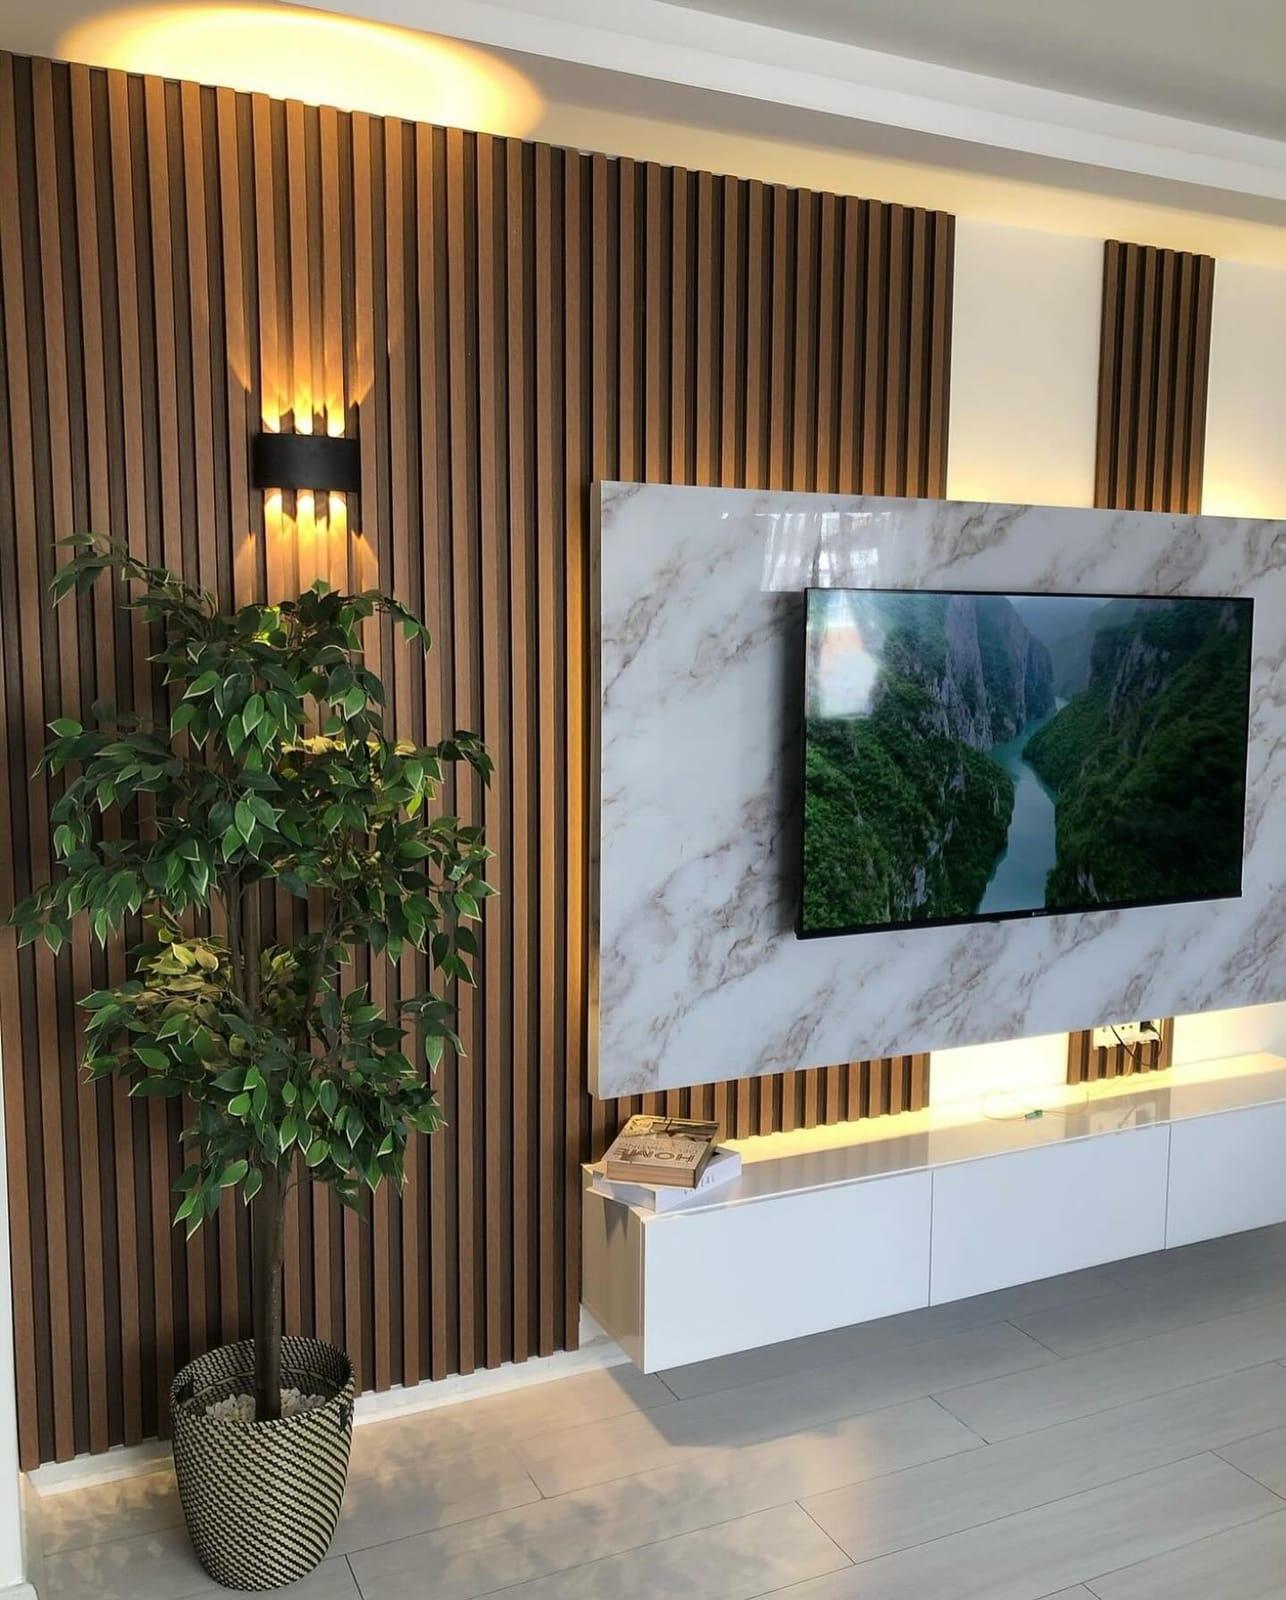
Veining adds a second layer. If the slab has a pattern that runs diagonally, as many marble-look slabs do, adjacent slabs can be arranged so the veins continue across the joint (a continuation or book-matched layout) or so they do not. Ask the supplier whether the slabs are produced in a numbered sequence, how you can see them side by side, and which arrangement the quotation assumes. Our guide on media wall colours and finishes covers how colour and pattern read across a room; the point here is that layout is something you approve on paper.
Thin slab, thick board: what carries what
The slab is very thin and the wall behind it is not. The drawing below puts three slab thicknesses (6 mm, 9 mm and 20 mm, the sizes quoted by the makers above) on a backing board of 18 mm, the thickness of the standard structural boards we use. Note how little of the wall is actually the stone-look surface: most of the build is board, frame and fixing. That is why a slab wall behaves like a board wall with a hard face, and why the board and its fixing matter as much as the slab.
Porcelain is denser and heavier than ordinary ceramic, and Wikipedia notes that this means a stronger adhesive is needed to hold the weight on walls. We would add the obvious corollary: the structure behind the slab must be flat, solid and sealed, because a slab cannot bridge a hollow or bend with a movement. We therefore ask three things of every supplier and write the answers into the drawing: the weight per square metre of the exact product, the adhesive or fixing system the maker recommends for a vertical wall, and the flatness the substrate must achieve.
Different thicknesses behave differently. A 6 mm slab is light and flexible in handling, and thin enough that it relies on the board behind it for strength. A 9 mm slab is stiffer. A 20 mm slab, like the optional version Optimum Surfaces mentions, is a different animal: heavier, stronger in itself, and more often used for tops and floors than for a wall behind a TV. Choosing a thickness is a trade-off between weight, handling and what the supplier recommends for walls. Ask for the maker's recommendation in writing; the sources quoted here say 6 mm for wall tiling, and that is the maker's statement, not ours.
- 1. 6 mm slab, 120 × 278 cm: the size one maker most recommends for wall tiling
- 2. 9 mm slab, 120 × 120 cm: the maker's other standard size
- 3. 20 mm slab, up to 1840 × 3300 mm: an option in one maker's range
Cutting niches, sockets and brackets in a hard thin slab
A TV wall is full of holes. There is a lit niche under the screen, there are sockets and a data point, and there are the fixings for a TV bracket and a floating shelf. In a board these are routine. In a hard, thin slab they are the delicate part of the job, because the cut must be accurate and the material around it must stay sound.
The drawing sets out the questions we put to a slab cutter. How close to a slab's edge can an opening sit before it leaves too thin a strip? Are the inner corners of a niche rounded or sharp, and what does the cutter recommend? Can a socket sit near a seam? How is a bracket fixed so that the load goes through to the frame behind and not into the slab's face? Where an opening comes close to an edge, the tight strip left beside it is the weakest part of the slab. These are questions for the fabricator, not rules from a standard, and the right answer depends on the product.
The practical result is a wall drawn so that openings sit comfortably inside a slab with a margin, away from the seams. If the TV, the niche and the sockets all land in one slab, that slab is cut once and checked. If they straddle a seam, there are two cut edges, a joint to align and a higher risk of a chip. Plan the electrical points with the slab layout, not after it; our sockets guide explains how to place them, and the cable guide explains the routes.
- 1. A niche tight to the edge leaves a thin strip: ask the cutter whether it is safe
- 2. A niche with a margin leaves more slab round the cut
- 3. A socket cut-out belongs away from the seam
- 4. Ask where the bracket fixing reaches the frame behind the slab
Edges, corners and where the slab ends
Every slab has a visible edge somewhere: at the side of the wall, above a console, at the return of a niche or at a corner. A bare cut edge of a through-body porcelain slab can look different from the face. Some slabs are printed on the surface only, so the edge shows the body colour; others carry the pattern through. Ask to see a cut edge of the exact product, because it is much cheaper to learn this on a sample than on the wall.
There are three usual ways to finish an edge. The slab can end against a trim, usually a slim metal or stone-look profile, which hides the edge completely. It can be mitred, with two pieces cut at 45 degrees so that the pattern appears to wrap around the corner, which is a skilled and costly detail. Or it can end against another material, such as fluted wood slats or a painted wall, with a shadow gap or a small reveal between them. Each has a different cost and a different risk of chipping, and the choice should be on the drawing.
Where the slab meets the floor and the ceiling, think about movement and cleaning. A thin gap or a trim at the base keeps mop water away from the lowest edge. At the top, the junction with the ceiling is a joint where two building elements meet, and our guide on where a media wall meets the ceiling explains the choices. Where the slab meets fluted slats, the fluted wall panel guide explains the pattern and the junction.
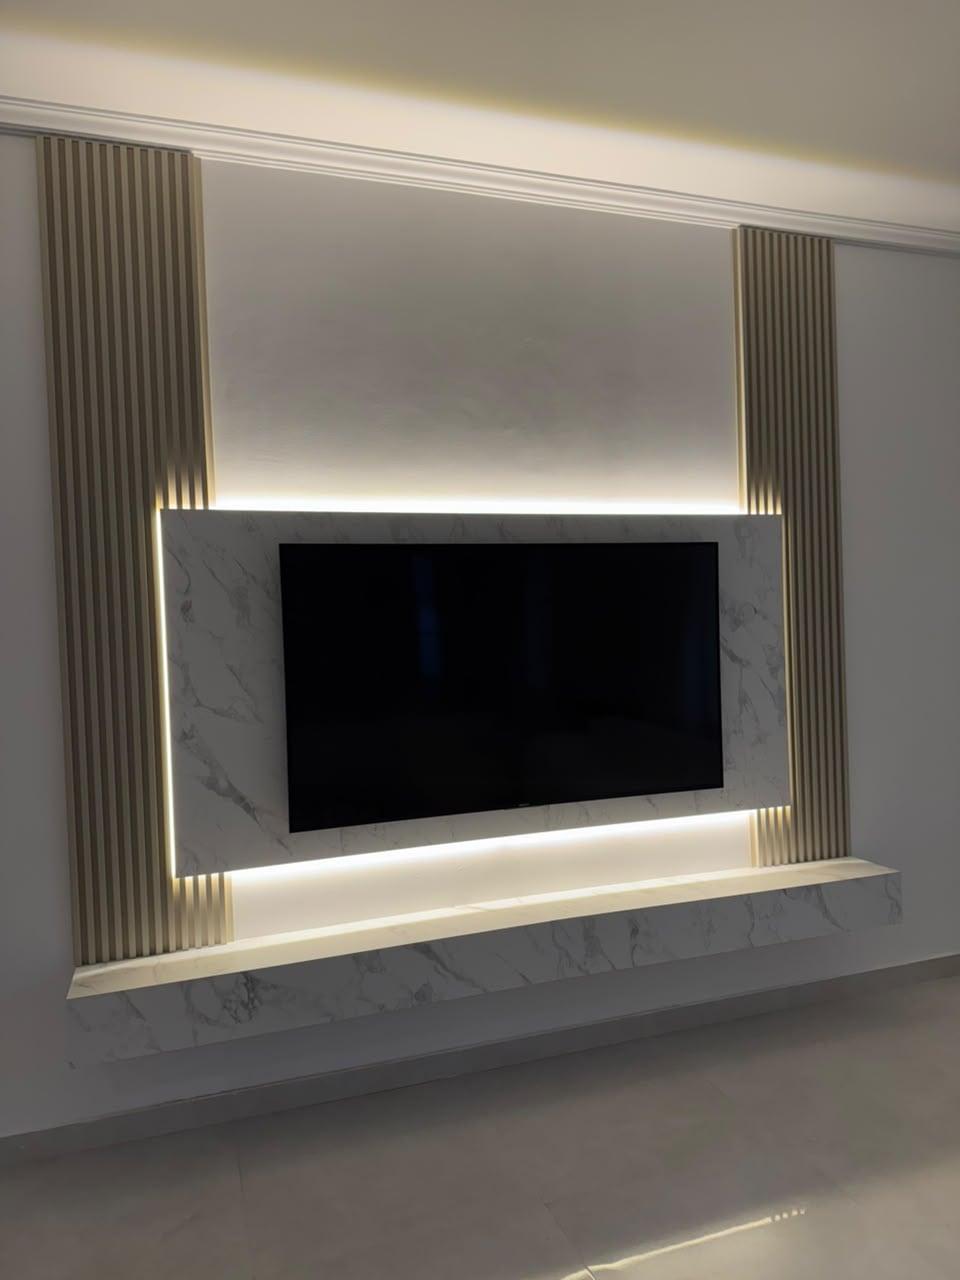
Getting a 2.8 metre slab into the building
A slab that is 278 cm long and 120 cm wide is a large object, and it must travel from the workshop or the supplier's yard, through a lift or up a stairwell, along a corridor and into a room without being dropped, chipped or bent. This is a logistics question as much as a design one, and it is the reason some apartments in towers choose smaller slabs or a laminate-faced board.
Before you commit, check the building. How tall and how wide is the lift cabin, and how wide is its door? Is there a service lift, and does it have a booking? Does the route have turns tight enough that a slab cannot be carried through? Will the slab travel flat or on its edge, and who carries it? Ask the supplier how the slab is packed and moved, and ask building management in writing about the access route and the lift rules. Our guide to apartment delivery and access for a media wall lists the questions, and the same guide applies to any large panel.
If a full-length slab will not reach the room, the options are a shorter slab cut in two along a planned seam, a stacked arrangement, or a different face, such as a marble-effect laminate on board, which comes as boards that are much easier to handle. These are not failures; they are the normal result of fitting a large idea into a real building, and a good drawing shows them early.
Fixing to the wall: what the structure must do
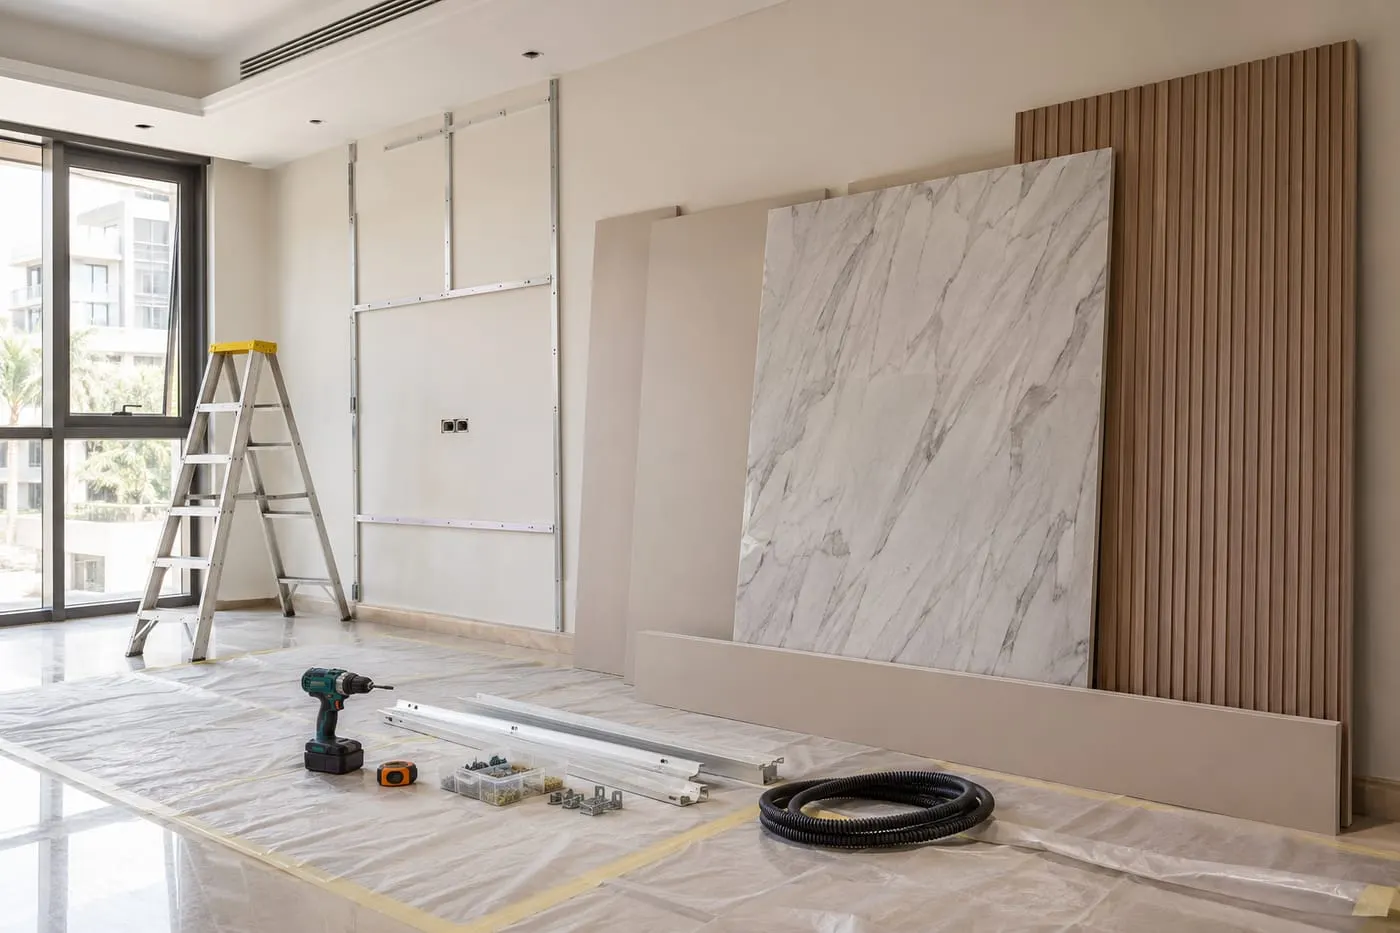
Behind a slab sits a structure, and its job is to be flat, strong and stable. A slab wall is normally a board on a frame fixed to the building wall, with the slab bonded to the board; ask us, and anyone else who quotes, to confirm the exact build in the quotation. The wall behind decides the fixings: block, concrete and gypsum all take loads differently, a point explained in block versus gypsum walls behind a TV. A hollow or soft wall may need local reinforcement before it can carry a heavy slab and a heavy screen.
Ask the supplier and the workshop for three things in writing: the weight of the slab per square metre and the total weight on the wall; the adhesive or fixing system, and whether it relies on bonding alone or adds mechanical support; and what the substrate must do, such as flatness and dryness. These details belong on the drawing. Everything about the adhesive is the supplier's and workshop's to specify, so we do not name one here; a stronger adhesive for walls is the only general statement the sources support.
Because the slab is rigid, any movement behind it can show up as a crack at a seam or a corner. That is why the structure matters: a wall that is solid and a board that is sealed against moisture give the slab a stable base. The same sealing logic as for any board applies, explained in humidity and MDF in a media wall. And in a very humid house, the beachfront plywood guide shows how a board is protected from salt air.
Surface, cleaning and everyday wear
Porcelain's low water absorption is the quality that makes it easy to live with. Marca Corona notes that porcelain stoneware is less porous than marble or stone, and Optimum Surfaces describes its slabs as stain proof, not absorbing liquids, and withstanding temperature changes, impacts, abrasions and UV rays, recommending a damp microfibre cloth with hot water and a neutral detergent for ordinary cleaning. Those are the makers' claims about their products, and we would still apply the same cloth and neutral detergent as a sensible default, then follow the care sheet of the product you choose.
Polished and matt surfaces behave differently. A polished slab reflects the room and the screen, shows fingerprints and streaks, and can add glare; a matt or honed slab absorbs light and hides marks. Our marble guide goes into glare and finish in detail, and the finish guide covers the same choice for laminate and lacquer. For a TV wall, many people prefer matt or lightly satin for the area right behind the screen and a polished finish on a feature strip.
Heat is covered in the marble and electric fireplace guides, and the point to add here is simply that a surface that tolerates temperature change does not remove the need for airflow behind a screen or a heater. A wall with a fireplace needs the clearances the fireplace maker gives; see electric fireplaces in a media wall. The slab is a surface, not a ventilation plan.
Judging a slab sample in your own room
A sample of a slab is a small square, and the wall is a large panel, so reading one from the other takes care. Ask for the largest sample the supplier can provide and lean it against the wall where the slab will go. Look at it from the sofa, not from a hand's distance, because the veining that looks bold at arm's length can look faint across a room, and a subtle pattern can vanish altogether.
Check three things. First, the scale of the pattern: does one slab show enough of the vein to read as a stone, or only a patch of it? Second, the sheen: a polished sample under a window shows reflections that will move through the day, so look in the morning, at midday and at night under the wall's LED. Third, the edge: turn the sample on its side and see whether the pattern and the colour go through the body.
If the supplier shows photographs of finished walls, ask which slab number each came from and whether the slab shown is the one you would receive. Large slabs can vary from one production run to another, and a single beautiful photograph is not a promise about yours. Our finish sample approval guide explains what to record and sign when a sample is approved, and the same steps apply to a slab, with the batch number added.
Returns, corners and slabs that turn a corner
Many walls are not flat. A TV wall may turn a corner into a side wall, return into a niche, wrap a column or step out around a chimney breast. A thin, rigid slab does not bend, so every turn becomes an edge, and each edge becomes a decision: trim, mitre or reveal, as covered above. The more turns the wall has, the more cut edges, and the more the cost and the risk of a chip.
A common and sensible solution is to keep the slab for the flat, main face behind the screen and use another material for the returns and the sides, such as slats, laminate or a painted board. This keeps the slab count low, concentrates the stone-look effect where the eye lands and avoids a mitred corner in a place where it is hard to protect. If you do want the slab to wrap a corner, ask for the mitre to be drawn and for a sample of the corner, because a corner is where a stone-look slab is most obviously a thin skin.
Where a niche is cut into the slab, its inside faces need covering as well. Options include a returned slab, a stone-look strip, a metal liner or another board. Each leaves a visible edge, so the drawing should say which. A lit niche with a bare cut edge on the slab behind it will show the edge in the light, which is a common surprise when the LED goes on.
If a slab cracks: repair, replacement and offcuts
A slab does not wear in the way a laminate does, but it can chip at an edge or crack if it is struck or if the wall behind moves. A chip at an edge can sometimes be repaired with a colour-matched filler; a crack across a face usually means replacing the piece. That is the key difference from a lacquered or veneered panel, which can be refinished: a slab is replaced, and the replacement must match.
Matching is the hard part. Large porcelain slabs are made in batches, and shade and pattern can differ a little between them. So ask three questions up front. Can offcuts from the same batch be kept for repairs, and who stores them? Is a spare slab or a spare piece available, and at what cost? And what is the supplier's policy on the batch number, so that a later order is as close as possible to the first? We would write the batch number into the handover pack, as the handover checklist suggests for finishes in general.
Do not underestimate the value of a spare. A wall that has been installed for years and needs one slab replaced is a wall whose slab may no longer be made. A kept offcut is the cheapest insurance in the whole job.
Porcelain slab, stone-print laminate or real marble?
The table lines up the three routes on the questions this guide has raised. Real marble has its own guides; the point of the table is to show where a slab fits between marble and a stone-print laminate on board, on the questions that decide a wall: seams, thickness, openings, repair, shade and handling.
Three routes to a marble look, on the questions that matter here
Seams
- Porcelain or sintered slab
- Few, set by the slab size
- Stone-print laminate on board
- More, set by the board size
- Real marble
- Set by the slab and the pattern
Thickness
- Porcelain or sintered slab
- Very thin, carried by a board
- Stone-print laminate on board
- Thin laminate on a board
- Real marble
- Thicker, heavier
Openings
- Porcelain or sintered slab
- Delicate: margins and cutter advice
- Stone-print laminate on board
- Routine, like any board
- Real marble
- Delicate and costly
Damage
- Porcelain or sintered slab
- Replace the piece; keep offcuts
- Stone-print laminate on board
- Replace the panel; keep the decor code
- Real marble
- Polish, fill or replace
Shade and pattern
- Porcelain or sintered slab
- Batch to batch, check the slabs
- Stone-print laminate on board
- Printed, consistent between batches
- Real marble
- Natural variation
Moving it in
- Porcelain or sintered slab
- Long slabs are awkward
- Stone-print laminate on board
- Boards are easy
- Real marble
- Heavy and awkward
Water absorption
- Porcelain or sintered slab
- Below 0.5% for porcelain (standard)
- Stone-print laminate on board
- Depends on the sealed board
- Real marble
- Needs a sealing routine
Our workshop reasoning plus the standard's absorption limit; marble specifics are in the marble guides. Ask for data sheets for every product.
What the price does, in direction only
Media walls start from AED 3,500 per project for a compact panel and floating console in standard laminate. Marble-effect panels, including porcelain, are listed among the things that set the final figure, with the wall size, the finish, the lighting and any electric fireplace. That is as far as we go without seeing your wall, because a slab wall's cost is driven by the slab itself, the cutting, the edges, the transport and the fixing, and those differ by product and by building.
The best way to control the budget is to make the slab do one job: a single large feature panel behind the TV, with the rest of the wall in a more modest material, such as fluted slats or laminate. That keeps the slab count and the cut-outs low, and it concentrates the effect where the eye lands. Our guides on what a media wall costs and what it is made of explain the structure of a quotation, and the materials tool gives a quick comparison.
We do not publish per-metre prices, because they would mislead. Ask for a drawing and an itemised price, with the slab named line by line: its maker, product, thickness, size, finish and the number of pieces.
Questions to put to any supplier of slabs
Take this list to the supplier and to us. Every answer should be written, and every number should come from a data sheet.
- Exact product name, maker, thickness, sizes and surface finish.
- Water absorption and the standard it is tested to.
- Weight per square metre and the maker's recommended fixing for a vertical wall.
- How close to an edge or a seam may an opening sit, and how are openings cut?
- How is the edge finished: trim, mitre or reveal, and is the body colour the same as the face?
- How will the slab travel, and what are the lift and corridor limits of the building?
- Is the batch number recorded, and can offcuts or a spare be kept for later repairs?
- Is the layout sequence-matched, and can you see the slabs side by side before they are cut?
- What care sheet comes with the product, and what is its recommended cleaning routine?
Our slab walls, and the WhatsApp message to send
We offer porcelain and Calacatta marble-effect panels, in high-gloss and matt, as part of our media walls. We draw the wall around the slab size, place the seams and the openings on purpose, build the frame and board in our Sharjah workshop and fit the work with our own team. The measuring visit is free, the drawing and itemised price are approved before production, and after measurements and details are agreed, a 60% advance is paid and production starts once it is received, with the remaining stage agreed with you. A wall takes up to about 10 days depending on size and design. The 5-year limited warranty covers the wood-based boards only; hinges, runners, labour and misuse are excluded, and our 24-month workmanship warranty is separate. We have been in the trade for ten years under founder Ali Haider Basra.
To start, send us a WhatsApp message with a photo of the wall, the wall's width and height if you have them, the TV size, a photo of the lift and the corridor to the room, and any marble-look photograph you like. Our guide to what to send for a media wall consultation lists the photos that help most, and the media walls page shows the range. If you are choosing between finishes first, read veneer, lacquer and HPL.
Common questions
What is the difference between porcelain and sintered stone?
Porcelain is defined by water absorption below 0.5%; sintered stone is a trade term for large pressed and fired slabs whose figures differ by product, so ask for the data sheet. Marble TV wall options.
How big are porcelain slabs for a TV wall?
One maker lists 120 × 278 cm in 6 mm and 120 × 120 cm in 9 mm, recommending the 6 mm slab for walls; another shows 1840 × 3300 mm. Marble TV walls.
Will there be a seam behind my TV?
With 120 cm slabs, a 50-inch screen (about 111 cm wide) can sit between seams, while a 65-inch screen (about 144 cm) cannot; the drawing shows where the seams fall. TV size and viewing distance.
Can a slab be cut for niches and sockets?
Yes, but it is the delicate part: openings need margins from edges and seams, and the cutter's advice should be on the drawing. Media wall sockets and power.
Can a 2.8 m slab fit in my lift?
Check the cabin and door size and the route with building management in writing; if it will not fit, a shorter slab or a board-based face is the alternative. Apartment delivery and access.
What if a slab cracks later?
A cracked slab is replaced, not refinished, so keep offcuts and the batch number for matching. The handover checklist.
What should I send on WhatsApp for a slab wall?
A photo of the wall, its width and height, the TV size, a photo of the lift and corridor and a reference image. What to send for a consultation.

Sources & specifications
Manufacturer information applies to the named products and systems. Sources reviewed on 10 November 2026.
- Wikipedia: Porcelain tile (water absorption below 0.5%, ISO 13006 and BS EN 14411, roller kiln about 1,200 °C, heavier so needs a stronger adhesive on walls, sizes to 1,600 × 3,200 mm)en.wikipedia.org(opens in a new tab)
- Marca Corona: Large porcelain stoneware slabs (120 × 278 cm at 6 mm and 120 × 120 cm at 9 mm; 6 mm most recommended for wall tiling)marcacorona.it(opens in a new tab)
- Optimum Surfaces: Large porcelain slabs (1840 × 3300 mm, 20 mm version, stain proof, cleaning with a damp microfibre cloth and neutral detergent)optimumsurfaces.com(opens in a new tab)
- Laminam: Ceramic surfaces and ceramic slabs (large size, minimum thickness; wall cladding among the uses)laminam.com(opens in a new tab)
Want this planned for your home?
Consultation and measurement are free. Tell us the rooms, location and what you need; we arrange a sample visit and define the measured quotation.