Wardrobes · 17 min read · 15 August 2026
A wardrobe around a beam, column or AC bulkhead: how it is fitted
A beam, a column or an AC bulkhead takes height or width from a wardrobe wall. How to measure at several points, the five ways round an obstacle, AC grilles and ducts kept reachable, doors, lighting at the joint, fixings agreed on site, and a decision table.

By Ali Haider Basra, Founder, Al Tareeq Decor · Contact our workshop
Key takeaways
- Measure at several points and never assume the wall is square: the lowest reading under a beam or bulkhead and the narrowest width beside a column decide the body.
- Five planning options cover most walls: build around with filler panels, box the beam in as a top box, step the wardrobe, use the column as a divider, or split the doors at the obstacle. Our drawing's wall and sizes are invented examples.
- AC grilles, ducts and access panels stay reachable: tell us at the measuring visit. We do not cut or move services, and anything structural is for the building and its trades.
- We make no structural claims and no 'safe to fix' statements. Fixings depend on the wall and are agreed on site.
- We build custom wardrobes, adjusting dimensions and compartments, and agree feasibility on the drawing before production. Our entry price is from AED 550 per sqm.
On this page
- Key takeaways
- A wardrobe around a beam, column or bulkhead: the short answer
- Four things an obstacle can take from a wardrobe
- Measure at several points: never assume the wall is square
- What to read, by obstacle (readings are examples only)
- The five ways round an obstacle
- A ceiling beam: build under it, box it in, or step round it
- A column: a divider, a filler, or a bay either side
- An AC bulkhead or a drop ceiling
- AC ducts and grilles: leave access and airflow
- Split doors and top doors at an obstacle
- Lighting and the joint at the top
- Fixings: agreed on site, not assumed
- A decision table, obstacle by obstacle
- Which answer usually fits which obstacle (illustrative)
- What we do about an obstacle on your wall
- Common questions
A wardrobe around a beam, column or bulkhead: the short answer
A beam, a column and a dropped ceiling over the air conditioning all do the same thing to a wardrobe: they take away part of the height or the width that the rest of the wall still has. The answer is almost never to give up the wall. It is to measure the obstacle properly, build the wardrobe to the tightest reading, and decide for each obstacle whether to build around it, box it in, step the wardrobe, use it as a divider or split the doors at it.
Our work here is custom: we adjust the dimensions and compartments to the wall, and we agree what is feasible with you on the drawing before anything is produced. This page is the planning side of that conversation. It is not engineering advice, and it says nothing about what a beam or a column carries: that is a question for the building and its engineers, not for a wardrobe maker, and we do not answer it.
The sources we opened for this page, listed under the article, give general advice on measuring and on closing gaps to uneven walls. None of them discusses a beam, a column or a bulkhead, so the options below are our own planning reading of that advice, and we label them that way. If your obstacle is a plain gap at the top of a clean ceiling, the floor-to-ceiling wardrobe guide is the better starting point.
Four things an obstacle can take from a wardrobe
Ceiling beam
- What it takes
- Height, over part of the width
- The first question to ask
- How low does it drop, and across how much of the wall?
Column
- What it takes
- Width, over the whole height
- The first question to ask
- How far does it stand out, and on which side of the wall?
AC bulkhead or drop ceiling
- What it takes
- Height, and sometimes the way to a grille
- The first question to ask
- Where is the grille or the duct access, and what must stay reachable?
Any of them
- What it takes
- A straight line to build to
- The first question to ask
- Is the wall square at all, at the points we measured?
Our own planning summary. The wall in front of you is read on site and settled on the drawing.
Measure at several points: never assume the wall is square
Start with the habit every source we opened shares: one reading is not enough. Online Bedrooms, a UK retailer of fitted wardrobes, tells customers to measure the width of a space at 3 different heights and the height in 3 different places, because "many properties and rooms aren't perfectly straight". FCI London, a UK maker, advises taking ceiling measurements from the centre and both ends, and adds that if there are discrepancies, modifications will need to be made. Both are advice for their own products and for ordinary walls; they set no rule for a beam, but they show how a careful measurer starts.
Around an obstacle the readings multiply. For a beam we read the height under it at the front edge, in the middle and at the far end, because the underside can differ along its length, and we read how far it stands out from the wall. For a column we read its width and its projection at three heights, and its distance from the next wall or corner. For a bulkhead we read the lowest underside, how far it runs along the wall, and how far it comes out into the room. Our wardrobe measuring visit guide shows the whole visit; this section is only what changes when something is in the way.
Which reading governs depends on the job. Online Bedrooms notes the tallest height for the filler on its alcove method, since the filler closes the gap upward. Under a beam or a bulkhead the box has to pass the lowest point, so the lowest reading decides the height of whatever sits there, and anything taller has to start where the ceiling is clear. Width works the same way: the box has to pass the narrowest point. If the wall leans, Stegbar, an Australian door maker, says scribing is recommended once a wall is more than 3 mm out of plumb; that is advice for its own panels, but it shows how small the margin is.
Do not forget what is already on the wall. FCI London lists skirting boards, coving, power points and any other protrusions as things to measure, and a column or a beam often has its own: a socket low on a column face, a light switch beside a boxed pipe. The alcove wardrobe guide treats the same checks for a recess, and its ceiling and plumb section works for an obstacle too.
What to read, by obstacle (readings are examples only)
Beam
- Readings to take
- Height under it at three points; how far it stands out; where it starts and stops along the wall
- Example of how they are used
- Lowest reading 2.20 m: whatever sits under the beam is built to that, and a taller section starts beyond it
Column
- Readings to take
- Width and projection at three heights; distance to the next wall
- Example of how they are used
- A column 40 cm wide and 25 cm out leaves a bay 80 cm wide to its left in this example
Bulkhead
- Readings to take
- Lowest underside; length along the wall; how far it comes out
- Example of how they are used
- A bulkhead 60 cm out is a step the doors must not swing into
All three
- Readings to take
- Level and plumb checks; sockets, switches, skirting on the obstacle
- Example of how they are used
- The narrowest and lowest readings decide the body; fillers take the rest
The figures are invented to show the arithmetic. Your readings are taken on site and written on the drawing.
The five ways round an obstacle
There are five ways a custom wardrobe answers an obstacle, and most walls use two of them. They are planning options, not a menu of products, and which one suits depends on the readings above and on what you want the wall to look like. The drawing below shows all five on one invented wall, arriving in the order we usually think about them. The wall, the drops and the widths are examples, and the dashed outlines are where the option applies.
One thing is common to all five. A built-in is made to the wall in front of it, so the line it follows, a stepped top, a box round a beam, a filler against a column, is drawn on your drawing before it is cut. The readings above are what the line is drawn from, and the quotation says how many boxes, fillers and doors the line creates, which is why our wardrobe quotation checklist asks for the shape of the top to be written down.
- 1. Measure at several points: the lowest drop and the narrowest width govern, not the average
- 2. Step the top: the box is tall where the ceiling is clear and lower under the bulkhead
- 3. A top box round the beam keeps the front line level (the shape is set on the drawing)
- 4. The column as a divider: a bay each side, or a filler against its face
- 5. The grille and the duct stay reachable: tell us at the visit, and ask the building or MEP trades about anything structural
A ceiling beam: build under it, box it in, or step round it
A beam comes down from the ceiling and runs across the wall, so the wardrobe has three honest choices. The first is to build under it: the box stops at the beam's underside with a filler strip closing the small gap, and the top section above the beam is left as the beam itself. This is the simplest and the cheapest of the three to describe, and it works when the beam is shallow or the room is tall enough to give up the strip.
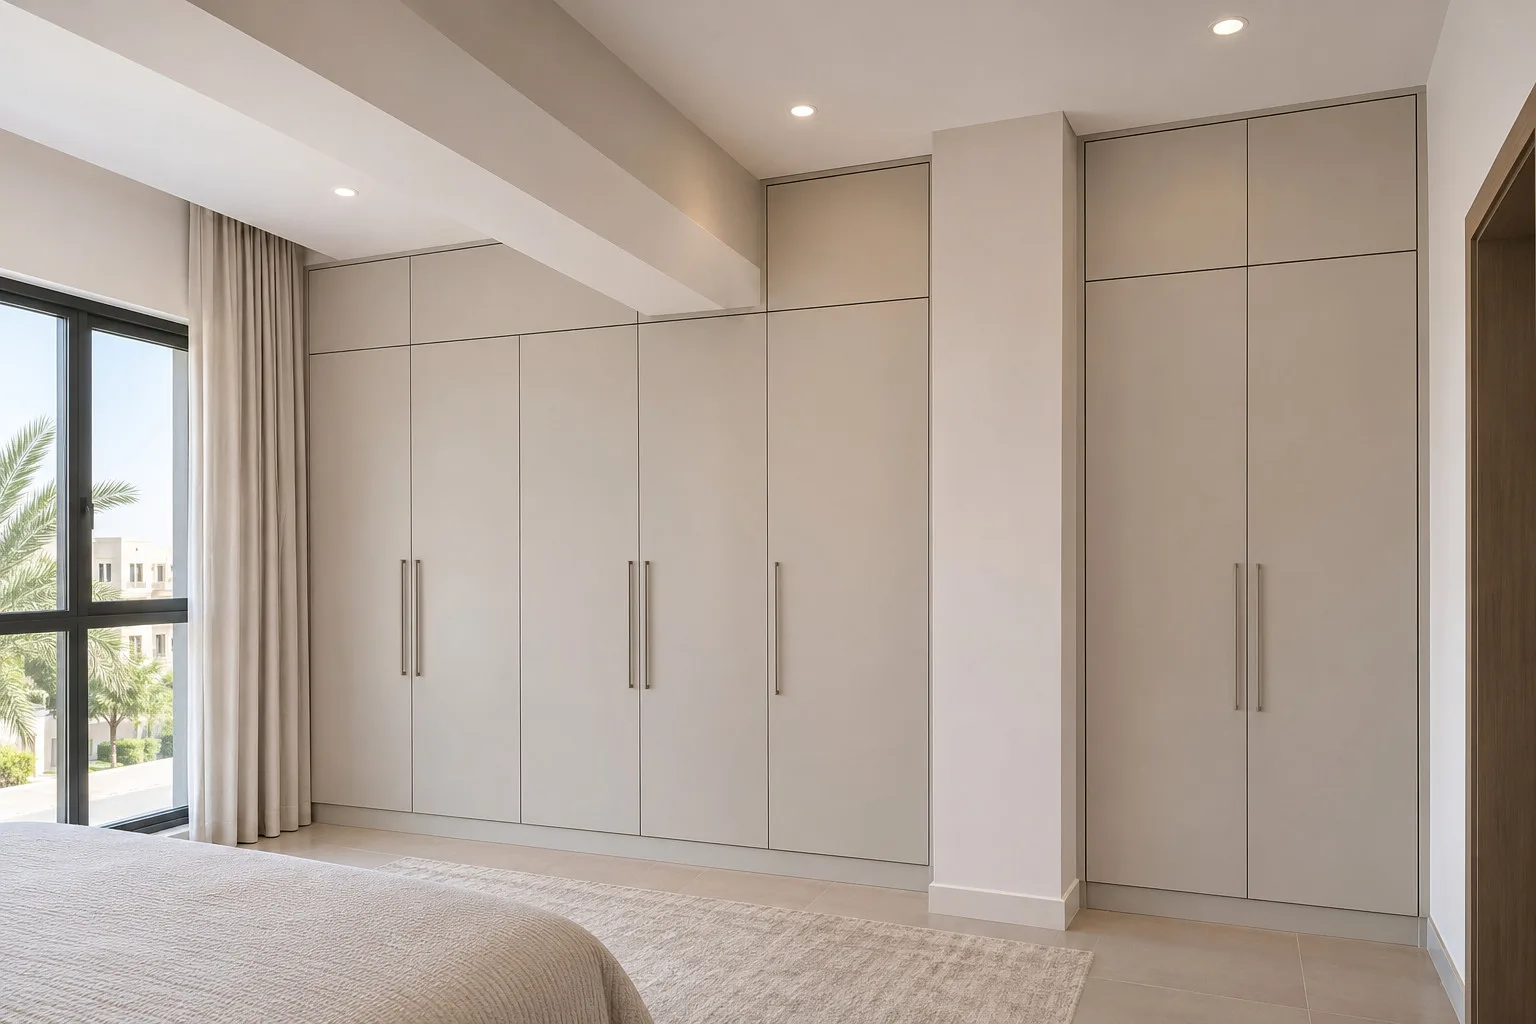
The second is to box the beam in as a top box. The wardrobe runs up to the ceiling across the beam, and the top section is made as a deeper box that wraps the beam's front, so the front line of the wardrobe stays level from the doors to the ceiling and the beam disappears behind it. The cost is that the top box has to be made to the beam's real size, which is why the readings come first. Whether the top section is reached by small upper doors or left as a closed box is set on the drawing, and the wardrobe hanging heights guide helps with what is reachable.
The third is to step the wardrobe: tall where the ceiling is clear and lower under the beam, so the top of the wardrobe follows the ceiling's line. The step is visible, so it works best when it is drawn as a feature, with the shorter section's doors lined up with the taller one's. The taller section's top boxes can double as storage for luggage and seasonal items, which is how many people use the space above the doors.
Which one to choose is a matter of how much height the beam takes and how it meets the wall, and a photograph is worth a thousand readings when you send it ahead of the visit. A beam that runs the full width of the wardrobe wall is usually boxed in or built under. A beam that stops part-way along the wall is usually stepped round. If the room is also a narrow one, a wardrobe for a narrow room or corridor covers how depth competes with the floor.
A column: a divider, a filler, or a bay either side
A column stands out from the wall over the whole height, so it takes width, not height. A wardrobe cannot pass through it, so the run is cut into two, a bay on each side, and the column becomes the divider between them. In a bedroom that is often a good result: one side hangs clothes, the other holds shelves or a dressing area, and the column reads as a deliberate part of the plan instead of an interruption.
Where the column is not exactly where you want a split, a filler panel does the work. It sits against the column's face or side and brings the run to a clean line, scribed to the column in the way Stegbar describes for an uneven wall: tracing its contour onto the panel so the two meet without a gap. If the column stands out by a few centimetres only, a filler beside it can let the doors run past it in one line, and the drawing then shows the doors as one front with a pilaster-like edge where the column is.
The column also changes where the doors can open. A hinged leaf next to a column has to clear it as it swings, and the hinge side may need a filler so the door opens fully; our wardrobe hinges guide covers leaf width and swing, and the door clearance guide covers the floor in front. Sliding doors skip the swing problem, but they need a straight run across the face, so a column in the middle of a sliding wardrobe usually means two separate sets of doors; which of the two suits a split run is a question for the drawing.
A column in a shared room is also a way to divide a wardrobe between two people without a partition: each side has its own bay and its own doors. That plan is worked in our guide to a wardrobe shared by two, and the same idea works for a guest room wardrobe, where one bay hangs and the other holds luggage.
An AC bulkhead or a drop ceiling
A bulkhead, or a dropped ceiling section that hides the air-conditioning run, is a beam with a longer reach: it comes out into the room as well as down. It takes height over part of the wall, and it often has a grille in it. The options are the same as for a beam, with one addition. Because the bulkhead can reach well into the room, a tall box that goes right to the real ceiling beyond it may have to be deeper or stepped back, and the floor-to-ceiling wardrobe guide has the planning for the ceiling line.
Before the wardrobe is drawn, find out what the false ceiling is and what it hides. If a ceiling is planned or being redone, the order of the two jobs decides where the wardrobe can end: our guides to gypsum false ceilings compared with other ceilings and false ceiling designs explain the ceiling side, and a wardrobe should be drawn after the ceiling line is settled, not before.
A drop ceiling also changes what you measure. The ceiling is lower at the bulkhead and higher beyond it, so the height must be read at both, and the lowest underside governs the box that sits under it. Do not take the bulkhead's height from the room's general ceiling height: read it.
AC ducts and grilles: leave access and airflow
This is planning only. We do not cut, move or reroute any air-conditioning duct, pipe, cable or other service, and nothing on this page suggests anyone should. What a wardrobe drawing can do is stay clear of them: leave the grille uncovered, leave the way to any access panel or duct opening reachable, and avoid putting a closed box where air has to move.
Tell us about every grille, duct opening and access panel at the measuring visit, and show them in a photograph if you can. If anything has to be moved, opened or checked, ask the building or its MEP trades; they decide it, and anything structural belongs to them, not to us. Our guide to ceiling access panels shows why a service point is worth keeping reachable.
Airflow matters inside the wardrobe too. A cupboard that shares a wall with a cooling unit or a damp room can behave differently from one on a dry inside wall, and the wardrobe musty smell guide explains what to look for. We do not publish a standard ventilation opening or a back gap, so ask in the quotation what is provided for air and write it down.
Split doors and top doors at an obstacle
Doors are where an obstacle shows. A tall door that runs past a beam has to be cut at the beam's underside, and a door beside a column has to stop at it. The answer is to split the doors where the obstacle splits the wall: a main door below the beam, a short upper door above or beside it, and a leaf that ends at the column's edge. Each split is a line on the front, so it is better drawn as a rhythm that matches the other doors than left to fall where the obstacle falls.
More splits mean more leaves and more gaps to align, so the number of splits is a trade you can see on the drawing. The wardrobe hinges guide covers leaf width and swing, which matters beside a column, and the door finishes comparison matters here because a lacquer or mirror door shows a misaligned gap more than a matt laminate does.
Mirror doors need particular care at an obstacle, since a split in a mirror front reads as a seam in the room. If the plan includes a mirror, read mirror wardrobe doors before the leaves are placed.
Lighting and the joint at the top
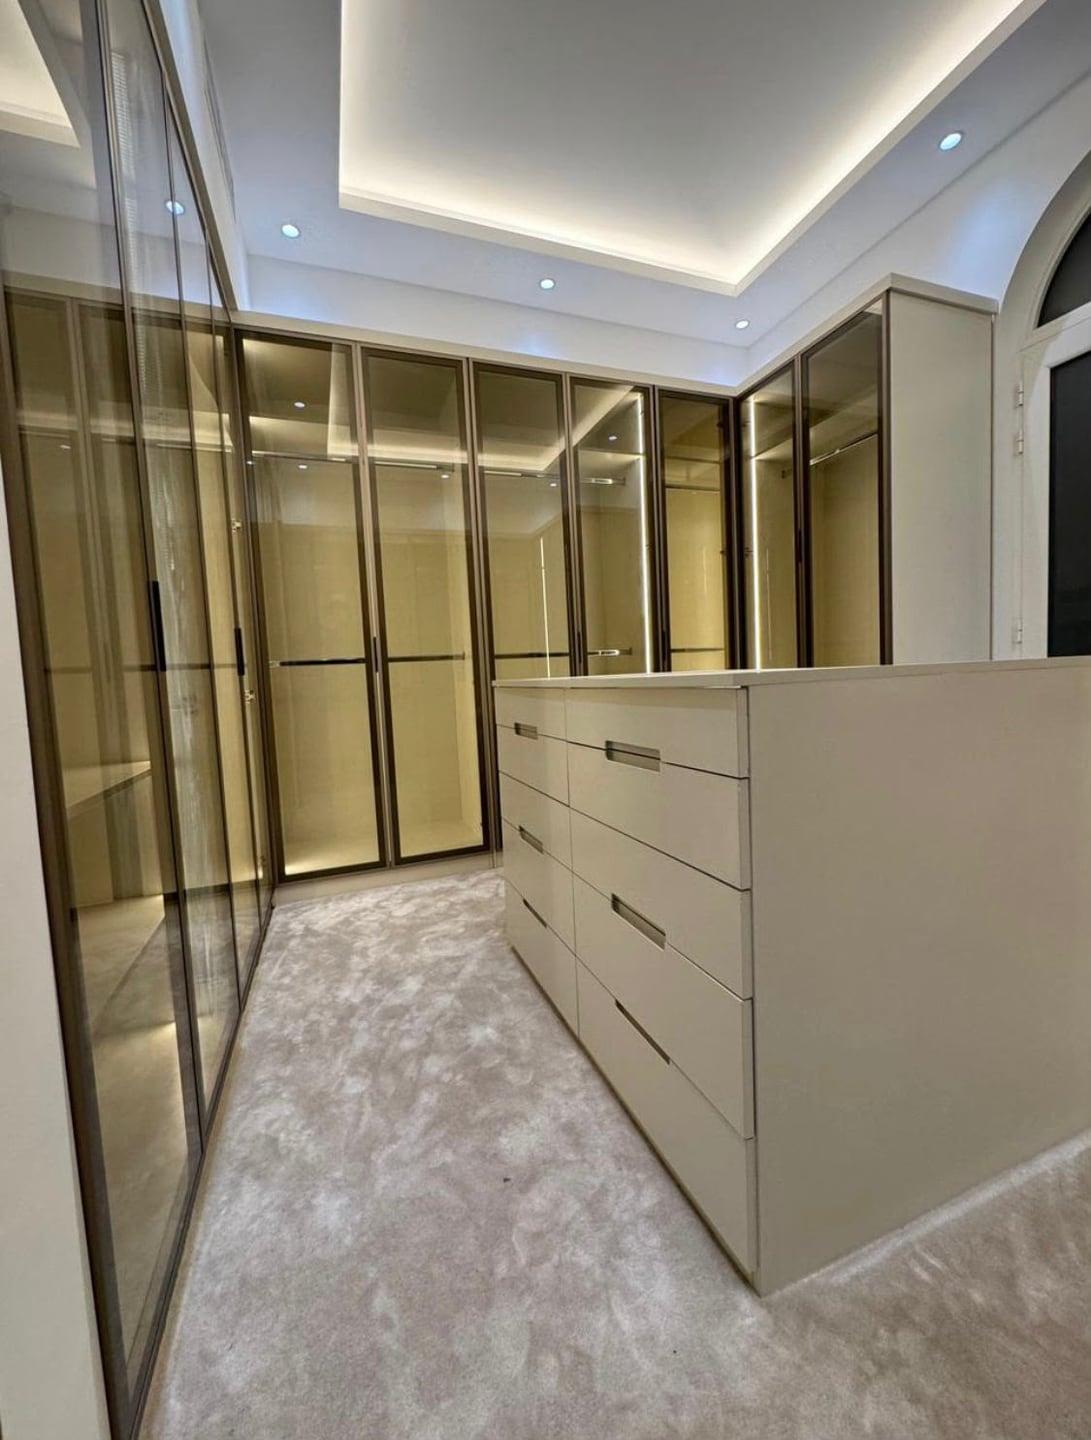
The line where the wardrobe meets the ceiling or the beam is the one that shows imperfection, because a ceiling is rarely perfectly level. Lighting can be used to treat it deliberately: a lit shadow line or a recessed light at the top reads as a design choice, where a bare edge with an uneven gap reads as a mistake. That is our reading, not a rule, and the decision belongs on the drawing.
Our own team installs internal LED lighting in the wardrobes we build, and the LED strip versus profile guide compares the two ways of doing it. Lights in the ceiling around the wardrobe, such as a cove, belong to the ceiling work, not to us; the gypsum ceiling lighting basics guide covers that side.
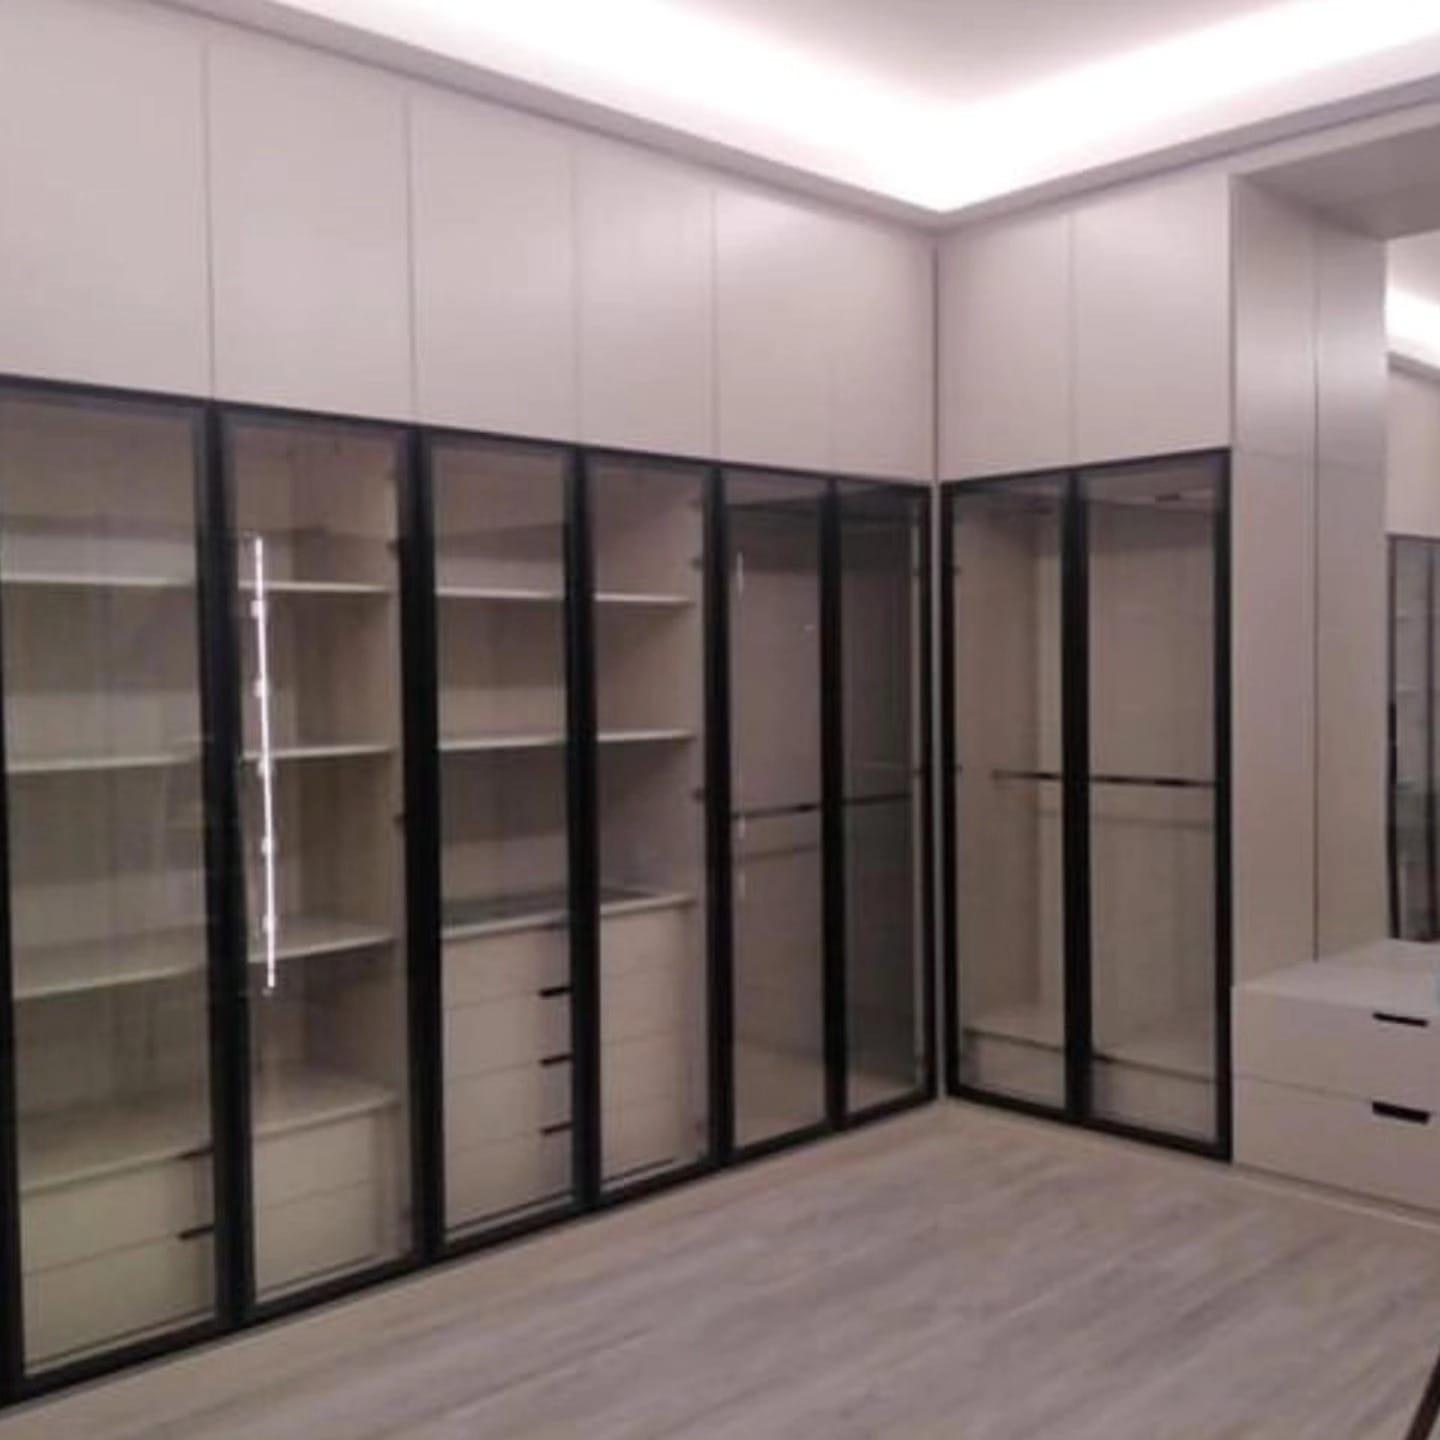
The wardrobe lighting guide shows where light goes inside and above a wardrobe. The photograph below shows a lit ceiling edge above a run of tall top cabinets. It is a different room from your wall, and the point it shows is the one we are making: the line at the top is more forgiving when it is designed than when it is hidden.
Fixings: agreed on site, not assumed
Where a wardrobe or a top box is fixed depends on the wall, the ceiling and the obstacle, and we agree it on site. We do not say that any surface is safe to fix to, and we do not publish a fixing method, because a reading taken on the day is the only honest basis for one. A beam or a column in particular is part of the building: ask the building, or the engineer who knows it, before anything is attached to it, and tell us what they say.
That is also why the measuring visit matters more here than usual. We read the obstacle, you show us any plans or notices from the building, and the drawing records what is agreed. If something cannot be done, we say so at that point and not after the boards are cut.
A decision table, obstacle by obstacle
The table is a quick way to see which answer usually fits which obstacle. It is illustrative: the wall in front of you may reverse any row, and the drawing decides.
Which answer usually fits which obstacle (illustrative)
Shallow beam across the whole wall
- Often a good answer
- Build under it with a filler strip, or box it in as a top box
- Watch for
- The top box has to be made to the beam's real size
Deep beam across the whole wall
- Often a good answer
- Box it in as a top box, or end the wardrobe below it
- Watch for
- The lost height and a lower top section
Beam that stops part-way along the wall
- Often a good answer
- Step the wardrobe round it
- Watch for
- The step must line up with the doors
Column at one end of the wall
- Often a good answer
- A filler against its face, with the run ending cleanly
- Watch for
- The hinge side and the swing next to it
Column in the middle of the wall
- Often a good answer
- A bay either side, the column as the divider
- Watch for
- Two separate sets of doors if sliding
AC bulkhead over part of the wall
- Often a good answer
- Step the top under it, tall beyond it
- Watch for
- A grille or duct access that must stay reachable
A grille low on the wall
- Often a good answer
- Leave it uncovered and draw round it
- Watch for
- Tell us at the visit; we do not move services
Beam, column and bulkhead on one wall
- Often a good answer
- Treat it as a sequence of bays, each to its own reading
- Watch for
- A busy front: keep the door rhythm regular
Our own planning comparison, not a standard. Your wall is measured at the free visit and the choice is made on the drawing.
What we do about an obstacle on your wall
We build custom wardrobes, so we can adjust the dimensions and the compartments to a wall that has a beam, a column or a bulkhead in it, and we agree what is feasible with you on the drawing before production. Our entry price is from AED 550 per sqm of wardrobe front for the entry specification, MDF laminate with hinged doors, installed; other options raise it, and a stepped top, a top box or a filler is part of the quotation after the visit. After measurements and details are agreed, a 60% advance is paid and production starts once it is received.
The free measuring visit brings samples to the room. We read the obstacle at several points, note grilles and sockets, and then send a drawing and an itemised price; nothing is made until you approve them. Our Sharjah workshop builds the wardrobe and our own team installs it, up to about 10 days after confirmation depending on size and design, with a 24-month written workmanship warranty (supplied products follow their own terms). The wood-based boards also carry a 5-year limited warranty, subject to the written terms, which exclude hinges, tracks and other moving hardware.
Book through the consultation form and send a photo of the wall. Our custom wardrobes service page lists what we make.
The built-in wardrobes page shows finished runs, and the sliding door wardrobes page covers the kind that skips the swing.
For prices, read the wardrobe price guide.
The wardrobe materials and hardware guide explains what moves a quotation, and the wardrobe quotation checklist lists what to ask each supplier.
We install across the UAE. The Sharjah page gives the workshop address, and our pricing guide shows how a quotation is built from a measured wall.
Obstacles are part of step one; the full wardrobe planning sequence covers the four steps after it.
Common questions
Can a wardrobe be built around a ceiling beam?
Usually yes. It can be built under the beam with a filler strip, boxed in as a top box, or stepped round it, depending on how low the beam drops and how far it runs along the wall. We agree feasibility on the drawing before production. See our floor-to-ceiling wardrobe guide.
How do I measure for a wardrobe when there is a beam or column?
Take the height under the beam at three points, how far it stands out, the column's width and projection at three heights, and the lowest and narrowest readings. Online Bedrooms and FCI London give the same several-points advice for ordinary walls. See our wardrobe measuring visit guide.
Can a column be used as part of the wardrobe layout?
Yes. It can be the divider between two bays, or be met with a filler panel so the run ends in a clean line. A hinged door beside it needs room to swing. See our wardrobe door clearance guide.
What about the AC grille or duct on my wall?
Leave it uncovered and reachable, and tell us at the measuring visit. We do not cut or move services; ask the building or its MEP trades about anything structural. See our ceiling access panels guide.
Is it safe to drill into a beam or a column?
We make no such statement. A beam or a column is part of the building, so ask the building or its engineer before anything is fixed to it. Fixings depend on the wall and are agreed on site. See our wardrobe quotation checklist.
Does lighting help hide the gap at the top?
It can make the line a deliberate feature rather than a flaw, which is our reading, not a rule. Our team installs internal LED lighting in the wardrobes we build. See our LED strip versus profile guide.
How much does a wardrobe around an obstacle cost?
Our entry price is from AED 550 per sqm, installed, for MDF laminate with hinged doors. A stepped top, a top box or fillers raise it, and the figure is set after the free visit. See our wardrobe price guide.

Sources & specifications
Manufacturer information applies to the named products and systems. Sources reviewed on 4 November 2026.
- Online Bedrooms (UK retailer), How to build a fitted wardrobe in an alcove: measure the width at 3 different heights, the height in 3 places; many rooms aren't perfectly straight. No mention of beamsonline-bedrooms.co.uk(opens in a new tab)
- Online Bedrooms, Fitted wardrobes around a chimney breast: a projection that leaves alcoves either side, wardrobes designed to fit around it; a retailer's product page, no measuring stepsonline-bedrooms.co.uk(opens in a new tab)
- FCI London (UK maker), How deep should built-in wardrobes be? (11 May 2026, updated 17 August 2026): ceiling measurements from the centre and both ends, discrepancies need modifications, check skirting, coving, power points and other protrusionsfcilondon.co.uk(opens in a new tab)
- Stegbar (Australian door maker), How to scribe: tracing the contours of an uneven wall; scribing recommended if a wall is more than 3 mm out of plumb; gaps read in 3 spotsstegbar.com.au(opens in a new tab)
Want this planned for your home?
Consultation and measurement are free. Tell us the rooms, location and what you need; we arrange a sample visit and define the measured quotation.