Media Walls · 20 min read · 4 October 2026
Media wall on an old villa plaster wall: what to check first
Can a media wall go on an old villa plaster wall? What is in the wall, how to find loose plaster, what damp and salts mean and what the frame must reach.

By Ali Haider Basra, Founder, Al Tareeq Decor · Contact our workshop
Key takeaways
- On an old plastered wall, fix through the plaster into the block; a screw that stops in loose plaster carries nothing.
- Tap the whole wall and map what sounds hollow; the hammer test is a fairly imprecise method (RICS journal article via iSurv), so it shows how much, not why.
- A tide mark, a white salt crust or bubbling paint point to moisture: find the cause before a panel covers it, and never seal the panel tight.
- Plaster repair and damp treatment are separate jobs and separate quotations from the media wall; ask in writing whether they are included.
- Send a wide photo of the wall, close photos of cracks and stains and the TV size on WhatsApp; we tap, map and measure at the free visit before the drawing.
On this page
- Key takeaways
- A media wall on an old villa wall: the short answer
- What is actually in an old villa wall
- Why old plaster lets go
- A ten-minute walk to read your own wall
- The tap test: mapping what is hollow
- Damp and salts: find the cause before you cover it
- What to do about loose plaster under the footprint
- How a frame is built out from an uneven wall
- Old chasing, old wiring and where the cables go
- Five steps from the first photo to the finished wall
- What the wall shows, what it may mean and what we draw
- Three villas, three decisions
- Mistakes that cost the most on an old wall
- What we do about it
- Send us the wall on WhatsApp
- Common questions
A media wall on an old villa wall: the short answer
Yes, a media wall can go on an old plastered wall, and old villas are among the places where it makes the most difference, because a built-out wall hides uneven plaster, old chasing and patched paint. But the rule changes from the one that works on a new flat: do not fix into the plaster, fix through it. The plaster on an old wall is a skin. In places it is still bonded to the block behind it, in others it has let go, and from the outside the two look the same. The frame that carries the TV and the panels has to reach the block, and the drawing should say where, because a screw that stops in loose plaster carries nothing.
This guide explains how to find out what your wall is really like before the drawing is made, what the signs of moisture mean, how a frame is built out from an uneven wall, and who decides when the plaster itself needs attention. It is a planning guide, not a survey: it cannot tell you whether your wall is sound, and no photograph can. What it does is give you the questions, the order and the words to use. If your project is a wider renovation, media wall renovation covers the whole-room view, and for the two most common wall types in general see block wall or gypsum wall.
One caution before we start. We build media walls; we do not promise to repair plaster, treat damp or rebuild a wall as part of a media wall quotation. Where an old wall needs that work, it is a separate job with a separate quotation, and we will say so on the drawing. Site access and protection matter on old walls too, as delivery and site preparation explains. That distinction is the most useful thing a customer with an old villa can know before the first visit.
What is actually in an old villa wall
Think of the wall as layers, from the structure outward. At the back is the block, the wall's structure. Over it is a coat of plaster, which on an interior wall is usually the finish that took the paint, and on an exterior wall is called render. Wikipedia's entry on plaster draws that distinction: in English, plaster usually means a material used for the interiors of buildings, while render commonly refers to external applications. Over the plaster there may be a skim, then paint, and in older villas often several coats of paint and perhaps wallpaper.
The plaster itself is not one material. The same entry lists the three most common types: those that mainly contain gypsum, lime or cement. It describes cement plaster as a mixture of suitable plaster, sand, Portland cement and water applied to masonry, and lime plaster as a mixture of calcium hydroxide and sand or other inert fillers. You rarely know which one you have, and you do not need to for the media wall. What you need to know is how well it is attached to the block, which is a different question and one that the type of plaster does not answer.
The drawing below shows the layers in section. The block is at the left, the render beside it with one hollow patch where it has let go, then the paint skin, then the frame and panel of the media wall. The long fixings pass through the render into the block. That is the whole idea of this guide: the frame is attached to the structure, and the plaster is simply passed through.
- 1. The block wall is the structure and what the fixings must reach.
- 2. The old render is sound in places and loose in patches.
- 3. The paint skin looks the same over both.
- 4. The frame is built out from the wall and kept plumb.
- 5. The fixings pass through the render into the block.
Why old plaster lets go
Plaster comes away from a wall for a handful of reasons, and for the media wall the reasons matter less than the places. Moisture is the usual cause where it appears. The RICS building surveying journal article on breathable renders, published on iSurv, describes how cement renders tend to be very dense and, if not totally impermeable, are certainly highly resistant to vapour transfer, and that such water retention can be very harmful to a building, particularly if the masonry is constructed from lime mortar. That article is about older buildings with lime mortar, and your villa may be nothing like that, but the principle is a general one: a dense coating that does not let water out can trap it behind.
Salts are the second reason. Wikipedia's entry on efflorescence describes it as the migration of a salt to the surface of a porous material, where it forms a coating: water carries the salt in solution to the surface, evaporates and leaves the salt behind. The same entry notes that it can clog the pores of porous materials. In a wall, the visible sign is a white powdery or crusty coating on the surface; the hidden sign can be paint that blisters and plaster that loses its bond.
A third reason is movement and age. Plaster that is thin, poorly keyed or old simply loses its adhesion over time, and the 1954 comment the Wikipedia damp article quotes about an old render, that its adhesion was poor and it will often be found that it has become separated from the walling, is a vivid reminder that this has been seen for a long time. None of these needs a diagnosis from us. What matters is that a patch can be hollow for a reason that is invisible from the room, and the way to find the patches is to listen.
A ten-minute walk to read your own wall
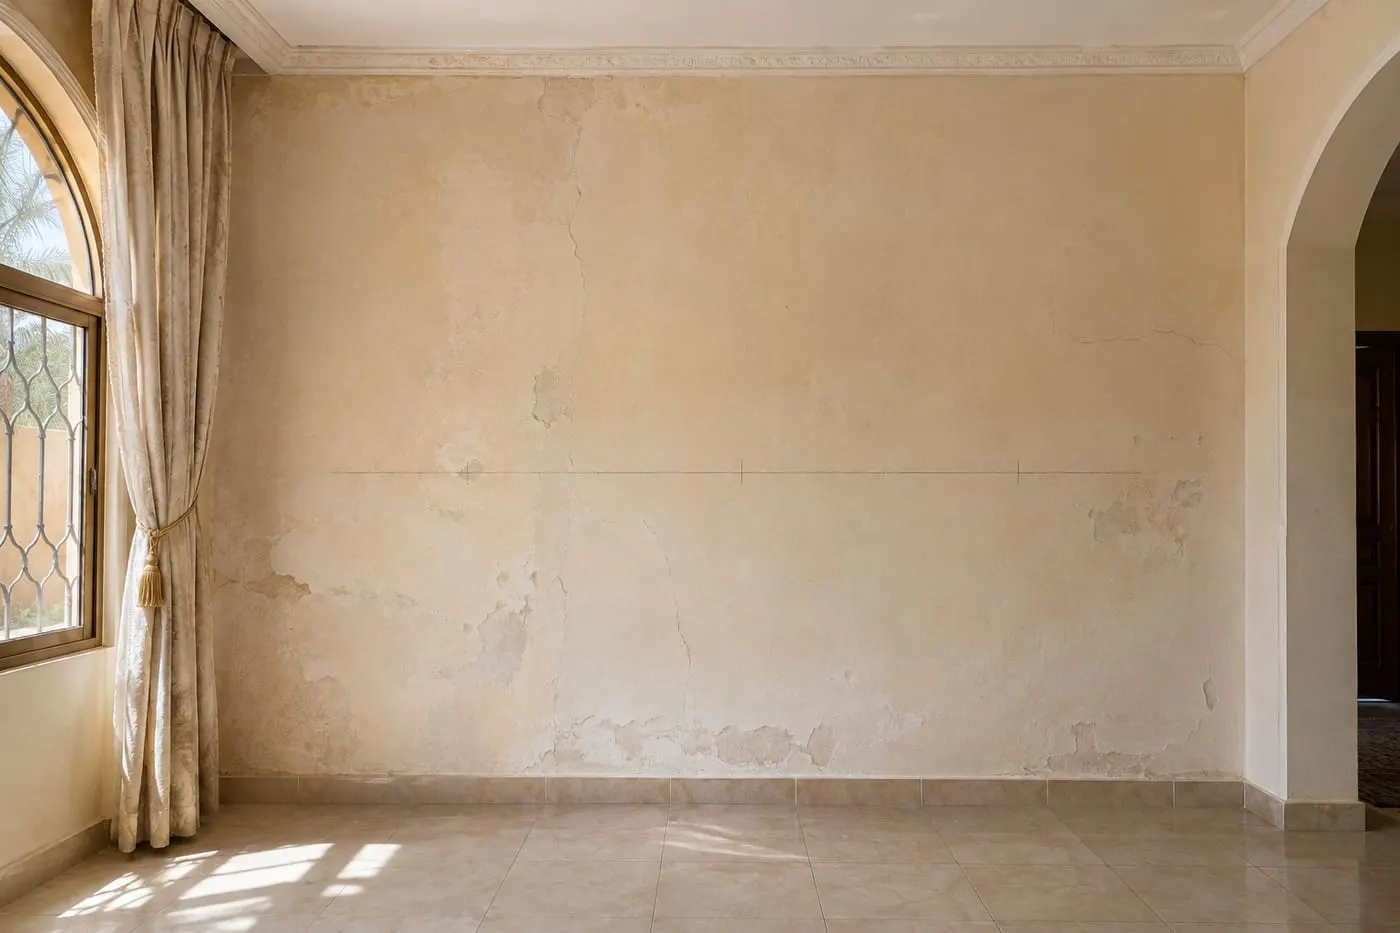
Before you send photos, walk the wall and the wall around it. Look at the bottom 1.5 metres, where moisture from the ground tends to show. Wikipedia's article on structural damp describes rising damp as the common term for the transport of water in the lower sections of walls, and says it is rarely above 1.5 metres, and that it can be identified by a characteristic tide mark on the lower section of affected walls, caused by soluble salts. If you see a horizontal line, a ring of paint that has peeled or a white crust near the skirting, note it.
Look at the corners and the junction with the ceiling: hairline cracks that follow a straight line often follow the joint between the blocks, and a crack that opens and closes with the seasons is a movement crack. Look at where pipes, drains or the roof's edge meet the wall, outside as well as inside, since a leak outside can show as a stain inside. Look for bubbling paint, a musty smell and any patch that is a different colour or sheen. And look at the places that have been repaired before: patches of newer paint, filler or a different texture are signs the wall has been dealt with and the repair may or may not have held.
Then press. Run the flat of your hand over the wall at the height of the planned media wall. A bond that has gone often gives slightly under the hand, a feeling you will recognise once you have felt it. Photograph what you find, wide first, then close, with something for scale, and send the pictures to us. They do not diagnose a wall, but they tell us where to look first at the visit.
The tap test: mapping what is hollow
The simplest way to find loose plaster is to tap it. Tap with a knuckle, a wooden spoon handle or the back of a screwdriver, on a grid across the whole wall, not just where it looks bad. Plaster that is bonded gives a dull, solid sound; plaster that has let go rings hollow, a higher, drummy note. Mark the hollow squares on a photograph or a sketch. The result is a map of the wall's condition, and it is more useful than any description.
Be modest about what the map tells you. The iSurv article states that the extent of delaminated render can be determined by the hammer test, save that this is a fairly imprecise method, and adds that the release of surface tension as loose render is hacked off often leads to a degree of peel-back on otherwise sound areas. In other words, the map shows roughly how much is loose, not exactly where the edges are, and removing the loose part may loosen more. The test also shows how much, not why: a hollow patch is a symptom, and the cause may be moisture, age or an earlier repair.
For the media wall the map has a precise use: it is laid over the footprint of the wall on the drawing. Hollow patches under the footprint are a fact the frame has to design around, by fixing beyond them or by agreeing in writing that the plaster is repaired or removed there first. The drawing below shows a footprint over a tap map. It is a schematic, and the pattern of red squares is invented to show the method.
- 1. Each square is one hand-width tapped on the wall.
- 2. Red squares sound hollow: the plaster has let go of the block.
- 3. The dashed footprint shows where the media wall will stand.
- 4. Fixings go beyond hollow patches into the block, or the plaster is repaired first.
Damp and salts: find the cause before you cover it
A media wall is a cover, and covering a wet wall is a bad idea. If a wall has a damp problem, building a panel in front of it does not solve it, and may make it worse by hiding the early signs. The honest order of work is the one in the drawing below: find the cause, fix the cause, let the wall dry, and only then decide what to do about the plaster and build in front of it.
The cause could be above, below or beside the wall: a leaking pipe or a failing waterproofing, a gutter or downpipe that discharges against the wall, ground levels that have risen against a villa's base, or a wet area on the other side of the wall. We are not a damp-proofing contractor, and it is not our place to name a cause from a photograph. What we can do is notice the signs, say so, and suggest that the person responsible for the building looks into it. Ask your landlord or building management in writing if you rent, and keep the reply.
A panel in front of a damp wall should also not be sealed tight. From the way we build, a frame that stands off from the wall leaves an air space, and where the site needs it, the design can include air gaps, concealed openings or grilles at the bottom and top of the panel. The amount depends on the site; there is no fixed gap that suits every wall. And a gap does not cure a leak or an existing damp problem; it only stops the panel from hiding it. Humidity and boards explains what moisture does to the panel itself, and plywood in beachfront villas looks at one coastal case.
- 1. Moisture rises from the ground into the wall.
- 2. Salts left behind form a crust on the surface near the base.
- 3. The frame stands off from the wall with an air gap.
- 4. Air enters low and leaves high, but the gap does not cure the damp.
What to do about loose plaster under the footprint
When the map shows hollow patches under the media wall's footprint there are three honest answers, and the choice is a decision about money, time and the building, not a technical rule. The first is to leave the plaster and fix beyond it: the frame is drawn so that every fixing lands on a sound part of the block, and the hollow patches are bridged by the frame and panel. This works when the patches are small, and the frame is large enough to reach sound block on each side.
The second is to repair the plaster before the media wall goes up. A plasterer cuts out the loose area, makes it good and lets it cure and dry; the frame then fixes as it would to a sound wall. The cost and the time belong to the plastering, not to us, and the drying time depends on the wall and the weather. The third, for larger or wetter areas, is to remove the plaster in the footprint entirely and fix directly to the block, with the plaster edge neatly closed by the panel, much as a fluted or slatted panel closes its own edges. In that case someone has to decide who does the removal, who clears the dust and who makes good the edges, and that decision is better made before the quotation than after.
Whichever route you choose, write it down, as planning a media wall suggests for every decision. The drawing should say which patches are bridged, which are repaired and which are removed, and the quotation should say who does what. If you rent, the landlord's written permission has to cover whichever of the three you choose; landlord permission explains how to ask. And if the wall is much worse than a patch here and there, step back and ask whether the right job is a media wall at all, or a repair first; our renovation guide helps with that decision.
How a frame is built out from an uneven wall
Old walls are rarely flat or plumb. They bulge between corners, lean a few millimetres over a storey and carry a century of paint. A media wall, by contrast, has to present a flat, plumb face with even joints and shadow gaps. The frame is what reconciles the two. It is built from the wall outward, set up from a level line and a plumb line rather than from the wall, and packed out where the wall falls away, so the face is true whatever the wall is.
That is why a laser measure matters at the visit and a laser level matters on the day. The measure shows how much the wall varies across the footprint, which decides how far the frame has to stand out at its thinnest and its thickest points. The frame's depth is therefore not a standard figure: it is the depth the wall's unevenness requires plus the depth the panel build-up needs, and it should be on the drawing before the niche, the console and the cove are fixed. Where the wall meets the ceiling covers the top edge, where an uneven ceiling and an uneven wall meet.
The fixings are long enough to pass through the frame, the plaster and into the block with enough bite to hold, and they are spaced so that no single fixing carries more than its share. We choose the type to suit the wall: a hollow block, a solid block and a concrete column each take a different fixing, as block versus gypsum explains. What the fixings reach is noted at the visit and written on the drawing.
Old chasing, old wiring and where the cables go
Old villas often have sockets and conduits that were set into the plaster when it was applied, and cut into it later. A media wall changes where the cables need to go, and the frame is a natural place to carry them: conduits run in the space between the wall and the panel, so nothing new is cut into old plaster. That avoids cracking and keeps the cables replaceable. Cable service access explains the conduit sizes and draw strings, and sockets and power shows how many sockets a TV wall needs.
If the existing sockets are in the wrong place, the drawing says so, and the quotation separates the carpentry from any electrical work. We do not do standalone socket or lighting jobs outside a media wall; where a socket must move, it moves as part of the agreed scope, and the drawing shows where it lands. If you have doubts about the existing wiring itself, ask a qualified person to check it before the wall is built; that is outside what a media wall quotation covers, and we will say so.
Bring the old wall's quirks to the measuring visit: a socket that does not work, a switch in the middle of the wall, a surface conduit someone added later. They are the things that change a drawing, and they are easier to deal with before the frame is made than after.
Five steps from the first photo to the finished wall
Put together, the work follows a short sequence, and the order matters because each step answers a question the next one depends on. You send photos of the whole wall, the cracks, the stains and the sockets. We visit, tap the wall, map the hollow patches and laser-measure. You and, where it applies, the building owner decide what to do about the cause and the plaster. We draw a frame that reaches the block and a panel that hides the unevenness. We build and fit.
The sequence below shows it as a timeline. The last note on it is the one to remember: plaster repair is its own job and its own quotation, so ask whether it is included before you assume it is. The free measuring visit and the line-by-line quotation exist so that you can see, before production, what is and is not in the price.
What the wall shows, what it may mean and what we draw
Solid, dull sound all over
- What it may mean
- Plaster bonded to the block
- What the drawing does
- Standard frame, fixings into the block
A few hollow patches, no stains
- What it may mean
- Local loss of bond
- What the drawing does
- Frame bridges them or fixes beyond them
Hollow patches with a tide mark or white crust
- What it may mean
- A moisture source, not only age
- What the drawing does
- Cause found first; air gap and openings; fix beyond
Bubbling paint or a musty smell
- What it may mean
- Moisture behind the paint
- What the drawing does
- Hold the drawing until the cause is dealt with
Large hollow areas under the footprint
- What it may mean
- Plaster has largely let go
- What the drawing does
- Repair or remove it first, written on the quotation
Uneven face, lean or bulge
- What it may mean
- An old wall that is out of true
- What the drawing does
- Frame packed to a true face; depth set from the laser measure
A planning guide from our own method and the pages listed under the article; it is not a survey and does not diagnose any wall.
- 1. Send photos of the whole wall, the cracks, the stains and the sockets.
- 2. We visit, tap the wall and map hollow patches, and measure.
- 3. The cause, the repair and who does it are decided and written down.
- 4. The drawing shows a frame that reaches the block.
- 5. The frame, panels and console are built and fitted.
Three villas, three decisions
The first villa has a living room wall that sounds solid everywhere except one small patch near a corner, with no stains. The decision is easy: the frame is drawn to fix beyond the patch, the panel covers it, and nothing is repaired. The drawing notes the patch, so that anyone opening the wall in future knows it was there.
The second has a majlis wall with a faint white crust at the bottom, a few bubbles in the paint and a damp smell in the summer. The decision is to wait. We note the signs on the drawing and ask the owner to look into the cause first: a downpipe, a drain or a wet area behind the wall. Once the cause is dealt with and the wall has dried, the plaster is repaired where necessary and the media wall is built with a ventilated frame. Building before that would hide the symptoms and leave the cause.
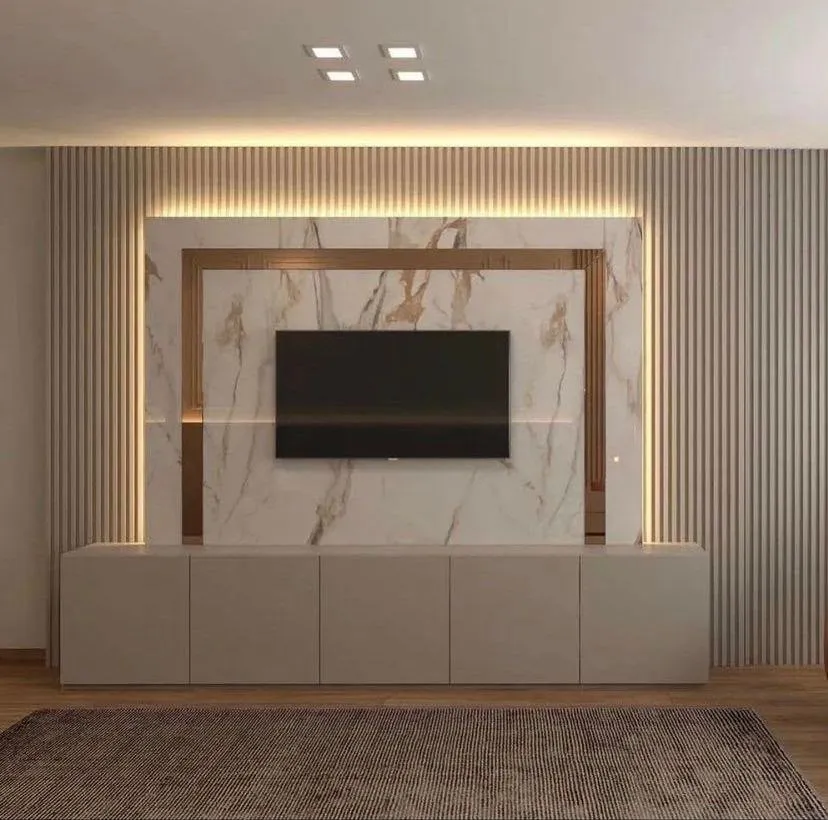
The third is an older villa with a long wall that is uneven by several centimetres across its width and has a large hollow area where an earlier shelf was removed. The decision is to remove the plaster in the footprint, make the edges good and fix the frame straight to the block, packing it to a true face. The quotation separates the plaster work from the media wall, and the owner chooses who does it. A villa TV wall shows what the finished result of a larger wall looks like, and full-height villa TV walls look at the floor-to-ceiling case.
Mistakes that cost the most on an old wall
The most expensive mistake is fixing into the plaster, which holds for a while and then does not. The second is covering damp: a panel over a wet wall hides the symptoms and keeps the cause. The third is skipping the tap test because the wall looks fine. The fourth is assuming that repairs to the plaster are part of the media wall price; ask, and have the answer in the quotation, as the media wall cost and materials guide recommends for every extra.
The fifth is cutting new chases into old plaster for cables when a frame can carry them. The sixth is designing to a standard depth without measuring how uneven the wall is. The seventh is hurrying: an old wall is the one that most rewards the visit, the map and a day's thought before the drawing. And the eighth, for renters, is starting without the landlord's written permission to fix and, where it applies, to make good.
What we do about it
At the free measuring visit we look at the wall, tap it, mark what sounds hollow, laser-measure the face and note the sockets and any signs of moisture. We send a drawing that shows the frame, the fixing points, the packing, the air gaps where the site needs them and the panels, and a quotation that lists the carpentry line by line and states what is not included, such as plaster repair or damp treatment. Once you approve the drawing and agree the details, a 60% advance is paid and production starts when it is received; the remaining stage is agreed with you.
Our media walls start from AED 3,500 per project for a compact panel with a floating console in standard laminate. The final figure depends on the wall size, the finish (laminate, veneer or lacquer), marble-effect panels, lighting and any electric fireplace, and most are made in up to about ten days depending on size and design. The workshop is in Sharjah, we fit across the UAE, and the founder, Ali Haider Basra, has ten years in the trade. Wood-based boards carry a 5-year limited warranty on the boards only; hinges, runners, labour and misuse are excluded. Our measuring visit guide shows what we note on site, the 3D design and drawing guide shows how the drawing is approved, and the price guide explains the figure.
Browse the media walls page and marble-effect TV backdrops, try the pricing tool, and see the Sharjah media walls page for visits there.
Send us the wall on WhatsApp
The easiest first step is a message. Send a wide photo of the whole wall, close photos of any cracks, stains or patched areas, the TV size, and say how old the villa is if you know, whether you own or rent, and anything you have been told about the wall or any past leaks. A short video tapping along the wall, with the sound on, is welcome too. That is enough for us to say what to expect and to book the free visit; the consultation guide lists the rest.
Common questions
Can I build a media wall on old plaster?
Yes, if the frame reaches the block behind the plaster; fixing into the plaster alone is the mistake. We tap and map the wall at the free visit. Block wall or gypsum wall.
How do I check if my plaster is loose?
Tap the wall on a grid: bonded plaster sounds dull, loose plaster sounds hollow. The RICS article on iSurv calls the hammer test fairly imprecise, so treat it as a map. Media wall renovation.
What does a white crust on the wall mean?
Wikipedia describes efflorescence as salt carried to the surface by water, which points to moisture moving through the wall. Find the cause before covering it. Humidity and boards.
Do you repair plaster or damp?
Not as part of a media wall quotation; it is a separate job and we say so on the drawing. We build the frame, panels and console. Media wall quotation checklist.
Will an uneven wall show behind the panels?
No: the frame is packed to a true face from a level and plumb line, so the depth is set from the wall's unevenness. Where the wall meets the ceiling.
Can I do this in a rented villa?
Ask your landlord or building management in writing first, and keep the reply, including who makes good. Landlord permission.
Where do the cables go on an old wall?
In conduits in the space behind the panel, so nothing new is cut into old plaster. Cable service access.

Sources & specifications
Manufacturer information applies to the named products and systems. Sources reviewed on 10 November 2026.
- iSurv (RICS Building Surveying journal): Refurbishment, breathable renders (8 Dec 2016)isurv.com(opens in a new tab)
- Wikipedia: Efflorescence (edited 30 Aug 2026)en.wikipedia.org(opens in a new tab)
- Wikipedia: Damp (structural), rising damp and tide marks (edited 12 Oct 2026)en.wikipedia.org(opens in a new tab)
- Wikipedia: Plaster, gypsum, lime and cement plasters and render (edited 19 Oct 2026)en.wikipedia.org(opens in a new tab)
Want this planned for your home?
Consultation and measurement are free. Tell us the rooms, location and what you need; we arrange a sample visit and define the measured quotation.