Media Walls · 20 min read · 29 September 2026
Preparing your room for a media wall: power, protection and dry walls
What your room needs before a media wall goes in: trade order, dry walls, a working socket, pipes behind the wall, floor protection and a cleared work zone, with a readiness checklist.

By Ali Haider Basra, Founder, Al Tareeq Decor · Contact our workshop
Key takeaways
- The media wall goes in after the wet trades and after the room has dried: do not schedule it the day after the painters leave.
- A live socket near the wall, with a clear path for a lead, is what the team needs; do not rely on the socket behind the TV.
- Locate conduits, air-conditioning pipes, water lines and any damp behind the wall before anything is drilled.
- Protect the floor from the door to the wall, clear a work zone, cover what stays and keep someone at home to decide.
- Send a photo of the room and the date of the last wet trade before the install date is fixed.
On this page
- Key takeaways
- What has to be true in your room before the team arrives
- Joinery goes in last: the order of trades
- How dry is dry enough for the boards?
- Power on site: what the team needs and what it does not
- Water, air conditioning and what is behind the wall
- Protecting the floor and the room
- The room on the day: zones and the first hour
- Three rooms, three plans
- Mistakes that slow the day or damage the wall
- A readiness checklist
- How the schedule fits together
- Special cases: villas, offices and rooms still being fitted out
- What we do about it, and what to send us
- Common questions
What has to be true in your room before the team arrives
A media wall is made in our workshop and fixed on site, so by the time it reaches you, the part of the job that depends on you is the room. The room has to be finished, dry, reachable and safe to work in. If it is not, the wall may still go up, but it goes up slower, with more risk of damage and with more things left to chance. This guide is about that room: the order of trades around the wall, how dry the room should be, the power the team needs, the pipes and cables hidden in the wall, how to protect the floor and what to move out of the way.
It is a different question from getting the pieces to the apartment. The lift, the booking, the stairs and the building's protection rules are covered in our guide to lift and delivery access, and the fixing order on the day is in the installation day checklist. Here we start at your front door and ask what the room itself needs.
The short answer is eight things: the room is finished and painted; the walls and floor are dry; there is a live socket near the wall; the air conditioning is running and the room is ventilated; the furniture is out of the work zone; the floor and the route are protected; the building slot and the parking are agreed; and the pipes and cables behind the wall are located. The rest of this guide explains each one, and the last drawing puts them in a checklist.
- Room finished, painted and dry before the wall goes in.
- A live socket within reach of the work zone.
- Services behind the wall located before anything is drilled.
- Floor and route protected; furniture cleared; dust covered.
- A photo of the room sent to us before the date is fixed.
Joinery goes in last: the order of trades
In a room that is being finished, the media wall belongs near the end. The sequence is electrics and air-conditioning pipework first, then plaster and ceiling, then floor and tiles, then painting, then a period for everything to dry, then joinery, then the final clean. The drawing shows it as bars; the lengths are not durations, they only show the order. The reason is not tidiness. Wet work puts a great deal of water into a building, and a wood-based board installed too early absorbs it.
The US Forest Products Laboratory's Wood Handbook, in its chapter on drying and moisture control, puts a number on it: during plastering in a moderate-sized six-room house, about 450 kg of water is used. It advises having flooring delivered after masonry and plastering are completed and fully dry, and installing wood at the moisture content it will experience in service. That is guidance for US houses and for flooring, not for media walls in the UAE, but the principle carries: wood-based material and wet trades should not share a room at the same time.
A New Zealand building research body, BRANZ, makes a similar point in a bulletin on construction moisture. It says new houses can experience high internal moisture levels for up to two years after construction, advises allowing time for materials to dry before finishes are applied, and lists swelling of wood-based products such as MDF among the effects of excess moisture. Again, the climate is different, and the building codes are not ours. But in a new UAE villa or apartment still drying out from plaster and screed, the same physics apply, and the lesson is to plan the wall for a dry room, not for a room that is merely painted.
In practice that means a simple rule: do not schedule the wall for the day after the painters leave. Leave time for the paint to cure and the room to settle, run the air conditioning, and let the building tell you when it is ready. Our guide to humidity and MDF explains how boards respond to UAE air once they are in place, and this guide is about the room they arrive in.
How dry is dry enough for the boards?
There is no single number we can give for a UAE room, and we do not invent one. What the published sources give is a picture of how much wood moves with the air. A Purdue University Extension sheet on stored lumber says wood at 70°F and 35 percent relative humidity settles at about 6.9 percent moisture, and that in summer conditions of 80°F and 80 percent relative humidity it settles at about 15.7 percent. That is solid lumber, not MDF, and it is a US source. It is useful because it shows the range: a board that has been in cool, dry air and then meets hot, humid air will take up moisture, and the difference is large.
The practical reading is about conditions, not numbers. A room with the air conditioning running, no standing water, no fresh plaster or screed, and a wall that is dry to the touch is a good place to install. A room with doors and windows open to outdoor humidity, a damp patch on the wall or new tiles still curing is not. Ask your contractor or the developer when the last wet trade finished, and write the date down. If you are in doubt, send us a photograph and the date, and we will tell you what we would want to see before the team comes.
Do not use a hot, dry day as evidence. Moisture hides in plaster and screed long after the surface is dry, and the first week of air conditioning often shows what was there. If a stain, a bubble in the paint or a damp smell appears, report it first and install second. A wall fixed over a damp patch hides the problem and then suffers from it. Our measuring visit guide explains what we look at on the wall during the free visit.
Ask us what we recommend for storing the panels if the room is not ready on the day. The answer depends on the room, the building and the finish, and we would rather say it to your face than put a rule in an article.
Power on site: what the team needs and what it does not
The team uses power tools: a drill, a driver, sometimes a saw for trimming at the wall and a laser level. That means a live socket near the work zone, with a clear path for a lead. It should not be the socket behind the TV, because that one is often the very point being moved or covered, and it should not be on a circuit that trips when the air conditioning starts. A socket in the next room with an extension lead is usually enough, as long as the lead can be run without crossing a doorway where it can be tripped on.
Tell us in your first photograph where the existing sockets are. The wall's design often uses them, and sometimes moves them. If the wall needs a socket in a new position, that is agreed in the drawing and shown as a separate line in the quotation; our guide to sockets and power explains how we plan them with the wall. We do not carry out stand-alone socket or lighting jobs, so if the socket you want does not exist yet and the wall does not need it, that is a job for your own electrician and your building's rules, which you should ask about in writing.
The lighting inside the wall is a different matter: our own team installs it, so you do not need an electrician for the lighting within our agreed scope. What helps is a known power source for the lighting transformer, in a place where it can be reached later through a service panel. We explain why in cable routes and service access.
One more point on power: switch off at the consumer unit only if the team asks. People sometimes cut the supply to a room as a courtesy, and then the tools, the laser level and the lights do not work. Ask what is needed; do not guess.
Water, air conditioning and what is behind the wall
A media wall needs no water. But water, drain lines and refrigerant pipes may be in the wall behind it, and that matters more than most people expect. A living-room wall can back onto a bathroom or kitchen. The air-conditioning system can have drain or refrigerant lines running through the wall, and electrical conduits run up from sockets and across to switches. A drill that meets one of these is a repair, not a drilled hole.
The drawing shows the idea: a conduit running up from a socket, an air-conditioning pipe in the wall, a water pipe in an adjoining wet area, and a damp patch. Next to them is a check zone, the part of the wall where the TV bracket and the panel fixings will go. The rule is simple: locate before you drill. The building, the developer or the landlord may hold plans of the routes, and our team can use a detector, but nothing replaces the drawing. If you can get the plans, send them. If not, say so, and we will plan the fixings with that uncertainty in mind.
Damp deserves its own sentence. If you see a stain, a patch of flaking paint, a salt bloom or a damp smell on or near the wall, report it before anything else. A media wall over a damp wall is a hidden problem for both of us. Our guide to block and gypsum walls explains how the wall type affects what can be fixed where, and the renovation guide explains how to document a defect you find before work starts.
Do not expect us to fix a leak or move a pipe. Those are for your landlord, your building management or a plumber, and a media wall should not hide a fault that needs to be seen.
Protecting the floor and the room
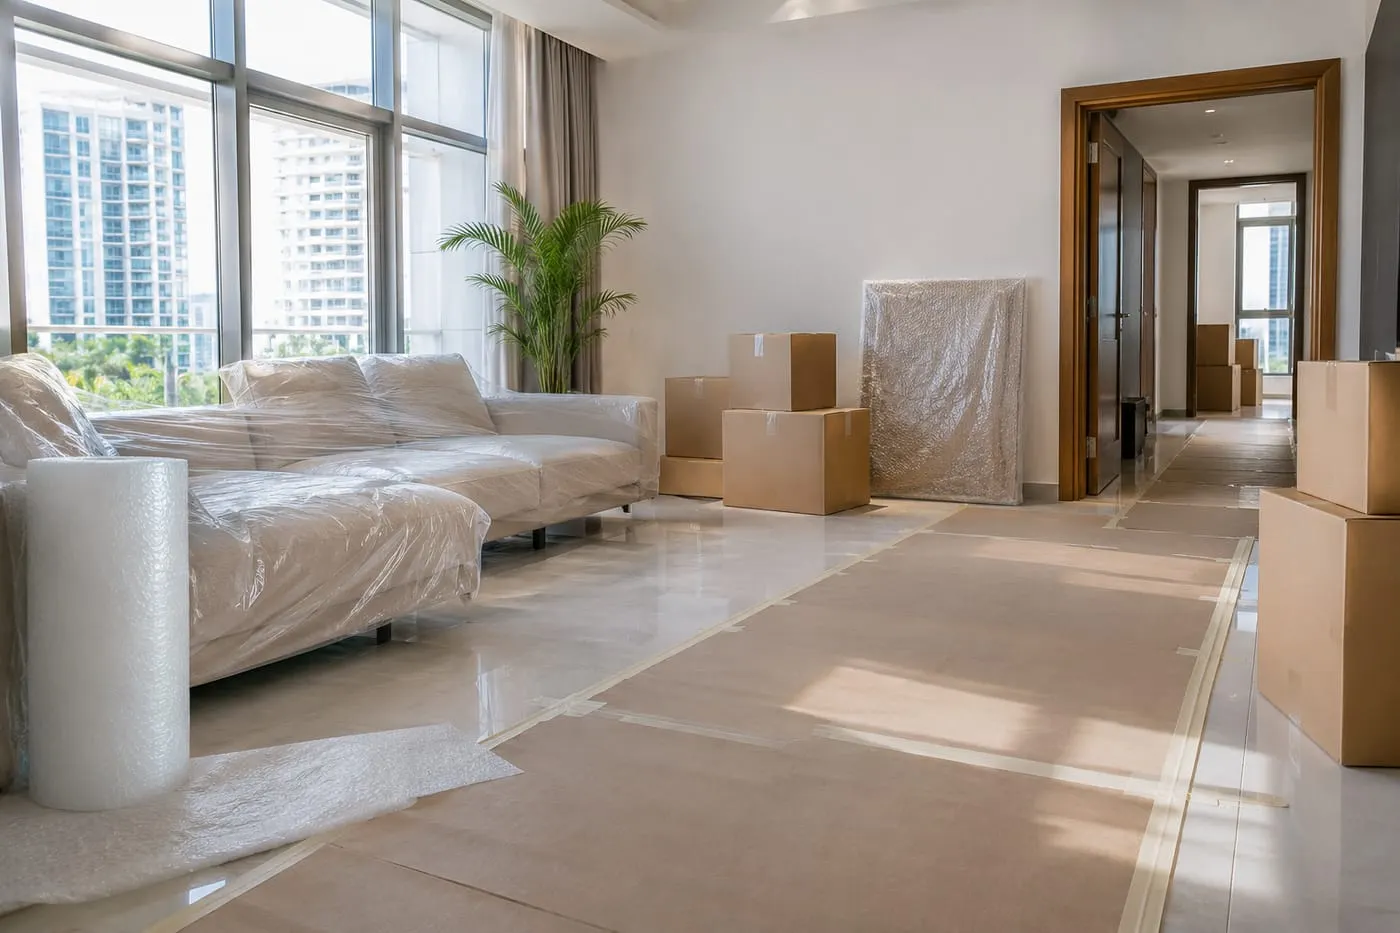
The route to the room is covered in our delivery guide. Inside the room, the floor is what needs protecting. Porcelain and marble are hard but chip at the edge when a corner drops on them, and polished surfaces scratch under grit carried on shoes. Ask for protection board, or lay your own, along the path from the door to the wall and across the zone in front of the wall. It takes minutes and is cheap compared with a replaced tile.
Protect what stays in the room as well. A dust sheet over a sofa, a cover over a coffee table and a wrapped rug make the day calmer for everyone. Move what you can out of the room, and what you cannot, to the far end, away from the wall. Curtains should be tied back and the track clear. Photographs and small objects off the walls beside the media wall. If there is a plant, a pet or a child's toy in the room, say so, because the team will walk with big pieces and cannot see round every corner.
On dust: most of the cutting for your wall is done in our Sharjah workshop, but fitting to a real wall always involves some drilling and trimming, and drilling makes dust. A vacuum used during the work and a sheet taped over the opening to the next room keep it where it belongs. Ask the building whether it has any rules on working hours and noise; we cannot state them, so ask in writing, and we will plan around the answer.
Agree, in the same message, who is responsible for what: the team for how it carries and fixes the pieces, the building for its own fittings, and you for the contents of your home. A short line in the message avoids a long discussion at the end of the day.
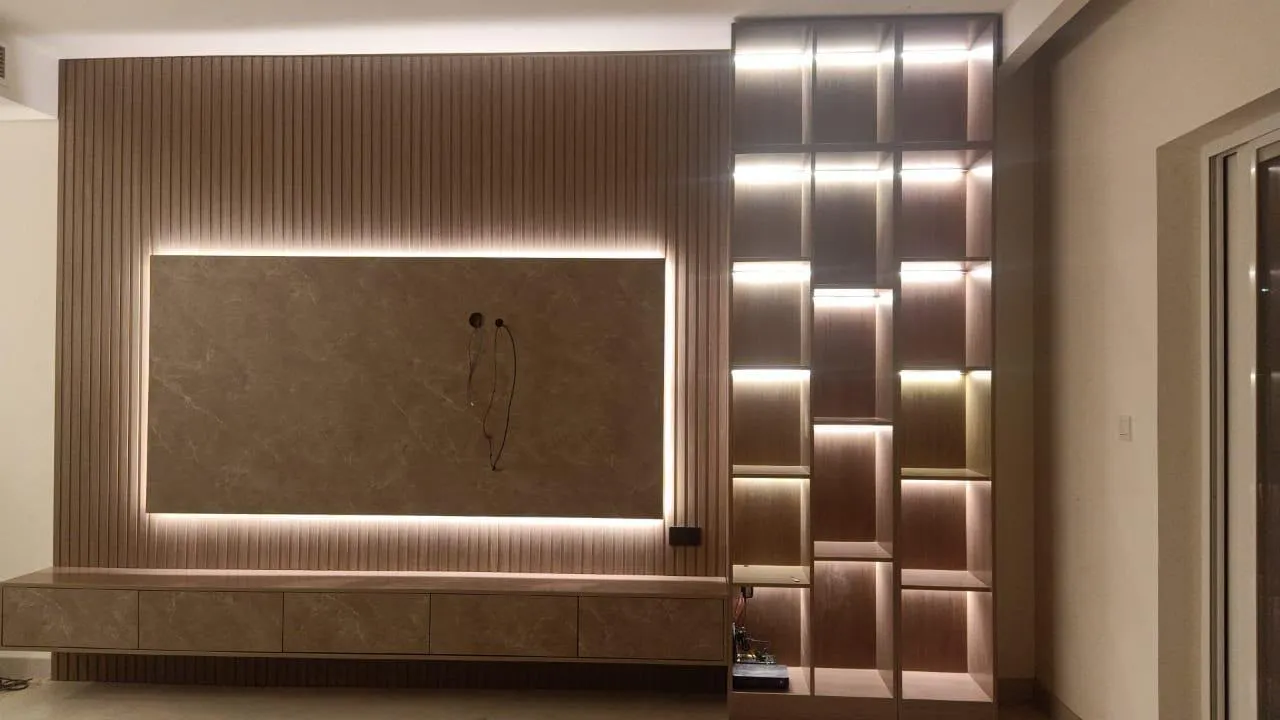
The room on the day: zones and the first hour
A room that is organised in zones is a room where the work goes quickly. The plan shows six marks. A protected route runs from the entrance to the wall. A landing zone near the wall is where each piece stands, labelled, while the team checks the list. A work zone, an arm's length wide, is kept clear in front of the wall. A working socket is within reach. The furniture is out of the zone. And a dust sheet covers whatever has to stay.
Walk the room with the team leader before the first piece comes in. Point out the places you were worried about: the floor that sounds hollow, the wall that sounds hollow, the socket that sparks, the AC pipe you know about. A team that knows what you know works differently from one that discovers it. Then confirm the order: which piece goes in first, where the heavy pieces stand, and where the console goes. The order of fixing itself is in the installation day checklist.
Keep one person at home who can make decisions. Small questions come up in the first fifteen minutes: whether a curtain can be moved, whether a socket may be covered, whether an item can be taken to the balcony. A decision made at once is worth more than a better decision made tomorrow. If you cannot be there, name someone and tell us.
At the end of the day, the team clears the room, removes the protection with you, and takes the waste. Walk the wall together, and use the list in our handover checklist for the finish. Photograph the floor and the walls beside the wall, because they show that nothing else was marked.
Three rooms, three plans
A new apartment, handed over a few weeks ago. The walls are painted, the floor is new porcelain, and the air conditioning has been running for a week. The only hidden question is the wall: block or gypsum, and what is inside it. The plan: send the developer's drawings, photograph the room, protect the floor with board, install after the building's slot is confirmed. This is the simplest case, and the preparation is mostly a matter of paperwork.
An occupied apartment, lived in for three years. The room is full of furniture, there is a rug, a sofa that cannot leave, and a child who plays on the floor. The plan: agree the day, clear the room to the opposite end, cover what stays, and keep the child and pets elsewhere for the hours of the work. The walls are dry and the building is old enough that the services behind the wall may not be in the drawings, so the team uses a detector and asks you about any earlier work.
A villa extension, still being fitted out. Painting finished yesterday, tiles last week, and the owner wants the wall installed as soon as possible. The plan is to wait. We would ask for the date of the last wet trade, check that the air conditioning has been running, look at the wall with the free measuring visit and, if the room is not ready, agree a later date rather than install into damp. A week's delay is cheaper than a swollen edge. It is also where our guide to villa TV walls helps with planning the wall for a larger room.
Mistakes that slow the day or damage the wall
The first mistake is scheduling the wall straight after the painters. The second is not asking when the last wet trade finished. The third is assuming the socket behind the TV will do for tools. The fourth is drilling without locating pipes. The fifth is forgetting that the room needs protection as much as the route does.
The sixth is leaving furniture in the work zone. The seventh is letting the room fill with people, pets and children while pieces are being carried. The eighth is making no one responsible for decisions. The ninth is hiding a damp patch. The tenth is assuming that the delivery slot is the installation slot: the lift booking gets the pieces in, and the room is what lets them be fixed.
The last mistake is not sending a photograph of the room in advance. A photograph takes a minute and shows us the floor, the wall, the socket, the AC unit and the light, and it often changes what we plan to bring. We would rather learn about the room from a photograph than from the doorstep.
A readiness checklist
Run through these eight lines the week before delivery, and tick each. The drawing shows the same list as a progress bar; each tick takes the room closer to ready.
- Room finished and painted; the last wet trade has dried.
- Walls and floor dry; no stains, no damp smell.
- A live socket near the wall, with a clear path for a lead.
- Air conditioning running, room ventilated, no open windows to the humid air.
- Furniture moved out of the work zone; dust sheets on what stays.
- Floor protected from the door to the wall.
- Building slot and parking agreed in writing.
- Pipes, conduits and any damp located and reported.
How the schedule fits together
Preparing the room is easier when it sits inside a schedule you can see. The order is the measuring visit, the drawing, your approval, production in the workshop, delivery and installation, and a handover, and the room has to be ready at the point where delivery arrives, not before and not after. Our guide to planning a media wall lays out the early decisions, and the quotation checklist shows what each line should name, including anything that depends on the room.
If you are building or renovating, tell the other trades when the wall is coming. Painters need to finish before it, electricians need the socket positions from the drawing, and the air-conditioning team needs to know the wall is going over a pipe. Our 3D feature wall guide and fluted panel guide show walls where the surface is complex enough that the room's finish matters even more.
If you are also choosing the finish, do it before the room is ready, not on the day. A sample approved in your own light, as in the finish sample guide, means nothing has to be decided on site, and the team can concentrate on fixing. A maker who explains this at the start is worth the choice; our guide on choosing a contractor says what else to ask.
Special cases: villas, offices and rooms still being fitted out
A villa often has a larger, plainer room and a longer route, and a wall that comes in bigger pieces. The preparation list is the same, but the protection matters more because the floor is larger and the route longer; our guide to villa TV walls explains how those walls are planned, and the majlis TV wall guide covers a room where the wall is a formal feature.
An office is different again. Working hours, shared corridors and a building that must stay open all shape the day, and the sequence is set by the building's rules, which you should ask for in writing. Our office media wall guide and the office media wall design guide explain how a screen wall is planned for a meeting room, and the same preparation points apply to the floor, the power and the pipes.
A bedroom wall is smaller and quieter, but it is often the room where furniture cannot be moved far. If the wall sits next to a wardrobe, the bedroom TV unit guide explains how the two fit together, and the preparation is mainly about moving the bed and covering it. For any room, a photograph sent on WhatsApp tells us what to plan, and our Sharjah media walls page shows where our workshop is and where we fit.
Use the pricing guide to get a sense of how room size and finish move the figure, and remember that the final number comes from the quotation, not from a guide.
What we do about it, and what to send us
Our media walls start from AED 3,500 per project for a compact panel and floating console in standard laminate; the final figure comes from the quotation and depends on the wall size, the finish (laminate, veneer or lacquer), marble-effect panels, lighting and an electric fireplace. We make them in our Sharjah workshop and our own team installs them across the UAE. The measuring visit is free, and once measurements and details are agreed, a 60% advance is paid and production starts when it is received, with up to about 10 days depending on size and design. The founder, Ali Haider Basra, has ten years in the trade. The 5-year limited warranty covers wood-based boards only, and hinges, runners, labour and misuse are excluded.
To check your room, send a photograph of the wall taken straight on from the middle of the room, a photograph of the floor and the entrance, the position of the sockets, the date of the last wet trade if the room is new, and the TV size. We will say what we would want to see before the date is fixed. If your building has a lift booking, the delivery guide explains the rest. The media walls page shows the range, and the price guide explains what moves the figure.
The simplest next step is a WhatsApp message: the wall photo, the TV size, a photo of the room and the date you have in mind. Orders are confirmed on WhatsApp, so the thread, the photographs and the quotation stay in one place. A checklist of what to include is in what to send before a consultation.
Common questions
What should be ready before a media wall is installed?
The room finished and dry, a live socket near the wall, services behind the wall located, the floor protected and a work zone cleared. The installation day checklist lists all eight.
Can a media wall be installed straight after painting?
It is better to wait: paint and plaster put moisture into the room, and wood-based boards take it up. Run the air conditioning and let the room dry first. Humidity and MDF explains the risk.
Do I need an electrician before the media wall is installed?
Not for the lighting inside our wall, which our own team installs. A new socket position is agreed in the drawing; a separate socket job is for your own electrician. Sockets and power for a media wall explains how we plan it.
Does a media wall need a water supply on site?
No, but pipes and drain lines may be in the wall behind it, so locate them before drilling. Block and gypsum walls explains how the wall type affects fixings.
How do I protect my floor during media wall installation?
Lay protection board from the door to the wall and across the work zone, and cover furniture that stays. The installation day checklist shows how the day runs.
Who arranges the lift and parking for delivery?
The building sets the rules and the resident usually books the slot; we supply the dates and vehicle details. Lift and delivery access explains the route.
What should I send before the installation date is fixed?
A photo of the wall, the room and the floor, the socket positions, the TV size and the date of the last wet trade if the room is new. What to send before a consultation lists it.

Sources & specifications
Manufacturer information applies to the named products and systems. Sources reviewed on 10 November 2026.
- USDA Forest Products Laboratory: Wood Handbook ch. 13, Drying and control of moisture content (plastering water load; flooring after plaster is dry)research.fs.usda.gov(opens in a new tab)
- BRANZ Bulletin 587: Dealing with construction moisture in new buildings (high moisture for up to 2 years; swelling of MDF)branz.co.nz(opens in a new tab)
- Purdue Extension FNR-403-W: Controlling moisture content in stored lumber (equilibrium moisture at 35% and 80% relative humidity)extension.purdue.edu(opens in a new tab)
Want this planned for your home?
Consultation and measurement are free. Tell us the rooms, location and what you need; we arrange a sample visit and define the measured quotation.