Media Walls · 21 min read · 7 September 2026
Soundbar and speakers in a media wall: what the wall must allow
What a media wall must provide for a soundbar, a subwoofer or speakers: the gap under the TV, an open front, the HDMI and power routes, a floor socket for the sub and wire routes for in-wall speakers, using five makers' own guides.

By Ali Haider Basra, Founder, Al Tareeq Decor · Contact our workshop
Key takeaways
- Decide the sound system before the wall: a soundbar needs a shelf, a gap under the TV and an open front, a subwoofer needs floor space and a socket, and in-wall speakers need positions and wires fixed before panels close.
- The gap under the TV differs by product: Sonos asks 4 in for Arc, 3 in for Amp, 2 in for Beam. Use your own soundbar's guide, not one number.
- Do not shut a soundbar in: Sonos says not to enclose Arc Ultra in a cabinet, and asks for clear ends on Arc and Beam.
- Keep the TV's remote sensor unblocked, and give the soundbar one HDMI lead in the signal route and its power in the power route.
- Send us your soundbar or speaker model with the wall photo; the drawing then follows its own guide.
On this page
- Key takeaways
- Soundbar or speakers in a media wall: decide before the wall
- Sound choices and what each asks of the wall
- What the makers' guides actually ask for
- Five Sonos guides, five different asks
- Five checks, in order
- The gap under the TV and the remote sensor
- Do not shut the soundbar in
- One HDMI lead, one power lead, and a socket for the sub
- Speakers beside the TV and inside the wall
- Three set-ups, worked through
- What to take from a soundbar guide before the visit
- Mistakes that cost the most after the wall is built
- Questions to ask any joiner about sound
- A worked height check, step by step
- Cables and routes in more detail
- A simple order of work
- What we do about it
- Common questions
Soundbar or speakers in a media wall: decide before the wall
Sound is the one part of a media wall that is easy to forget until the wall is up. A soundbar needs a shelf or niche the right size, a gap under the TV, an open front, an HDMI lead and a power lead. A subwoofer needs floor space and a socket. In-wall or beside-the-TV speakers need their positions and their wires decided before any panel closes. Every one of those is cheap on the drawing and expensive after the finish is on.
This guide covers what the wall has to provide for each kind of sound system, using the makers' own installation guides for the numbers. Each guide is for one product, so use the guide for the product you own; none of the figures below is a rule for all soundbars. If you have not chosen a TV yet, read whether to buy the TV before the media wall; if you have not chosen sound either, the table below shows what each choice asks of the wall. For what a media wall is made of and where the sound fits in the whole, see what a media wall is.
Sound choices and what each asks of the wall
TV speakers only
- What the wall must provide
- Nothing extra
- What to decide on the drawing
- Nothing; leave a spare conduit in case you add sound later
Soundbar on the console
- What the wall must provide
- A shelf, a gap under the TV, an open front, HDMI and power
- What to decide on the drawing
- Console height, the gap and the shelf width
Soundbar on its own bracket below the TV
- What the wall must provide
- A fixing point and the same gap and cables
- What to decide on the drawing
- Bracket position and cable route behind the panel
Compact speakers beside the TV
- What the wall must provide
- A stable surface at each side, a wire route to the console
- What to decide on the drawing
- Distance apart, height and speaker cable route
In-wall speakers
- What the wall must provide
- A cut-out and cavity for each, wire routes, access
- What to decide on the drawing
- Positions, cut-out sizes and a pull cord, before panels close
Subwoofer
- What the wall must provide
- Floor space with a free slot, a socket at floor level
- What to decide on the drawing
- Where it stands and that no panel boxes it in
Which row suits you depends on the room and the equipment; send us your soundbar model on WhatsApp so the drawing can use its own guide.
What the makers' guides actually ask for
We opened the installation guides of five Sonos products on sonos.com and read what each asks of the space around it. They differ, which is the point: a niche drawn for one soundbar can be wrong for another. The table shows what each page says. None of the pages shows a date, so we cite them as read on 9 November 2026.
Five Sonos guides, five different asks
Arc
- Gap below the TV
- At least 4 in (102 mm) between the top of the soundbar and the TV
- Sides and ends
- Both ends at least 1 ft (30 cm) from a wall or other obstructions
- Other points
- Can be wall mounted below the TV or placed in or on a TV stand
Arc Ultra
- Gap below the TV
- At least 4 in (10 cm) between the top of the soundbar and the TV
- Sides and ends
- Both ends at least 1 ft (30 cm) from a wall or obstructions
- Other points
- Do not enclose it in a cabinet or a corner; place it in front of and below the TV
Beam (Gen 2)
- Gap below the TV
- At least 2 in (50 mm) from the TV
- Sides and ends
- Both ends at least 1 in from a wall; on a shelf, 2 in clear on both sides
- Other points
- Do not block the TV's IR sensor; 1 in free above for the controls
Amp (an amplifier, not a soundbar)
- Gap below the TV
- At least 3 in (50 mm) from the TV
- Sides and ends
- On a shelf, 3 in clear on all sides
- Other points
- Do not block the TV's IR sensor or any ventilation opening; 0 to 40 °C
Sub 4 (subwoofer)
- Gap below the TV
- Not applicable
- Sides and ends
- At least one side of the slot free of obstruction
- Other points
- On the floor: nothing on top, and at least 1 in clear above it under furniture
Each row is one product's own guide on sonos.com. They are not a standard for every soundbar; check your model's guide before the niche is cut.
Five checks, in order
The drawing runs the five checks in the order we mark them on a wall: the TV's remote sensor, the gap under the TV, a soundbar that is not shut in, the subwoofer, and speaker positions and wires. The chart at the bottom shows the gap under the TV that three Sonos guides ask for: 4 inches for Arc, 3 for Amp, 2 for Beam. Three guides, three answers, which is why the number on your drawing comes from your soundbar's own page.
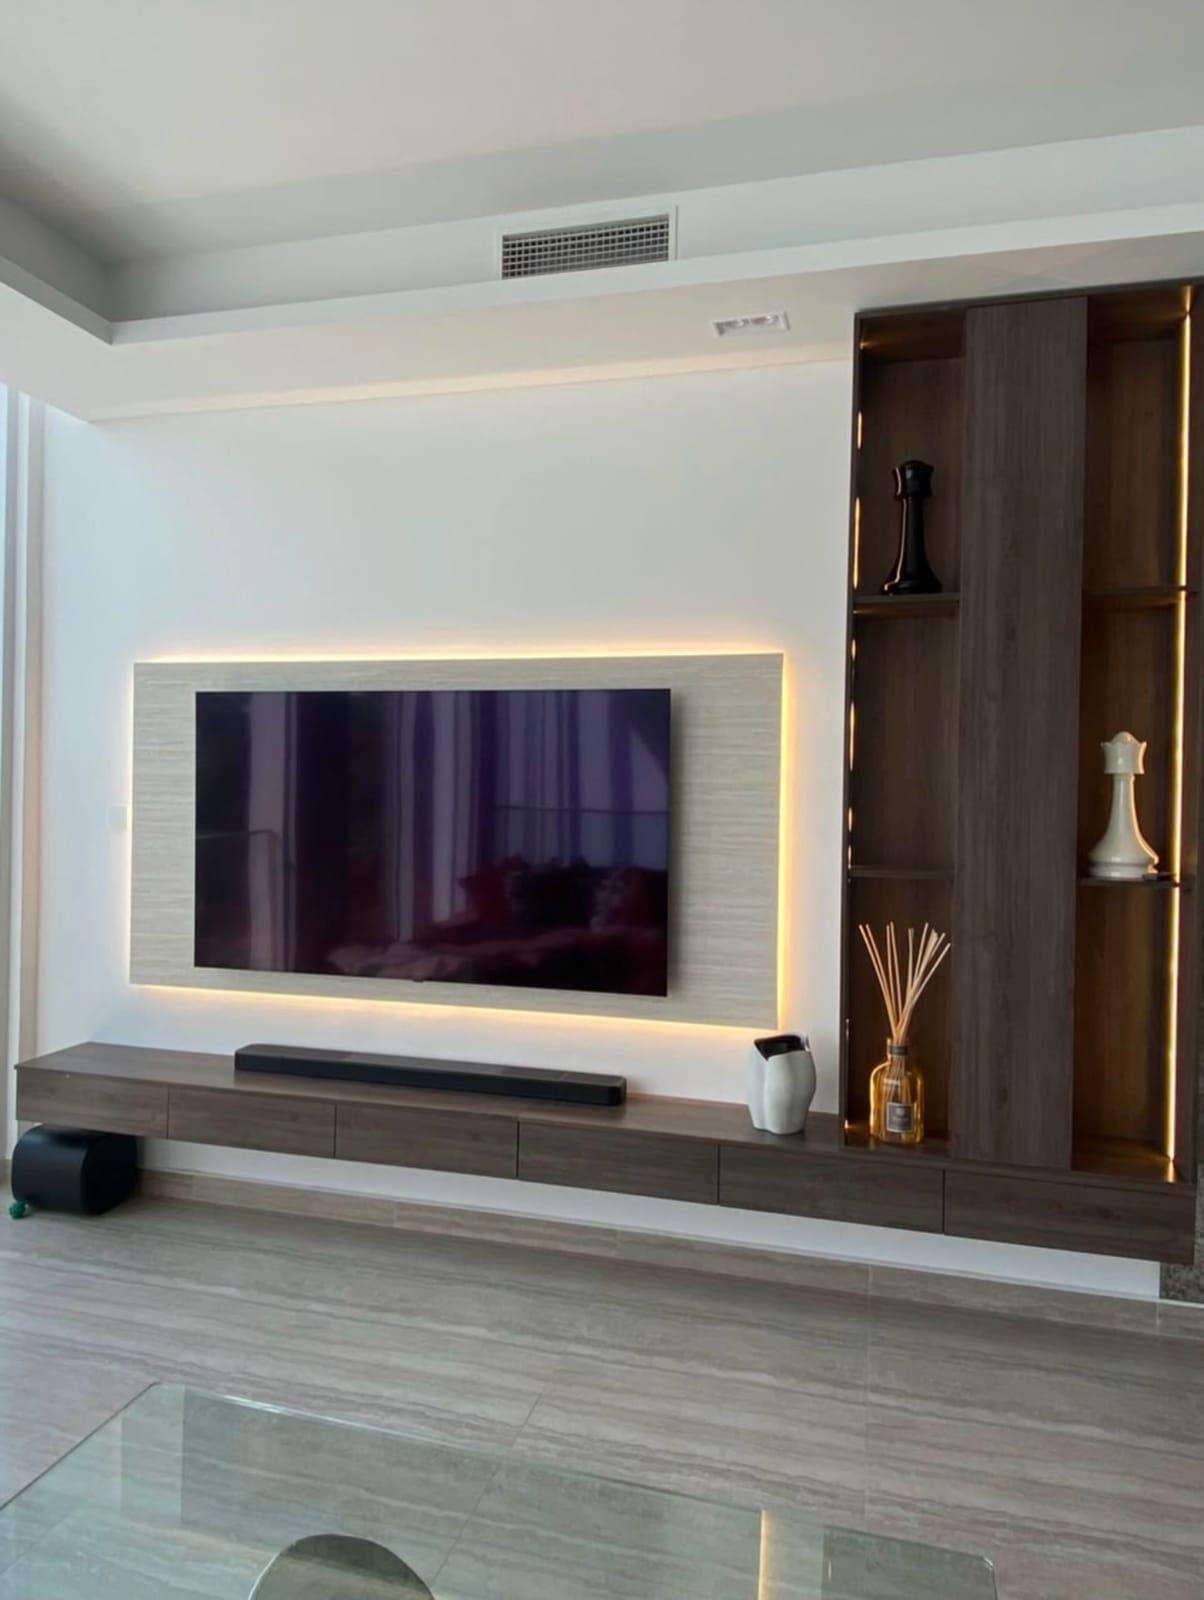
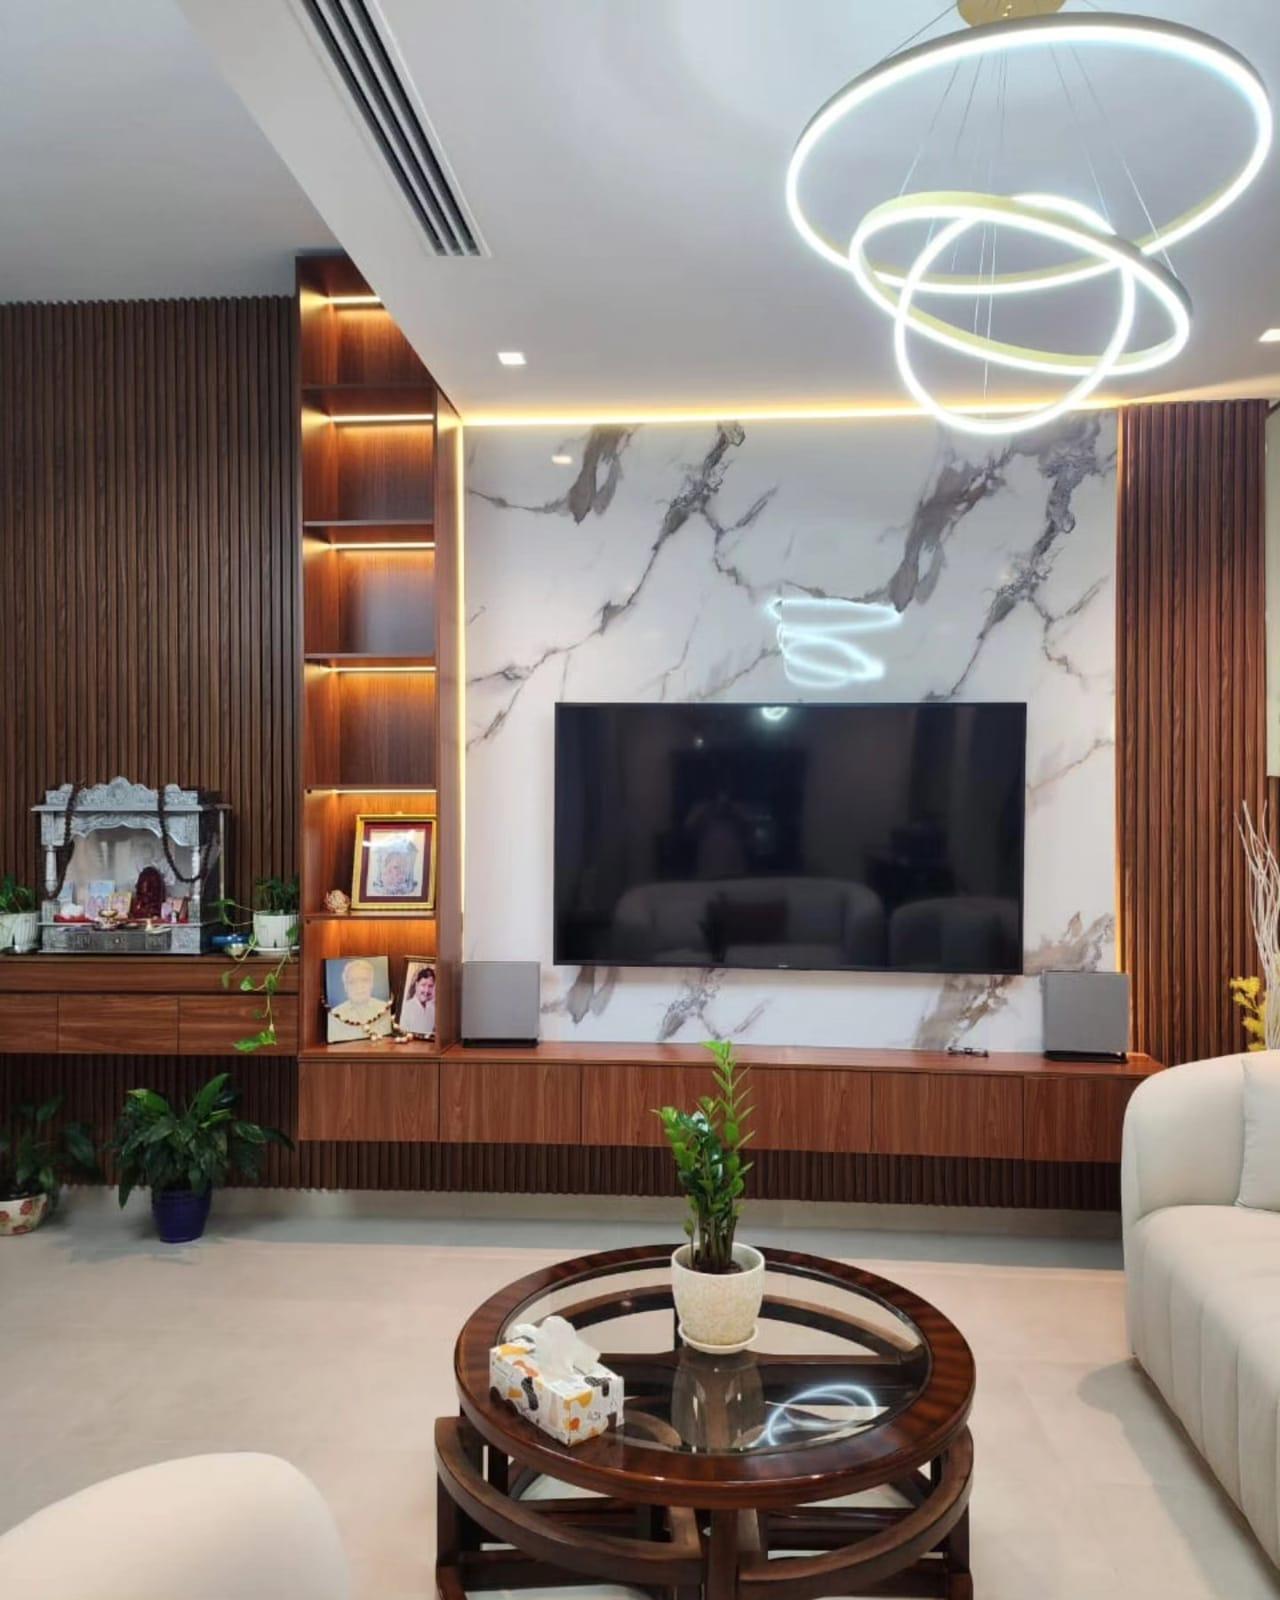
Whether the wall is a full-height design or a compact panel with a console, as full wall or compact media wall compares, the same five checks apply. The photograph of a finished wall shows the layout the drawing describes: a soundbar on a floating console under the TV, a subwoofer on the floor at one end, and the ceiling air-conditioning grille above the wall. The AC above the wall matters for the boards too, as humidity and AC behind a media wall explains.
- 1. The TV's remote sensor stays clear: the Sonos Beam and Amp guides both say not to block it
- 2. The gap under the TV comes from the soundbar's own guide: Arc 4 in, Amp 3 in, Beam 2 in
- 3. A soundbar that is not shut in: Sonos says not to enclose Arc Ultra in a cabinet, and keeps its ends clear
- 4. A subwoofer with a free slot and a socket at floor level (Sonos Sub 4 guide)
- 5. Speaker positions and wire routes are fixed before the panels close
The gap under the TV and the remote sensor
The gap matters because the soundbar's top and the TV's bottom edge are where height is decided. Sonos's Arc guide asks for at least 4 inches between the top of the soundbar and the bottom of the TV, its Amp guide 3 inches from the TV, and its Beam guide 2 inches. If the TV on the drawing sits low, the soundbar may not fit under it at all, and the first place to look is the TV's height, which TV height on a media wall covers; the screen size changes the figure too, as TV size and viewing distance shows.
The Beam and Amp guides both say not to block the TV's IR sensor. That is the little window on the TV that the remote talks to, and a soundbar placed carelessly in front of it makes the remote unreliable. On the drawing, mark where the sensor is on your TV (it is in the TV's manual; an office or boardroom screen, as in office media wall design, follows the same rule) and keep the soundbar's top below it or off to one side.
If you might change the TV for a larger one, planning a media wall for a future TV explains why the niche should leave margin; a bigger TV that lowers its bottom edge is the usual way a soundbar suddenly stops fitting. The LED channels around the TV are planned at the same stage; see lighting ideas for a TV wall.
Do not shut the soundbar in
A niche is attractive on a drawing and risky for sound. The Arc Ultra guide says not to enclose it in a cabinet or in a corner and to place it in front of and below the TV, and the Arc and Beam guides ask for clear ends. A deep shelf with a lip in front, or a niche exactly the width of the bar, is the opposite of that. We draw the shelf wider than the bar, with the front open, and ask what your soundbar's guide says about its ends.
The same logic applies to equipment you hide in the console. The Amp guide asks for 3 inches clear on all sides on a shelf, an operating temperature of 0 to 40 °C, and that no ventilation opening is blocked. A closed box with a receiver in it is the kind of space that guide warns against; cable routes and equipment cabinets shows how we give a cabinet air.
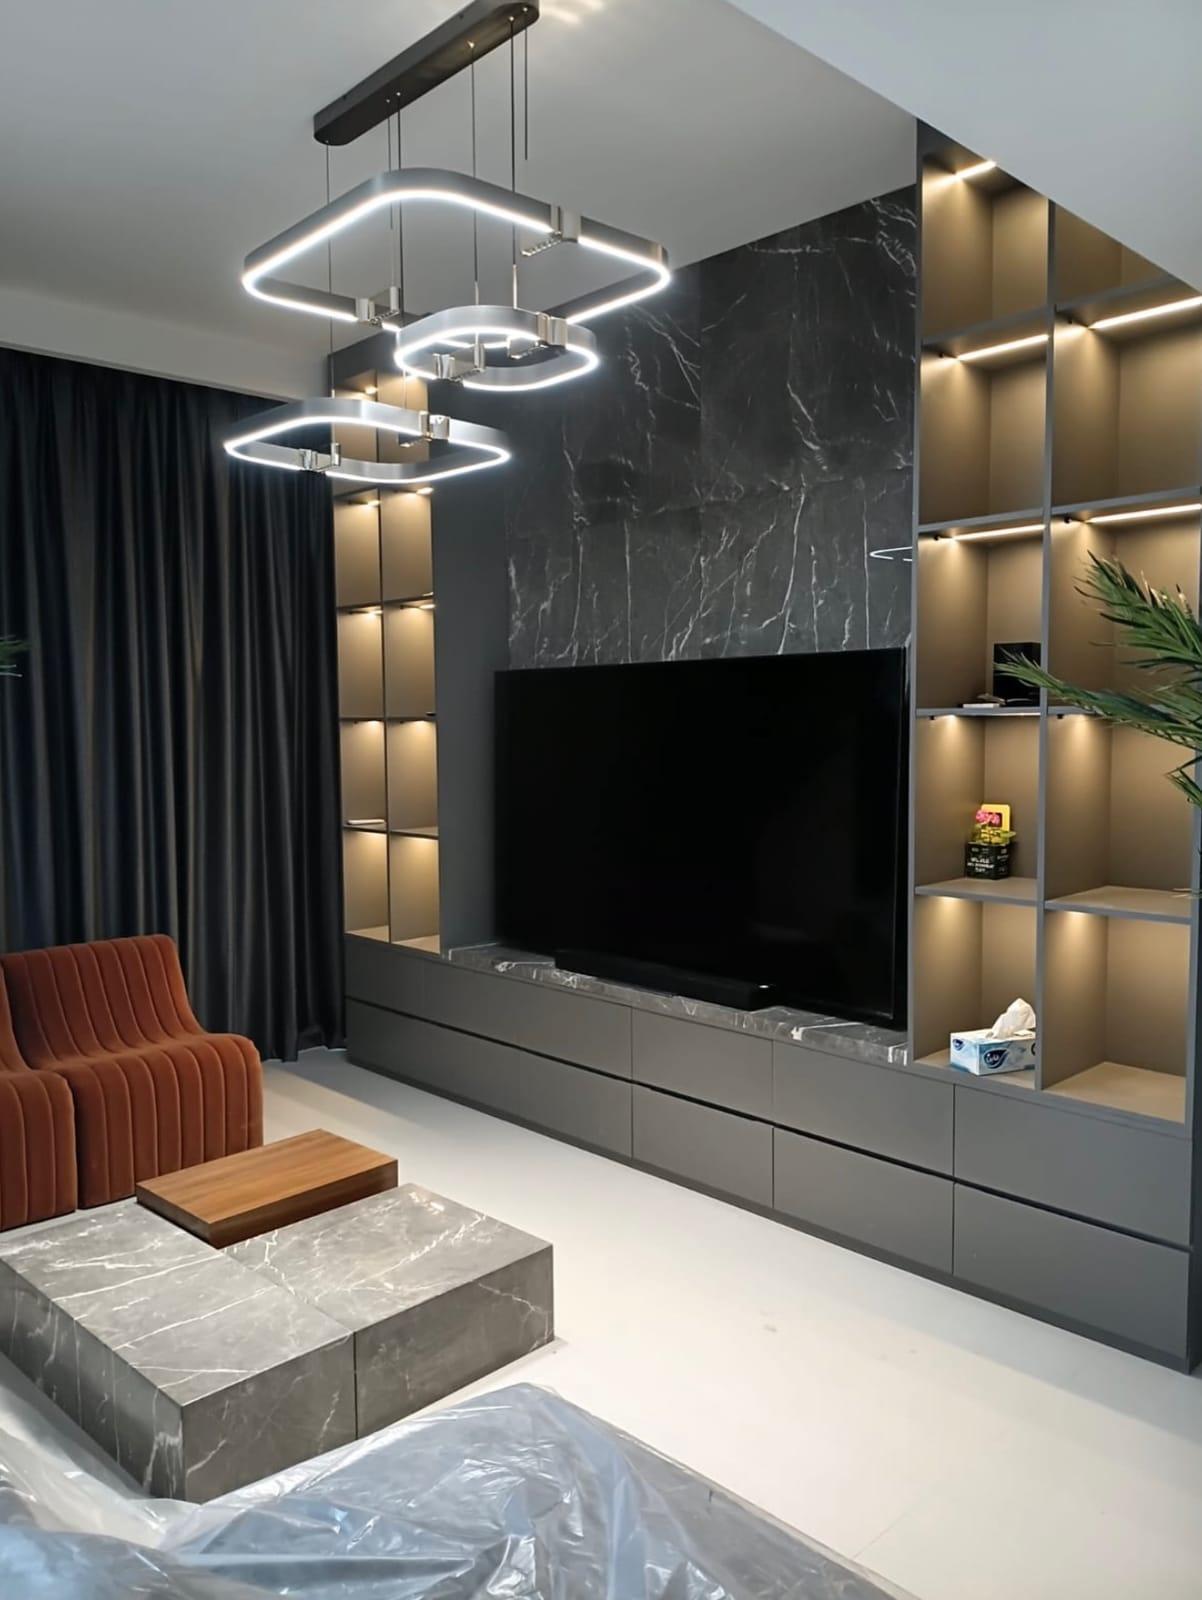
We make no claim that slatted or fluted panels improve a soundbar's sound or that they dull it; we opened no source on that, so we say nothing. If the soundbar will sit in front of slats, the open front and the gap still matter, and the fluted and slatted TV wall guide shows how the faces are built. The stone-effect ledge in the photograph below is one of the choices in marble and stone-look TV walls.
One HDMI lead, one power lead, and a socket for the sub
Most soundbars take the TV's sound through an HDMI port on the TV marked ARC or eARC. HDMI Licensing, which owns the standard, says eARC enables the audio that reaches a TV from cable, satellite, streaming or source devices to be sent to a sound bar through a single HDMI cable. Check your TV's manual for the port marked for it. HDMI's page on its Ultra High Speed cables says certified cables must carry a certification label so a buyer can verify them; its eARC page names no cable type, so we claim none, and the label is the thing to look for when you buy.
Cable sizing, pull cords and keeping power apart from signal are covered in the cable and service-access guide; for the soundbar the point is simple: its HDMI lead joins the TV's in the signal route, and its power lead goes in the power route. A subwoofer needs a socket at floor level where it stands, and the Sonos Sub 4 guide asks for at least one side of its slot to be free of obstruction and, if it is placed horizontally on the floor, for nothing on top of it and 1 inch clear above it under furniture. Do not let a console base or a panel box it in; which sockets can stay and where new ones go explains how we decide.
Speakers beside the TV and inside the wall
Compact speakers on the console, one each side of the TV, are the simplest. They need a stable surface (a floating console such as the TV wall units and floating consoles is one), a speaker cable route to wherever the amplifier or soundbar is, and an even distance from the centre. The photograph shows that layout on one of our walls.
In-wall speakers are different, because they live inside the wall. We opened the installation manual for Sonos In-Wall by Sonance, a PDF revision dated 03.25.20, through a retailer's copy, and it gives numbers for that product: left and right speakers 6 to 10 feet apart with the main listening position 4 to 10 feet from them, surround speakers 5 to 7 feet from the floor, and a clamp that fits wall material 32 mm thick (48 mm with the toggle caps removed). Other makers differ, so take your speakers' own cut-out size, depth behind the speaker and maximum board thickness and give them to us before the drawing is done.
The same manual describes an obstruction survey for walls that already exist, to check the cavity for studs, conduit, pipes, heating ducts and air returns before cutting, and a note to consult local building codes before running speaker wires through walls. Which board and finish the console and panels use is compared in MDF, WPC, PVC and wood panels. A bedroom TV wall with a wardrobe beside it follows the same rules; a bedroom wardrobe with a TV unit shows the layout. In a rented flat or a managed building, ask the landlord or building management in writing before wires are run through a wall. Its grilles are paintable and the flange must be masked if the wall is painted afterward; if you want the grille to match a lacquered or laminated face, ask your speaker maker what finishing it allows.
Three set-ups, worked through
Numbers in a guide only help once you set them against a wall, so here are three set-ups and the questions each raises. We use the makers' figures quoted above and no others; where a figure is missing we say what to ask instead.
The first is a soundbar on a floating console under a wall-mounted TV. Take the soundbar's own guide and read three lines: the gap it wants under the TV, the clearance at its ends, and anything it says about enclosing it. Add the soundbar's height to the gap, and you know how much room there has to be between the console top and the TV's bottom edge. Then check that against the height you want for the TV, which TV height on a media wall helps with. If the sum does not fit, the answer is rarely to squeeze the soundbar; it is to raise the TV a little, lower the console, or choose a lower soundbar. Make the console shelf wider than the bar and keep the front open.
The second is a soundbar on its own bracket below the TV, with the console lower down. The bracket is fixed to the wall or to the panel behind, so the panel must be strong enough where it is fixed, and the drawing must show where. The cables for the soundbar rise behind the panel to the bar, so the cable route is drawn to that point and not only to the TV. Because the bar is then above the console, the console can be shallow and the gap under the bar is simply the bracket's own height.
The third is a soundbar plus a subwoofer plus two speakers beside the TV. Here the wall carries more: a shelf or bracket for the bar, a floor slot for the sub with a socket close by, a stable surface or fixing at each side for the speakers, and a speaker cable from each side to the equipment. Draw all of it at once. Of the three set-ups this is the one most often changed after the finish is chosen, and each change costs more than the same line on the drawing would have.
Notice that in none of the three do we give a single universal gap. The guides disagree with each other, from 2 inches to 4, and the right figure is the one for the product on your shelf.
What to take from a soundbar guide before the visit
You do not need to read the whole manual. Open the maker's guide for your model and copy six facts onto a note. First, the width, height and depth of the bar. Second, the gap it asks for between the bar and the TV. Third, what it asks for at the ends and sides, and whether it may be placed on a shelf or in a niche. Fourth, whether the guide says anything about enclosing it. Fifth, which HDMI port it uses, and whether it has its own power lead. Sixth, whether it needs the TV's IR sensor clear.
For a subwoofer, add the footprint, whether it stands upright or lies flat, and the clearance the guide asks for around it. The Sonos Sub 4 guide, for example, asks that at least one side of its slot is free of obstruction, and if the unit lies flat on the floor, that nothing sits on top. Other makers write different things, so take the figure from your own guide and not ours.
For in-wall speakers, add the cut-out size, the depth needed behind the board, the maximum board thickness, and whether the grille can be painted. Send these to us with a photo of the wall, and the drawing is made around them. We would rather draw once than move a cut-out later.
Mistakes that cost the most after the wall is built
Drawing the niche before the soundbar is chosen. The niche is then cut for an imagined bar, and the real one is a different width, height or depth. Choose the bar, or at least its likely size, first.
Sizing a niche to the exact width of the bar. The guides for Arc and Beam ask for clear ends, and a niche that fits like a glove leaves none. Make the shelf wider than the bar.
Closing the front with a door or a slat panel. An enclosed soundbar is what the Arc Ultra guide says not to do. If you want a door, ask what your own bar's guide permits and keep the speaker grille out of the way.
Placing the bar in front of the TV's remote window. The Beam and Amp guides both say not to block the IR sensor, and a TV that stops answering its remote is a daily annoyance.
Forgetting the subwoofer socket. A sub needs power where it stands. A socket high on the wall and a lead trailing over the floor is the usual fix nobody likes; media wall sockets and power explains how we place sockets in advance.
Running speaker wires after the panels are fixed. In-wall and side speakers need their wires pulled before the board closes, ideally with a pull cord left in for later. A wire that has to be added afterwards means opening a finished wall.
Using a thin or random HDMI lead. The standard body says certified Ultra High Speed cables carry a label so you can verify them; look for the label when you buy, and keep the lead short enough to be tidy but long enough to pull out.
Questions to ask any joiner about sound
Whichever joiner you choose, these questions show how carefully the sound has been planned. Where will the soundbar sit, and what is the gap between its top and the TV? Is the front open, and are the ends clear? Where is the TV's IR sensor in relation to the bar? Where does the subwoofer stand, and where is its socket? Which route does the HDMI lead take, and which does the power take? If there are speakers, where are their wires and is a pull cord left in? Is there a way to reach the equipment later without breaking the finish?
The last question matters more than it sounds. Equipment fails or is replaced, and a wall with no access panel turns a ten-minute swap into a repair. Our own approach to access is set out in the cable and service-access guide; in short, the routes and the access are drawn before production.
Ask also for the answers in writing, on the drawing or the quotation. A reply in a chat message is useful, but a line on the quotation is what the workshop builds from.
A worked height check, step by step
Here is how we read a soundbar guide against a wall, using only the figures quoted earlier. Take the Sonos Arc guide as the example, because it gives a clear number: at least 4 inches (102 mm) between the top of the soundbar and the bottom of the TV when the bar sits below the TV. That is one input. The others are the bar's own height, which comes from the maker's specification for your model, and the height you want for the TV's bottom edge, which comes from the viewing position.
Work upward from the console. The console top is the base level. Add the height of the soundbar and you have the top of the bar. Add the gap the guide asks for and you have the lowest point the TV's bottom edge may take. If your planned TV bottom is above that point, the bar fits with room to spare. If it is below, you have a conflict, and there are only three ways out: lower the console, raise the TV, or choose a different bar. We would not shave the gap, because the guide's number is the maker's own.
The same exercise with the Beam guide uses 2 inches (50 mm) from the TV, and with the Amp guide 3 inches, so the result for each bar is different even on the same wall. This is why we ask for your model before the drawing. If you have not chosen yet, a drawing that leaves the larger gap covers the other two, but it may sit the TV higher than you like, and that is a choice to make on purpose.
Finally, check the sides. The Arc and Arc Ultra guides ask for both ends to be at least 1 foot (30 cm) from a wall or other obstruction. If the niche has side panels, the shelf has to be that much wider than the bar, or the panels must be set back. Write the final shelf width on the drawing so that the workshop cuts it, not the installer on the day.
Cables and routes in more detail
A soundbar adds two leads that a bare TV does not need: a signal lead and a power lead. The signal lead is usually the HDMI cable from the TV's marked port, and HDMI Licensing says eARC sends the TV's audio to a sound bar through a single HDMI cable. The power lead goes to a socket. Because the two should not run bundled together in a tight bend, we draw them as two routes, one for signal and one for power, as the cable and service-access guide sets out.
Draw each route end to end. Where does the lead leave the TV, where does it pass behind the panel, where does it come out at the soundbar, and where does it join the socket? A route drawn only as an arrow tends to become a hole in the wrong place. A route drawn with its two end points and any bend can be built as drawn and checked afterwards.
Leave a spare. A conduit or a pull cord left in the wall costs little at the time and allows a new lead later, for a different bar, a streaming box or a second speaker. This is the cheapest insurance in the whole job, and it is also why we ask whether you might add sound later even if you have none today.
The subwoofer follows the same logic with a different geometry. It always needs power at the floor, and we make no claim about how any particular model connects to its soundbar, so the point is simply that your sub's guide tells you whether it needs a signal lead as well. If it does, that is a third route, and it should be on the drawing.
A simple order of work
If you are building from scratch, this is the order that avoids rework. Choose the TV size and mounting first, since it sets the height of everything under it. Choose the soundbar, subwoofer and speakers next, and copy the facts above from their guides. Draw the wall with the console, niche and routes, and check each of the five checks on the drawing. Agree the finish, the lighting and the quotation. Only then is production started, with the 60% advance paid.
If you already own the equipment, photograph it, note the model, and measure it. If you plan to change it later, say so, and leave a spare conduit and some margin in the niche; planning a media wall for a future TV explains why.
When the wall is installed, we connect nothing for you beyond what is agreed, but the routes are in place so that your own installer or the shop that sold the equipment can set it up in minutes. Keep the guides with the quotation, so the next person who touches the wall knows what it was drawn for.
What we do about it
At the free measuring visit we ask what sound equipment you have or plan to buy, and we measure the wall. Our media walls include concealed wiring for the TV, soundbar, consoles and mounts, and the drawing shows the console, the niche and the cable routes before anything is made. Walls start from AED 3,500 per project, for a compact panel with a floating console in standard laminate; the final figure comes from the quotation and depends on wall size, finish, marble-effect panels, lighting and any electric fireplace. Our price guide explains what changes it. The materials guide lists what the quote should name.
After the details are agreed, a 60% advance is paid and production starts when it is received; the remaining stage is agreed with you. Most walls are built in our Sharjah workshop in up to about 10 days, depending on size and design, and the wood-based boards carry a 5-year limited warranty; hinges, runners, labour and misuse are not covered, and it is not a warranty on the whole wall. Ali Haider Basra, our founder, has worked in the trade for 10 years.
To begin, message us on WhatsApp with a photo of the wall, the TV size, the room and the soundbar or speaker model. What to send for a media wall consultation lists what helps most. Our media walls page shows the range, media wall design ideas the finishes, and the Sharjah media wall page gives the workshop location.
Common questions
How much gap should I leave between my TV and soundbar?
It depends on the product: Sonos asks for at least 4 inches for Arc and Arc Ultra, 3 for Amp and 2 for Beam in its own guides. Check your soundbar's guide, then see TV height on a media wall.
Can I put a soundbar inside a niche or cabinet?
Be careful: Sonos says not to enclose Arc Ultra in a cabinet or a corner, and asks for clear ends on Arc and Beam. Draw the niche wider than the bar with an open front. See planning a media wall.
Which HDMI port does a soundbar use?
Usually the TV port marked ARC or eARC; HDMI Licensing says eARC sends a TV's audio to a sound bar through a single HDMI cable. Check your TV's manual. See media wall cable management.
Where does the subwoofer go in a media wall?
On the floor with a free slot and a socket at floor level; the Sonos Sub 4 guide asks for at least one side of the slot to be unobstructed. See media wall sockets and power.
Can in-wall speakers go in a media wall?
Possibly, but plan them before the panels close: cut-out size, cavity depth, board thickness and a wire route come from the speaker's manual. Ask the landlord or building management in writing if the flat is rented. See what a media wall quote should name.
Does a fluted or slatted panel change how a soundbar sounds?
We opened no source on that, so we make no claim either way. Keep the soundbar's front open and its gap as its guide says. See fluted and slatted TV wall guide.
How do I start a media wall with a soundbar?
Message us on WhatsApp with a photo of the wall, the TV size, the room and your soundbar model; we arrange a free measuring visit. Walls start from AED 3,500 per project. See what to send for a consultation.

Sources & specifications
Manufacturer information applies to the named products and systems. Sources reviewed on 9 November 2026.
- Sonos, Arc guide (no date shown): gap of 4 in below the TV, ends 1 ft from obstructions, wall mount below the TV or on a standsonos.com(opens in a new tab)
- Sonos, Arc Ultra guide (no date shown): do not enclose in a cabinet or corner; place in front of and below the TV; 4 in gapsonos.com(opens in a new tab)
- Sonos, Beam (Gen 2) guide (no date shown): 2 in from the TV, do not block the IR sensor, 2 in clear each side on a shelfsonos.com(opens in a new tab)
- Sonos, Amp guide (no date shown): 3 in clear on all sides on a shelf, 3 in from the TV, 0 to 40 °C, do not block ventilationsonos.com(opens in a new tab)
- Sonos, Sub 4 guide (no date shown): free side of the slot, nothing on top, 1 in clearance under furnituresonos.com(opens in a new tab)
- HDMI Licensing, Enhanced Audio Return Channel (eARC): audio to a sound bar through a single HDMI cablehdmi.org(opens in a new tab)
- HDMI Licensing, Ultra High Speed HDMI cable: certification label to verify cableshdmi.org(opens in a new tab)
- Sonos In-Wall by Sonance installation manual (revision 03.25.20, retailer copy): speaker spacing, obstruction survey, building codes note, wall thickness, grille paintingadorama.com(opens in a new tab)
Want this planned for your home?
Consultation and measurement are free. Tell us the rooms, location and what you need; we arrange a sample visit and define the measured quotation.