Media Walls · 21 min read · 4 November 2026
Media wall step by step: from first message to finished wall in the UAE
A media wall step by step in the UAE: the eight steps from the first WhatsApp message to handover, what you do and what we do, the workshop, the chain of fixings and common delays.

By Ali Haider Basra, Founder, Al Tareeq Decor · Contact our workshop
Key takeaways
- A media wall is made in eight steps: message, free visit, drawing and quote, approval and advance, workshop, delivery and fitting, handover check, final stage and aftercare.
- Most of the work is on paper: a wall that is measured, drawn and approved carefully is fitted with few surprises.
- Once the details are agreed, a 60% advance is paid and production starts when it is received; workshop time is up to about 10 days, depending on size and design.
- The television's load travels back through bracket, backing frame and wall; never hang it from the face of a panel, and check each fixing's rated limits.
- Your parts are mostly decisions and access: decide the TV first, read the drawing within a day or two, book the lift, and inspect at handover.
On this page
- Key takeaways
- A media wall step by step: the whole route in one page
- Step 1: the first message
- Step 2: the free measuring visit
- Step 3: the drawing and the quotation
- Decisions hidden inside step 3: board, finish, light and heat
- Step 4: approve the details and pay the advance
- Step 5: inside the workshop
- Between workshop and fitting: get your home ready
- Step 6: delivery and fitting, and what is fixed to what
- Who does what, at every step
- Step 7: the handover check
- Step 8: the final stage and the aftercare
- A one-page brief to write before step one
- Walls and homes that need an extra step
- Where delays come from, and how to avoid them
- A worked journey, in order
- What we do, and what to send
- Send us your wall on WhatsApp
- Common questions
A media wall step by step: the whole route in one page
A media wall looks like one object, but it is the end of a sequence of eight small steps, and knowing the sequence makes every one of them easier. You message us with photos of the wall. We visit and measure, free of charge. We draw the wall and send an itemised quotation. You approve the details and pay the advance. The workshop makes the wall. We deliver and fit it. You inspect it with us. And the remaining stage and the aftercare close the order.
This guide walks the route in order. At each step it says what you do, what we do, what is decided and what commonly goes wrong. It deliberately stays at the level of the whole journey: where a step has its own detailed guide, we link to it rather than repeat it, so that this page stays readable in one sitting and the detail pages stay detailed.
If you only remember one thing, remember that most of the work happens on paper before anything is cut. A wall that is measured properly, drawn clearly and approved carefully is fitted in a day with few surprises; a wall that skips those steps is fixed in stages with many. The map below shows the eight steps and where the one gate sits, the advance that starts production.
Step 1: the first message
The first step is yours and takes five minutes. Message us on WhatsApp with a photo of the wall as it is now, the size of the television you have or plan to buy, and a line about the room: apartment or villa, who lives there, what the wall must hold. If you have a picture of a wall you like, send it. We do not need a perfect description. We need enough to ask the right questions.
We reply with a few questions: which floor, whether there is a lift, what the wall is made of if you know, where the sockets are, whether you rent. Those are not formalities. A third-floor apartment without a lift, an old villa wall and a rented flat each change how we plan, and it is cheaper for everyone to learn that now. What to send us for a consultation lists the photos that help most.
What is decided at this step: nothing binding. What commonly goes wrong: a photo taken at an angle that hides the ceiling, the floor and the sockets, or a television size left open. A straight-on photo of the whole wall, from the doorway, solves most of it. And if the television is not yet bought, the guide to buying the TV before the wall explains how to settle on a model.
Step 2: the free measuring visit
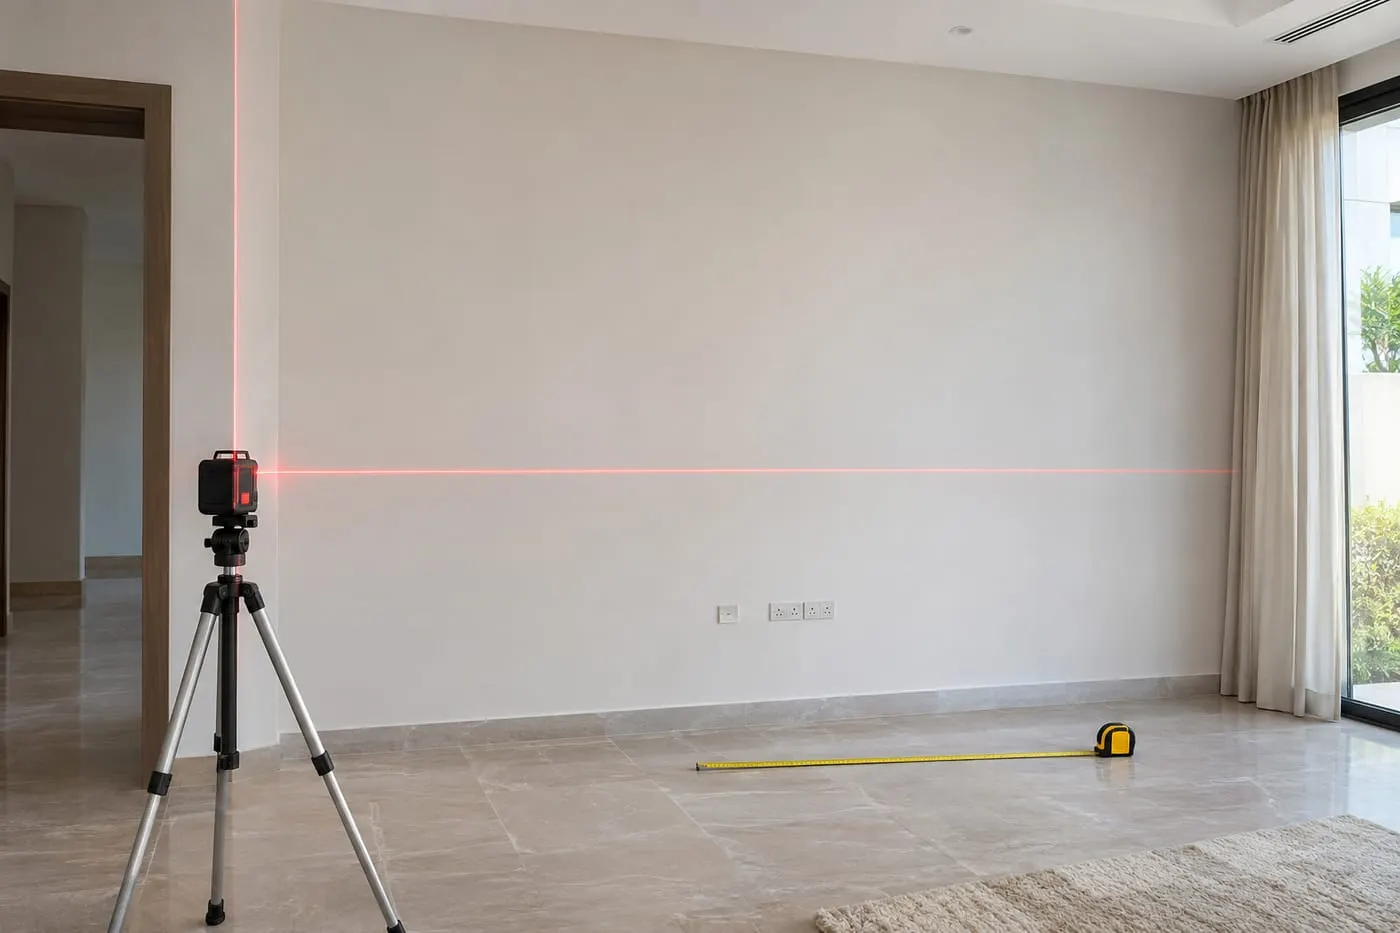
We aim to visit as soon as is practical, often the same day or the next day once you have confirmed, though we do not promise it, and you choose the time that suits you. The visit is free. Someone from our team comes to the room with a laser measure, finish samples and a notebook. They measure the width and height of the wall in several places, because a wall is never quite square, and note the position of every socket, the ceiling and the floor, and what is built behind the surface.
They also look at the other half of the picture: where the sofa will sit, how the daylight falls, what equipment will live in the console and how the cables will route. Samples go up against the wall so you can see the colour in your light. The measuring visit guide explains what is recorded and why. The guide to TV size and distance helps you check the screen against your seating.
What is decided: the facts of the wall, and your shortlist of finishes. What goes wrong: a visit where nobody has thought about the television or the equipment, so the measurements are right and the wall is wrong. A short list prepared in advance fixes this: the television model, the devices, the finish you prefer and the budget you have in mind.
Step 3: the drawing and the quotation
After the visit you receive two documents. The drawing shows the wall as it will be: width and height, the television and its position, the console, shelves, panel or slat layout, LED lines, socket and cable points and joins. The quotation lists the scope in lines, with the finishes, the lighting, the electrical work, how the television is fixed, the delivery and fitting, and the warranty. A media wall starts from AED 3,500 per project for a compact panel and floating console in standard laminate; the final figure depends on the wall size, the finish, any marble-effect panels, lighting and an electric fireplace.
This is the step where you do the most useful work. Read the drawing against your life, not against a photograph. Does the television size match the one you will really buy? Is the console deep enough for the equipment? Does the socket sit where you will plug things in? Is a shelf wider than you can stock? The quotation checklist shows what each line should say. The guide to full or compact walls helps if the size or price is not right yet.
What is decided: the design and the number. What goes wrong: approving a drawing by glancing at it. A drawing is a set of promises with numbers; take an evening with it, mark it, ask questions and expect a reissued version if anything changes. The new version should carry a new date, and the approved one is the reference for everything that follows.
Decisions hidden inside step 3: board, finish, light and heat
Four choices sit quietly inside the drawing and deserve a conscious decision. The board decides how the parts behave under screws, along shelves and near damp; MDF or plywood explains where each fits. The finish decides how the wall looks in your light; stone-look or wood compares the two looks.
Light and heat are the other two. The LED layers, their colour and the dimmers are set on the drawing, and the lighting guide explains them. If an electric fireplace is planned, its clearances and electrical line belong on the drawing as well. For a first idea of how these choices add up, see our pricing guide tool. The range of consoles we make is on the floating console page.
Step 4: approve the details and pay the advance
Once the drawing and the details are agreed, a 60% advance is paid, and production starts once we receive it. The remaining stage is agreed with you and written on the quotation. This is the gate in the middle of the route: before it, a change costs a message; after it, the first panels exist. The reasons and the questions to ask are covered in full in our guide to ordering and the advance, so here we keep to what matters for the route.
Before you pay, run a short check. Is the drawing the final version, with its date? Is the finish named, with the sample you approved? Are the sockets, the lighting and the television model noted? Is the total clear, and what it covers? Is there a receipt for the advance? And are the fitting window and the access arrangements agreed? Eight lines in writing take ten minutes and save the arguments that cost days.
What goes wrong at this step is an unwritten promise: a date, a favour or an extra mentioned on the phone and never confirmed. If it is not in writing, it is not part of the order. We would rather you ask for the confirmation than hope. For the checks to run on any maker, see how to choose a media wall contractor.
Step 5: inside the workshop
Production runs up to about 10 days, depending on size and design. In our Sharjah workshop the boards arrive, the parts are cut to the approved drawing, the finish is applied, the frame, console, slats and LED channels are assembled, and the finished pieces are packed for the lift and the stairs. The picture below shows the five stages. A compact wall in a plain finish moves through them quickly; a full wall with veneer, lacquer, a marble-effect panel, lighting and shelves takes longer, which is why the time is quoted as a range, not a promise.
A small point about boards is worth knowing, though we cite it as general background rather than a claim about any workshop. Wood-based boards exchange moisture with the air. Pfleiderer, a large board maker, says in a transport and storage sheet for its raw particleboards that, relative to the ambient humidity, the boards will attain an equilibrium moisture content, which can make them shrink or swell, that storage and processing should match the final installation climate, and that boards stored in open-sided conditions should be acclimatised for at least 48 hours before processing, giving 20 °C and 65% relative humidity as its example. That sheet is for Pfleiderer's raw particleboard, not for every board. The USDA Forest Service describes equilibrium moisture content in the same terms, as the moisture wood reaches at given temperature and humidity. It is a good question to ask any maker: how are boards stored before cutting?
What you do during this step: very little, and that is deliberate. Do not change the design now; changes at this stage are the expensive kind. Use the time to prepare your home, which is the subject of the next step, and to settle the television and equipment. For why a change gets heavier the later it comes, see the curve in the ordering guide.
Between workshop and fitting: get your home ready
The days before fitting are for preparation, and a little preparation removes most delays on the day. Clear the area in front of the wall, so that the team has room to work and the finished pieces have somewhere to lean. Protect or clear furniture and the floor. Have the television and the equipment accessible. Confirm the lift, the parking and the building's rules for deliveries and working hours, and ask your landlord or building management in writing if you need anything from them.
Two guides cover this in detail. Delivery access for apartments explains how to measure the route from the vehicle to the room, and what to photograph and ask. The installation day checklist covers the day itself: what to clear, what the sequence looks like and what an occupied household should do.
What commonly goes wrong: a lift booked for the wrong hour, a car park full of delivery vehicles, a television still in its box in another room. None of these is dramatic, and all of them are avoidable with a short list. If anything on that list is uncertain, tell us before the day, not on it.
Step 6: delivery and fitting, and what is fixed to what
On the day, our team delivers the pieces, checks the wall once more and fits the wall in a sequence: marking out the level and the centre line, fixing the backing frame, fixing the panels and slats to the frame, fitting the console, installing the LED channels and their wiring, and mounting the television bracket and the television. Fitting is where the drawing becomes a wall, and where the question of what is fixed to what matters.
The chain runs from the wall outwards. The wall itself, block, concrete or gypsum, is the structure. The backing frame is fixed to it. The panels are fixed to the frame, the console is fixed to the wall or the frame, and the television bracket is fixed to a solid backing. The load of the television travels back along that chain into the structure; it never hangs from the face of a panel. Block versus gypsum explains why the wall type changes the fixings.
The bracket matters too. Televisions carry a standard pattern of mounting holes: the VESA flat display mounting interface, which Wikipedia describes as a family of standards first published in 1997 and extended in 2006, with patterns such as 100 by 100 mm, 200 by 200 mm and 400 by 400 mm. Check that the bracket suits your television's pattern and weight. And fixings have limits: a plasterboard fittings data sheet from Bullfix says those fixings are not recommended with extendable TV arms and warns when the load centre sits more than 150 mm from the wall. That is one maker's guidance, but it is the reason to ask what each fixing is rated for.
Who does what, at every step
It helps to see the whole thing as a partnership. At each step you have a part and we have a part, and the order runs smoothly when both are done promptly. In the message step you send the photos and we ask questions. In the visit, you choose the time and we measure and show samples. With the drawing, you read and approve and we draw and itemise. At the advance, you confirm and pay and we start production on receipt. In the workshop you do nothing and we cut, finish and assemble. For fitting, you clear the area and give access and we deliver and fit. At handover you inspect and list any snags and we put right what is listed. And at the final stage you keep your receipts and terms while the last stage is settled as agreed.
The matrix below puts that in one view. Notice that your parts are mostly decisions and access, and that none requires technical knowledge. What the order needs from you is attention at three moments: the drawing, the advance and the handover.
Step 7: the handover check
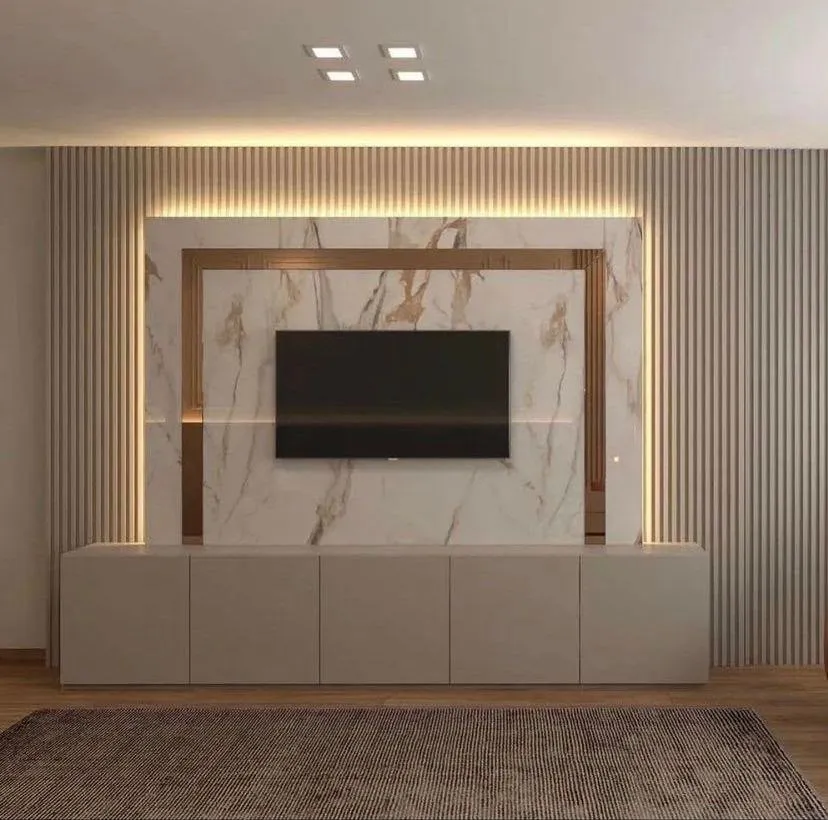
When the wall is finished, we walk through it with you. Sit where you normally sit and look at the wall from there, then from the door. Turn the television on with the equipment you really use, and test the remote. Dim the lights. Open every door and drawer, and look at the edges and the joins. Compare what you see with the approved drawing and the sample. The handover checklist lists what to check, in what order, and how to record a snag so it can be fixed.
A snag is a small, specific item: a door that rubs, a gap that is wider than its neighbours, a light that flickers. List them, with a photo, and we put them right. The list is short when the earlier steps were done well, and the handover is the moment to make sure the five papers are in your hands: the quotation, the drawing, the receipts, the WhatsApp thread and the warranty terms.
Step 8: the final stage and the aftercare
After the handover, the remaining stage is settled as agreed with you and written on the quotation. Then the aftercare begins. Wipe the surfaces with a soft cloth, keep spray cleaners away from the gaps and the LED channels, and keep the manufacturer's care notes for the finish you chose. If something needs attention, message us with a photo, the order reference or the address, and a description.
Our warranties are two separate lines. The wood-based boards carry a 5-year limited warranty, subject to its terms; it covers the boards only and excludes hinges, runners, labour and misuse, and is never a warranty on the whole wall. Fabrication and fitting by our team carry a 24-month written workmanship warranty. Keep the terms with your papers.
A one-page brief to write before step one
You can make every step quicker by writing a one-page brief before you message us. It does not need to be formal. It is a list of facts that you already know, collected in one place so that nobody has to ask for them twice, and it is the single most effective preparation for the whole route. The items below are the ones we find ourselves asking about most.
- The television: model and size, or the size you are considering, and whether it will be wall-mounted.
- The devices that must live near it: soundbar, games console, streaming box, router, set-top box.
- The room: apartment or villa, floor, whether there is a lift, and the wall's width as far as you know.
- Where you sit: how far the sofa is from the wall, and whether the seating is straight on or at an angle.
- What you want the wall to do: storage, lighting, a fireplace, display shelves, or simply a clean look.
- A shortlist of finishes, or a picture of a wall you like, and the colours of your floor and sofa.
- Your budget in mind, as a range, so that we can suggest a compact or a fuller design.
- Whether you own or rent, and if you rent, whether your landlord has agreed in writing.
- Anything unusual about the wall: a window beside it, a door, a bulge, an old patch of damp.
Walls and homes that need an extra step
Most walls follow the route exactly as described. A few need one more step, and it is better to know in advance. The first is an older villa with a plaster wall that is out of square or crumbly, where the visit may recommend preparing the surface or choosing a fixing method suited to it. The second is an apartment with a small lift or a long carry, where the delivery plan matters as much as the design, because pieces that cannot get up to the room cannot be fitted; the delivery access guide shows how to check the route.
The third is a wall that backs onto a bathroom, a kitchen or an outside face, where moisture is a question the drawing should answer before any board is chosen; the humidity guide covers what to look for. The fourth is a rented flat, where the extra step is written permission from your landlord or building management and, if appropriate, a removable design. The fifth is a wall with an electric fireplace, which adds a dedicated electrical line, vents and clearances to the drawing; the electric fireplace guide explains them.
None of these is a reason to hesitate. They are reasons to tell us at step one, so that the visit looks for the right things and the drawing answers the right questions. A wall that needs an extra step and gets it is no harder to live with than one that does not.
Where delays come from, and how to avoid them
Most delays are not about the workshop. The commonest is an undecided television, because the drawing cannot be final until the size is. The second is a late approval: the drawing sits unread for a week and the timeline slips by the same week. The third is access: a lift that is not booked, a building that will not allow delivery at the hour proposed, a vehicle that cannot park near the entrance. The fourth is a late change, which sends the order back a step. The fifth is a surprise in the wall, such as an old plaster surface or a damp patch that the visit should have found.
The remedies are short. Decide the television first. Read the drawing within a day or two. Book the lift and confirm the building's rules before the fitting date. Make changes before the advance, not after. And point out anything odd about the wall at the visit. If you are unsure whether your building has rules, ask your building management in writing, and keep the reply.
A worked journey, in order
Imagine a living room in an apartment in Sharjah. On Sunday evening the owner sends a straight-on photo of the wall, writes that the television will be 75 inches, and mentions that the lift is small. We ask for the floor and the lift size. On Monday the owner confirms a visit time, and the same afternoon we measure the wall in four places, note two sockets and a bulge in the plaster, and bring two finish samples.
The drawing arrives with the quotation. The owner reads it, asks for the console to be 100 mm shorter to clear a door, and approves the reissued version in writing. Then the advance is paid, receipt received, and production starts. While the workshop works, the owner books the lift, clears the wall and photographs the route. On fitting day the team arrives, the wall goes up, the television is mounted, the owner inspects it with the checklist and lists one small item. It is corrected, the remaining stage is settled, and the five papers go into one folder. Every step was visible, and nothing was left to memory.
What we do, and what to send
We are a Sharjah workshop with ten years in the trade, founded by Ali Haider Basra, building media walls with our own team and fitting them across the UAE. We start with a free measuring visit and samples, draw the wall, send an itemised quotation, and fit it at your home. A media wall starts from AED 3,500 per project. Once the details are agreed, a 60% advance is paid and production starts when we receive it; the remaining stage is agreed with you. Production takes up to about 10 days, depending on size and design. You can see the range we build on our media walls service page.
To begin, send us the first message described in step one: a photo of the wall, the television size and the room. If you would like to see what a Sharjah job involves, media walls in Sharjah has the local page. The planning guide is a good companion if you are still thinking about size and layout.
Send us your wall on WhatsApp
Start where the route starts. Message us on WhatsApp with a straight-on photo of the whole wall, the television size and a line about the room. Tell us whether you rent, which floor you are on and whether there is a lift, and add any finish you have in mind. We will reply with questions and offer a time for the free measuring visit.
If you are unsure what to include, what to send us for a consultation lists the photos and numbers that save a visit. If you are weighing the cost against the benefit first, is a media wall worth it gives a fair test.
Common questions
How does a media wall get made, step by step?
Message us, we measure free, draw and quote, you approve and pay the advance, the workshop builds it, we fit it, and you inspect it with us. The measuring visit.
How long does a media wall take?
Production takes up to about 10 days, depending on size and design, after the details are final and the advance is received. Media wall price guide.
What do I need to prepare before fitting?
Clear the wall area, protect the floor, book the lift and check the building's delivery rules in writing. Installation day checklist.
Can I change the design after approving the drawing?
Yes, but earlier is cheaper; changes after the advance may mean remaking parts. How ordering and the advance work.
How is the TV fixed to a media wall?
On a bracket fixed to a solid backing frame behind the panel, matched to the TV's VESA pattern and weight. Block or gypsum wall behind the TV.
What happens at handover?
We walk through the wall with you, test the TV and doors, compare with the approved drawing and list any snags to put right. Media wall handover checklist.
How do I start in Sharjah?
Send a straight-on photo of the wall, the TV size and the room on WhatsApp. Media walls in Sharjah.

Sources & specifications
Manufacturer information applies to the named products and systems. Sources reviewed on 12 November 2026.
- Wikipedia: VESA mount (Flat Display Mounting Interface; 100, 200 and 400 mm patterns)en.wikipedia.org(opens in a new tab)
- Bullfix: Plasterboard Fittings data sheet, Rev B (extendable arms, load centre 150 mm)media.wickes.co.uk(opens in a new tab)
- Pfleiderer: Raw particleboards, storage and transport (equilibrium moisture content, acclimatisation)pfleiderer.com(opens in a new tab)
- USDA Forest Service: Historic equilibrium moisture content data from the Forest Products Laboratoryresearch.fs.usda.gov(opens in a new tab)
Want this planned for your home?
Consultation and measurement are free. Tell us the rooms, location and what you need; we arrange a sample visit and define the measured quotation.