Media Walls · 24 min read · 27 September 2026
Moving out with a media wall in the UAE: leave it, remove it or take it
Leaving a flat with a media wall? Ask your landlord in writing, photograph everything, then leave it, remove it or take it. Six marks a removed wall leaves and how to make good.

By Ali Haider Basra, Founder, Al Tareeq Decor · Contact our workshop
Key takeaways
- Ask your landlord or building management in writing first: leave it, remove it, or take it. The written reply decides everything else.
- Photograph the wall, the fixings, the floor and the ceiling edge before any work, in daylight, with dates.
- A removed media wall leaves six kinds of marks: bracket holes, panel fixing lines, socket and plate, cable route, shelf fixings and the edges.
- Repaint the whole wall from corner to corner; spot patches often show as patches in side light.
- Finish with a walk-through, notes signed by both sides and a photograph of the signed page.
On this page
- Key takeaways
- Leaving a flat with a media wall: the short answer
- Start with the paper, not the screwdriver
- An eight-week plan for the exit
- Leave it, remove it or take it: the decision path
- What a media wall leaves behind when it comes off
- Which mark needs which repair
- Marks, repairs and photographs
- Making good: why the whole wall beats the spots
- Taking the unit off without damaging the wall or the unit
- Photographs and the walk-through: your evidence
- Three worked examples
- Mistakes that make a move-out harder
- A move-out checklist you can copy
- Related questions people ask when they leave
- What we do about it, and what to send us
- Common questions
Leaving a flat with a media wall: the short answer
If you are moving out and there is a media wall in the living room, you have three honest options: leave it, remove it and put the wall back as you found it, or take it with you to the next home. Which one applies is not decided by the wall, and it is not decided by you alone. It is decided by what your landlord or building management agreed when the wall went in, and by what your tenancy contract says about changes to the property. So the first move is never a screwdriver. It is a written question to the person who owns the flat.
The sensible order is: ask in writing what is expected, photograph the wall and everything around it, decide between leaving, removing or taking, carry out the work with the wall protected, make good the surface, and finish with a walk-through where both sides sign the same notes. The rest of this guide takes those steps one at a time, shows where a removed media wall leaves its marks, explains why a whole-wall repaint often looks better than patches, and gives three worked examples from typical UAE flats.
We build media walls in our Sharjah workshop and install them across the UAE, so we know exactly how they are fixed and therefore what they leave behind. What we do not do is give legal advice, and we do not tell you what your landlord must accept. Where a rule is involved, the answer in this guide is the same every time: ask your landlord or building management in writing, and keep the reply.
- Ask first, in writing: leave it, remove it, or take it?
- Photograph the wall, the fixings, the floor and the ceiling edge before anything moves.
- Remove only what the written answer allows, and protect the floor and the lift route.
- Fill, sand, prime and paint the whole wall rather than spots.
- Finish with daylight photos and a signed walk-through note.
Start with the paper, not the screwdriver
A media wall is joinery fixed to the building. Many tenants install one with their landlord's agreement, and some do it informally because nobody asked. At move-out those two situations are very different. If the wall was approved, there is usually a message, an email or a line in an addendum that says what happens at the end. If it was never discussed, you are in the position of asking now, and the earlier you ask the more options stay open. Read your tenancy contract for any clause about alterations and fixtures, and read what building management expects from a departing resident. Both can differ from one building to the next, and neither is for us to state.
Write the question so it can be answered with one word. Something like: “I have a fitted media wall in the living room. When I leave in six weeks, do you want me to leave it, or to remove it and repaint the wall? Please reply in writing.” Add one photo. A landlord who has to guess what you mean will reply in generalities; a landlord who sees the wall and a clear either-or will usually give a clear answer. Keep that reply together with your contract, because it is the document everything else rests on. It is also the document that protects you if the person who replied is later replaced by someone else.
Ask a second question at the same time: whether the landlord has a preferred paint colour or finish for the wall when it is handed back. A flat that was repainted in a specific shade before you arrived is easier to match if you know the shade. If the landlord does not know, photograph the wall in daylight beside a window, and read the paint tin label if one is left in a cupboard. A match is rarely perfect, which is why the whole-wall approach later in this guide matters.
If the wall was installed through us, send us the photos of the wall too. We cannot tell you what your contract says, but we can tell you how a wall like yours was fixed, which parts come off in one piece, and which parts cannot come off without damage to the unit. That is practical information you can pass to your landlord with your question, and it makes the answer you receive more reliable. Our guide to asking in writing and what to send shows the kind of photos that help, and the same photos work for a move-out discussion.
An eight-week plan for the exit
Moving out has a deadline, and the wall has several steps that cannot be rushed or reordered. The drawing below is an example schedule, not a rule: shorten it if your notice period is short, and lengthen it if you want quotations for the removal. The principle is that the written question comes first, the photographs come before any work, and the walk-through comes last, because by then everything else is finished and visible.
In the first two weeks the work is paperwork: the question, the photographs, the decision. The third and fourth weeks are for quotations, for booking the lift in your building if the wall pieces are coming out of the apartment, and for finding out who will do the painting. The fifth week is the removal. The sixth is the make-good. Leave the seventh as a margin, because paint needs time to dry and a first coat often shows what the second coat must fix. The eighth is the walk-through.
Do not let the removal fall in the last three days before keys are returned. It is the step most likely to reveal something you did not expect: a hole behind a panel, a cable chase cut into the plaster, a patch that was never painted. Each of those costs time. A removal one or two weeks before the deadline leaves room for the surprises, which is exactly what the margin is for.
Leave it, remove it or take it: the decision path
Everything above leads to a three-way choice, and the choice depends on two facts only: whether approval exists on paper and what that paper says. The drawing shows the path. If you are not sure, or there is no paper, you go back to the written question. If approval exists, you read it for the words that matter: leave, remove, make good, or nothing at all.
Leaving the wall is the simplest outcome for you, and it can be the best outcome for the next tenant or for the owner. A landlord may like a wall that is well made and in good condition, and may be glad to keep it. But leaving it has to be agreed, and it is best agreed with a short condition list: which parts stay, whether the shelves, the lighting and the console stay, whether the TV bracket stays, and who answers for the wall afterwards. Without that list, a wall left behind can later become a disagreement about whose it was. The handover checklist we use for new walls is a good model for the list.
Removing the wall is a project in its own right, and it is the option with the most work and the most marks. The next section shows what a removed wall leaves behind. Taking the wall with you is possible for some designs and not for others; it depends on how the wall was built and fixed, and it is the subject of our guide to moving a media wall to a new home. Whichever option you choose, keep the written answer and refer to it in every later message.
What a media wall leaves behind when it comes off
A media wall is made of panels, a console and sometimes shelves, and all of them are fixed to the building. When they come away, the fixings leave marks, and it helps to know where to look for them. The drawing shows a typical front view of an emptied wall with six places to check. They are not measured positions; they are the usual places on the usual wall, so that you can walk up to your own wall and check each one against a list instead of discovering them one at a time.
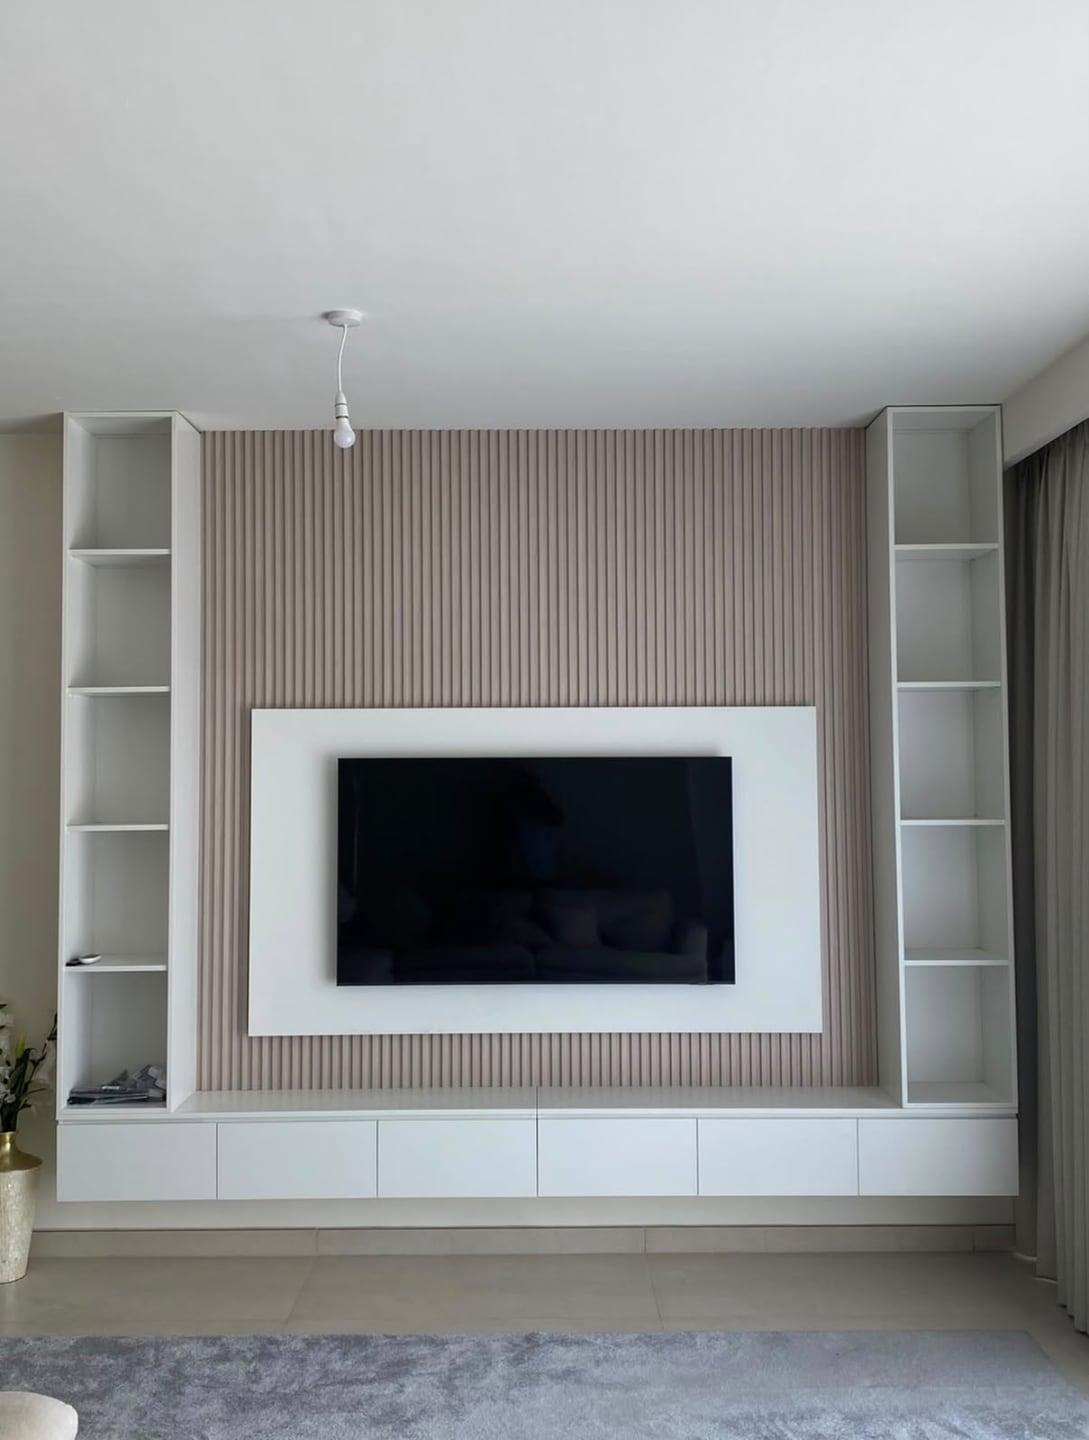
The first mark is the TV bracket. A wall bracket is screwed through the finished wall into plugs, and when it comes away it leaves several holes in a rectangle. Those holes are usually the largest ones on a compact wall. The second is the panel fixing line: the boards and slats of a full wall are fixed on a framework or directly to the wall, and removing them leaves rows of small holes at regular distances. If panels were glued as well as screwed, glue marks and torn paint come off with them. Our own walls are described in the panel types guide, and the fixing pattern follows the panel type.
The third mark is the socket and AV plate. If the wall moved sockets or added a plate for the HDMI route, then removing the wall means deciding what happens to those points: capped, returned to their original position, or left as they are with the landlord's agreement. Cables that ran in a chase cut into the plaster leave a groove, and that is the fourth mark. You may find the original route, a patch that was filled and painted over, or an empty channel. Our guide to cable routes and service access explains why walls are planned with a route that can be followed, and the same route is what you follow in reverse when the wall leaves.
The fifth mark is the shelf and console fixing. Floating consoles and shelves are held by rails or brackets, with larger plugs than the TV bracket, and they leave larger holes. The sixth is the edge: where the wall met the floor, the ceiling and the side walls. Edges collect scuffs, glue lines, gaps in the skirting and dents from the removal itself. This is where most people find a mark they did not plan for, because it is created during the work rather than by the original installation.
Photograph each of the six places before you touch it, and again after the unit is off. Those two sets of photographs are the evidence of what the wall looked like with the unit on it and what it looked like once the unit was gone. If your landlord later asks about a mark, you can show whether it was already there. A guide for the opposite situation, a new wall being checked, is in our handover checklist; here the same habit works in reverse.
- 1. Bracket holes: fill, sand, prime
- 2. Panel fixing lines: rows of small holes
- 3. Socket and AV plate: cap off or return, as agreed
- 4. Cable route: check for a cut chase
- 5. Shelf and console fixings: larger plugs to fill
- 6. Floor and ceiling edge: scuffs, glue lines and gaps
Which mark needs which repair
The table puts the six marks next to the usual repair, a note on who should do it and the photograph that belongs to it. The right-hand column matters more than it looks: a repair without a before photograph is just your word against a memory, and a repair without an after photograph is a claim that cannot be checked.
The words used are plain on purpose. Filling means pressing a suitable filler into a hole until it sits slightly proud, letting it set, and sanding it flush. Priming means sealing the filled spot so the finish coat does not soak into it differently from the wall around it. Painting means applying the finish coat across the whole wall, which the next sections explain. The materials are ordinary decorating ones, and a decorator will know what suits the wall type. Which type of wall you have is covered in our guide to block and gypsum walls, because the repair differs between the two.
Marks, repairs and photographs
TV bracket holes
- Usual repair
- Fill, sand, prime
- Who usually does it
- You or a decorator
- Photograph to take
- Before removal, after fill, after paint
Panel fixing lines
- Usual repair
- Fill rows of holes, scrape glue, prime
- Who usually does it
- A decorator
- Photograph to take
- Close-up of one row, wide shot of the wall
Socket and AV plate
- Usual repair
- Cap off or return, as agreed
- Who usually does it
- Qualified electrician
- Photograph to take
- The plate before and after, with the landlord's note
Cable route
- Usual repair
- Check the chase, fill or leave as agreed
- Who usually does it
- A decorator, electrician if wiring
- Photograph to take
- The groove or patch, with a ruler in frame
Shelf and console fixings
- Usual repair
- Fill larger holes in stages
- Who usually does it
- You or a decorator
- Photograph to take
- Each fixing before it is filled
Floor and ceiling edge
- Usual repair
- Touch up, re-seal gaps
- Who usually does it
- A decorator or fitter
- Photograph to take
- A low-angle shot along the edge
Illustrative: the repair depends on the wall, the fixing and what your landlord agreed. Ask in writing.
Making good: why the whole wall beats the spots
After the holes are filled and sanded, there is a decision that surprises people: should you paint only the repaired spots, or the whole wall? Spots feel cheaper and quicker. In practice, new paint over old paint often shows as a patch, because the sheen, the thickness and the age of the coat are all different from the paint beside it. The effect is strongest when light crosses the wall at a low angle, such as from a window on the side wall, which is the usual case in a living room. A wall with five tidy patches can look worse than a wall with five unrepaired holes, because the eye is drawn to a colour edge more than to a small hole.
A whole-wall repaint, from corner to corner and ceiling to skirting, removes the edge. The coat is continuous, so there is no line to find. It also lets you correct several small things at once: a scuff, a glue ghost, a faded rectangle where the unit was. This is the approach most decorators recommend for a visible wall, and it is why we suggest agreeing it with your landlord in the same message as the question about leaving or removing the unit. The drawing shows the difference in principle; it is illustrative, not a measurement.
If the wall had wallpaper or a textured finish before the media wall, the picture changes, and the right answer is to ask your landlord what they expect. We do not offer wallpaper removal, and a textured wall is a decorator's job. What we can say is that the repair starts from the same six marks and ends with the same test: stand beside the window, look along the wall, and see whether you can find a repair.
Do not paint over the wall before the holes have been filled and primed. Paint does not hide a hole; it highlights it. And do not start before the wall is dry, which can take longer than expected in humid weather. Our guide on humidity and boards explains how moisture behaves in UAE homes, and the same principle applies to filler and paint: give each coat the time it needs.
Taking the unit off without damaging the wall or the unit
If the written answer says remove, the order of removal matters, and it is close to the reverse of the order of installation. We describe that installation order in our installation day checklist. Start with the contents: the TV, the soundbar, the console equipment. Then the lighting: switch it off, and leave the transformer and the wiring to someone qualified, because wires pulled out of a box are a hazard and a repair bill.
Next come the loose parts: shelves, doors, drawer fronts, and anything that lifts off without tools. Put each into a labelled bag with its screws. Then the console, which is usually fixed by rails or brackets and can be heavy; two people should lift it, and the reason is explained in our guide to panel and console weight. Last come the wall panels, working from the top down so that nothing leans on a fixing that has already been released.
Throughout, protect the floor. A dropped corner on porcelain or marble tile chips the edge, and a chipped tile costs more than a day of protection board. Protect the lift too, if the pieces leave the building by lift. Our guide to lift and delivery access covers the booking and the route; a removal follows the same route in the other direction, and the same building rules usually apply.
If you want our team to quote the work of dismantling a wall that we built, send us photos and the written answer from your landlord. We will say what we can do and what we would need to see before agreeing; we do not promise an outcome from photographs alone, and we do not offer to repaint the wall. The wall unit is our work; the painting is a decorator's.
Photographs and the walk-through: your evidence
Photographs are the cheapest protection you have, and most people take them badly. A good set has three kinds of picture: wide ones that show the wall in the room, medium ones that show each zone, and close ones that show each mark with a ruler or a coin for scale. Every set has a date, and the phone's own date stamp is enough. Take them in daylight with the curtains open, because artificial light hides colour differences that daylight reveals.
Take the same pictures at three moments: before any work, after the unit is off, and after the wall is made good. Name the files in order so they sort themselves: 01 wide before, 02 bracket holes before, and so on. Send the set to your landlord or building management with the message that confirms the date of the walk-through, and keep the sent message. If a later disagreement arises, you will not be arguing from memory.
At the walk-through, walk the wall with the person who is checking it. Stand where the light crosses the wall, because that is where defects show. Agree the notes while you are standing there, sign the same paper and take a photograph of the signed page. If any point is disputed, write it down as a disputed point with both views, rather than leaving the room with an unspoken disagreement. The same approach is used when a new wall is handed over, as in our handover guide.
Three worked examples
Example one: a compact wall in a one-bedroom flat. The wall is a single panel behind a wall-hung TV with a floating console below it. The tenancy is ending in six weeks, the landlord approved the wall in an email two years ago, and the email says only “fine, please remove at end”. The plan: ask the landlord whether a whole-wall repaint is expected; photograph; remove the console first, then the panel; fill the bracket holes and the two rows of panel fixings; repaint the living-room wall, not the spots. The work is small, and a decorator can do the repaint in a day. This is the case where the whole-wall rule saves the most, because the wall is visible from the sofa.
Example two: a full-wall slatted wall in a two-bedroom apartment. The wall covers the whole TV wall with slats, shelves and a lit console, and the lighting has a transformer behind a service panel. The landlord has not been asked. The plan: ask in writing with a photograph and the question “leave, remove or take?”. The landlord replies that they would like to keep it if the condition is good. The tenant and landlord agree a short condition list, covering the shelves, the lighting, the console and the TV bracket, and sign it at a walk-through. Nothing is removed, no wall is repainted, and the tenant avoids the largest piece of work. The wall is now the landlord's, and any future repair is theirs, which is why the list matters.
Example three: a wall that must come off, and a wall behind it that is not in good shape. The landlord says remove it. When the panels come away, the wall behind shows an older cable chase that was never painted, two filled sockets and a stain near the floor. The tenant stops, photographs everything, and tells the landlord before doing anything else. Some of what is found was there before the wall, and the photographs from the move-in help to show that. This is the case where the evidence habit pays for itself, and where our guide to renovating a media wall helps with how to document an unexpected finding before any repair is agreed.
Mistakes that make a move-out harder
The first mistake is removing before asking. Once the unit is off, you have made the decision for the landlord, and if they wanted it left, you cannot put it back. The second is asking by phone only: a call is not evidence, and the person who said yes may not be the person who inspects at the end. The third is photographing on the last day. The before photographs have to exist before the work, or they are not before photographs.
The fourth is painting spots and calling it done. The fifth is treating the removal as a one-person job. A console and a tall panel are heavy and awkward, and an accident can hurt a person as well as a wall. The sixth is forgetting the lift: pieces that came in through a booked lift also have to leave by one, and the booking depends on the building, not on you. The seventh is leaving the electrical work to chance. A pulled wire is not a repair; a qualified person should deal with sockets, plates and any lighting transformer.
The eighth is not reading the contract. Nothing in this guide overrides it, and nothing in it tells you what your landlord has to accept. The ninth is assuming the wall is yours to sell. If the wall was installed by the previous tenant, or by the landlord, or by the building, then who owns it is a question to settle in writing, not a fact to assume. The last mistake is the quietest: forgetting to keep the paper. Keep the message, the photographs, the quotations and the signed note together in one folder, and send yourself a copy.
A move-out checklist you can copy
Use this list as written, tick each line, and keep the completed list with your photographs. It is built from the order described above, and each line can be answered yes or no.
- Tenancy contract read for clauses about alterations and fixtures.
- Written question sent to the landlord or building management, with a photograph.
- Written reply received and saved: leave, remove, or take.
- Wide, medium and close photographs taken in daylight, dated.
- Lift or route booked with the building, if pieces leave the apartment.
- Contents removed: TV, soundbar, console equipment.
- Lighting switched off; transformer and wiring left to a qualified person.
- Shelves, doors and drawer fronts removed and bagged with their screws.
- Console lifted by two people; panels released from the top down.
- Fixings pulled and holes filled, sanded and primed.
- Whole wall repainted, corner to corner, in the colour agreed.
- Daylight photographs of the finished wall, along the line of the window.
- Walk-through done, notes signed, photograph of the signed page saved.
Related questions people ask when they leave
Moving out raises questions that are really about the wall you had. If you are a tenant in a villa rather than a flat, the wall is often larger and the landlord more likely to want it kept; our guide to villa TV walls shows how those walls are built and why they are harder to take down. If the media wall was part of a bedroom, with a TV unit beside a wardrobe, the same fixing logic applies, and the bedroom TV unit guide explains what is fixed to what.
Some people ask whether the wall should have been a built wall at all. If you are moving on and planning a next home, it is worth knowing the options before you commit: what a media wall is explains the idea, media wall versus a TV unit compares a fixed wall with a piece of furniture that moves with you, and full wall or compact media wall explains how much of the wall you actually need. A compact wall leaves fewer marks and is faster to take off.
If you are an owner selling rather than a tenant leaving, the question is different: a media wall can help a sale or hurt it, depending on its condition and on the buyer. Photograph it in good light, decide before the viewing whether it stays, and say so in writing, in the same way as the tenant's list above. Our media wall guide and design ideas show what a well-kept wall looks like.
For an office or a majlis, the principles are the same but the rules come from the lease and the building, not from this guide. Our guides to office media walls and majlis TV walls show how those walls differ, and a short written question to the landlord or building management comes first there too. Use the pricing guide when you want a feel for what a replacement wall might involve in your next home.
What we do about it, and what to send us
Our media walls start from AED 3,500 per project for a compact panel and floating console in standard laminate; the final figure comes from the quotation and depends on the wall size, the finish, any marble-effect panels, lighting and an electric fireplace. They are made in our Sharjah workshop and installed by our own team across the UAE. Once measurements and details are agreed, a 60% advance is paid and production starts when it is received, with up to about 10 days depending on size and design. The founder, Ali Haider Basra, has ten years in the trade, and the boards carry a 5-year limited warranty on the wood-based boards only; hinges, runners, labour and misuse are excluded, and it is not a warranty on the whole wall. A separate 24-month workmanship line applies for orders agreed from 10 October 2026.
For a move-out, the useful thing we can do is look at your wall. Send a photograph taken straight on from the middle of the room, a photograph of each side and of the floor edge, the TV size, and the written answer from your landlord if you have it. We will tell you whether the unit looks removable in one piece, which fixings we would expect to find, and what we would need to see before quoting the removal. We do not repaint walls, so ask your landlord or a decorator about that part. The price side of a new wall is explained in our price guide, and the whole range is on the media walls page.
The simplest next step is a WhatsApp message. Send the wall photograph, the TV size, a photograph of the room and your move-out date, and say whether you are leaving, removing or taking the wall. Orders and quotations are confirmed on WhatsApp, so you can keep the thread, the photographs and the reply from your landlord in one place. A checklist of what to send is in what to send before a consultation.
Common questions
Do I have to remove a media wall when I move out of a rented flat?
It depends on what your landlord agreed and what your tenancy contract says, so ask your landlord or building management in writing: leave it, remove it, or take it. Keep the reply with your contract. Our guide to the whole exit starts from that question.
How do I fix the holes left by a TV bracket and panels?
Fill each hole, let it set, sand it flush, prime it and then repaint the whole wall so no patch edge shows. The filler depends on the wall type, which is explained in block and gypsum walls for TVs.
Should I paint just the patches or the whole wall?
Paint the whole wall from corner to corner. New paint over old often shows its edge in side light, and a continuous coat leaves nothing to find. Renovating a media wall explains how to judge a surface before repainting.
Can I take my media wall to my next home?
Sometimes. It depends on how the wall was built and fixed, and on the shape of the new wall. Moving a media wall to a new home explains what usually survives.
Who removes the lighting and sockets of a media wall?
Leave the lighting transformer, wiring and sockets to a qualified person; do not pull wires out of a box. Switch the lighting off and photograph the point before and after. Cable routes and service access shows where the routes run.
What photos should I take before removing a media wall?
Wide, medium and close photographs in daylight, dated, of the wall, the fixings, the floor and the ceiling edge, with a ruler in the close ones. Repeat them after removal and after making good. Our consultation checklist shows the angles.
Can Al Tareeq Decor remove a media wall we built?
Send photos and your landlord's written answer on WhatsApp and we will say what we can do and what we need to see first; we do not repaint walls. Our media walls page lists what we build.

Sources & specifications
Manufacturer information applies to the named products and systems. Sources reviewed on 10 November 2026.
- Dulux UK: Preparing walls for painting (build up deep holes in layers, sand filled spots flush)dulux.co.uk(opens in a new tab)
- Popular Science: How to patch holes in drywall (painting only the patch rarely blends)popsci.com(opens in a new tab)
- This Old House: Patch and repair holes in drywall or plaster (prime the whole patched area)thisoldhouse.com(opens in a new tab)
- PlaceMakers NZ: Removing construction substances (cured sealant and adhesive are hard to remove)underconstruction.placemakers.co.nz(opens in a new tab)
Want this planned for your home?
Consultation and measurement are free. Tell us the rooms, location and what you need; we arrange a sample visit and define the measured quotation.