Media Walls · 24 min read · 26 October 2026
How to replace a failed LED strip in a media wall (UAE guide)
How a failed LED strip in a media wall is diagnosed and replaced: reading the fault, voltage drop, 12V and 24V, the channel, a replacement visit and what to ask next time.

By Ali Haider Basra, Founder, Al Tareeq Decor · Contact our workshop
Key takeaways
- Read the symptom first: nothing lit, one dark stretch, a dim far end and flicker when dimmed each point to a different cause.
- A dim far end is usually voltage drop; one vendor's practical limits are about 3 to 4.5 m for a 12V strip and 6 to 7.5 m for 24V, so check your strip's data sheet.
- The strip, the driver, the dimmer and the run length must be matched; a 12V strip needs a 12V driver, and a replacement keeps or deliberately changes all of them.
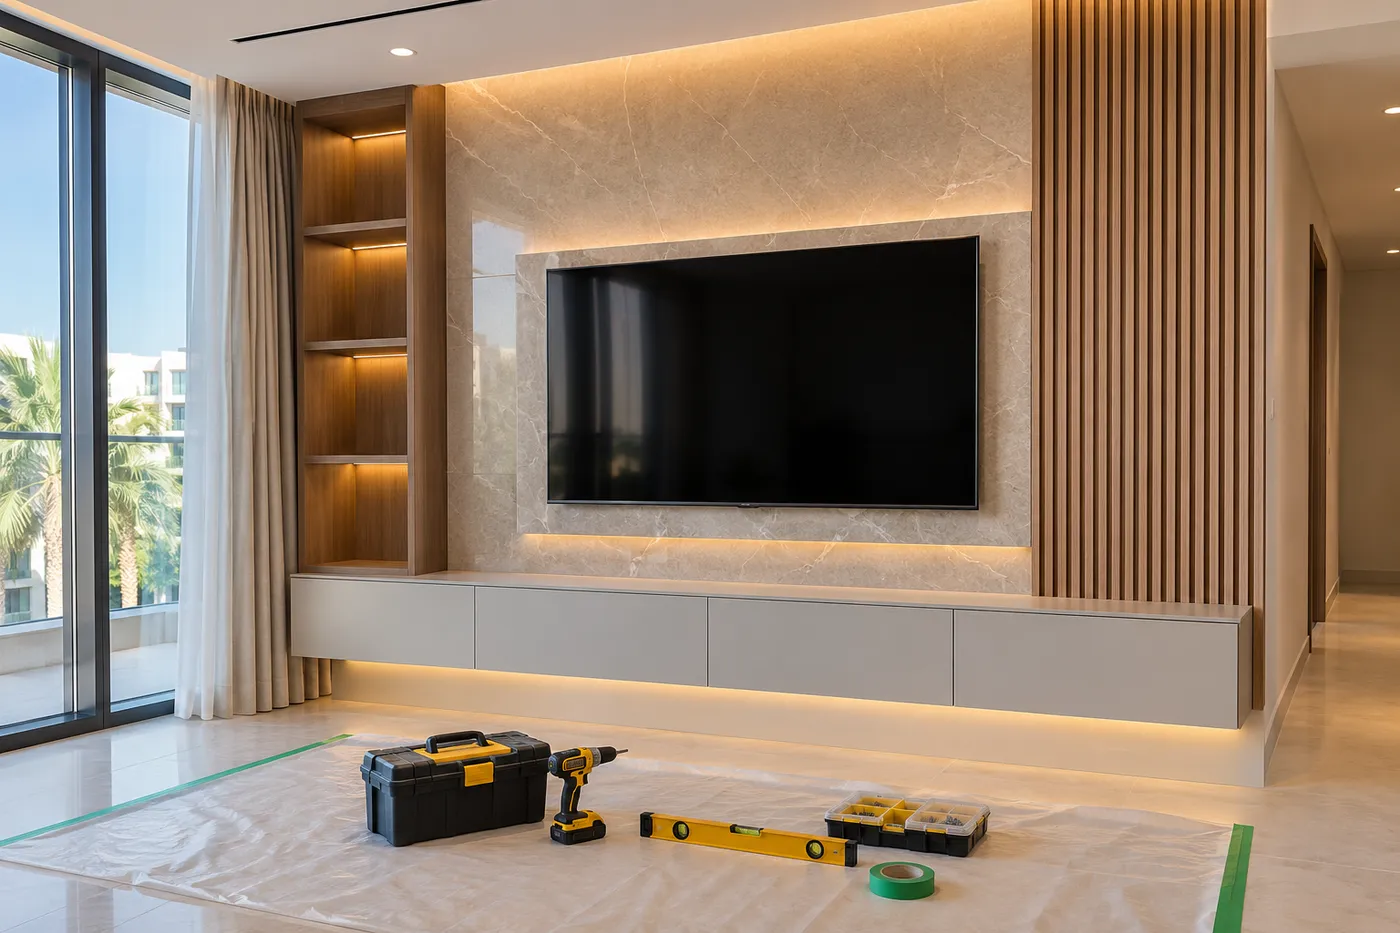
- A wall built with a clip-out diffuser and a driver behind a lift-off panel is serviced from the front; ask for both on the drawing.
- Mains-side work is for a qualified electrician or our team. You can safely observe, photograph and describe, and that makes the repair quicker.
On this page
- Key takeaways
- When the glow behind the TV goes wrong
- Read the fault before you call anyone
- What you can safely do, and what you should not
- Why the far end goes dim: voltage drop on a long strip
- Fixing a dim far end without replacing everything
- Twelve volts or twenty-four, and why the driver must match
- Inside the groove: what you are actually replacing
- How a strip replacement visit goes
- Matching the old light so the repair does not show
- When the strip is fine and the driver is not
- Walls that make replacement hard, and what to ask for next time
- Special cases: fluted walls, shelves and niches
- Fault, likely cause and next step at a glance
- Reading an LED strip fault
- Three worked scenarios
- Mistakes that make a repair harder
- What changes the price of a replacement
- What we do and how to start on WhatsApp
- Common questions
When the glow behind the TV goes wrong
A strip of light behind the screen or in the grooves of a slatted wall does a lot of quiet work. It softens the contrast of the TV at night, outlines a shelf, and turns a plain panel into something you notice when you walk in. So when one section goes dark, flickers, or turns a little pink at the far end, the whole wall looks neglected, even though the boards, the finish and the TV are perfectly fine.
This guide is about the strip itself: how to read what is wrong, what is physically inside the groove, how a replacement is carried out, and what to ask so that the next failure takes an afternoon instead of a wall. It is deliberately not a guide to choosing light layers or colour temperature from scratch. If you are still designing, our lighting ideas guide covers that, and if the wall needs more than a new strip, renovating an existing media wall covers the wider scope.
One rule frames everything below. The strip sits at the low-voltage end of a system that starts at the mains. Anything on the mains side belongs to a qualified electrician or to our team, and nothing in this article is an instruction to open a driver, a socket or a switch. What you can do safely is observe, photograph and describe, and that alone makes most repairs quicker and cheaper.
Read the fault before you call anyone
Four symptoms account for most strip complaints, and each points in a different direction. The drawing below puts them side by side so you can find yours before you send a message.
If nothing lights at all, the fault is usually on the supply side: the driver that turns mains into the strip's voltage, the switch or dimmer that feeds it, or a connection that has come loose. If one stretch stays dark while the rest works, the cause is usually local: a joint, a cut end or a section of strip that has been damaged. If the far end of a long run is dim or tinted, that is the signature of voltage drop, which gets its own section below. And if the light flickers when you dim it, the dimmer and the driver are probably not a matching pair.
A fifth symptom deserves a mention because it is easy to misread: a strip that works but looks different from the one next to it. Two strips that were bought at different times can differ in white tone, and the eye picks that up instantly in a groove where they meet. That is a matching problem, not a failure, and it is solved when the new strip is chosen, not after it is fitted.
- 1. No light at all: look at the supply side first
- 2. One dark stretch: a joint, a cut end or a damaged section
- 3. Dim or pink far end: voltage drop on a long run
- 4. Flicker when dimmed: dimmer and driver do not suit each other
What you can safely do, and what you should not
Safe and useful: switch the wall light off at the switch you normally use and look at the strip with your phone torch. Note which stretches are dark and where the dark stretch begins. Photograph the groove from the front and, if you can see it, the point where the strip enters the wall. Note whether the flicker happens at every dimming level or only at the low end, and whether it began after a power cut, a new TV, a new dimmer or a change in the room. Those four observations are worth more to an installer than any guess about the cause.
Sockets are a separate subject, covered in which sockets can stay. Not safe: prying a diffuser out with a knife, pulling a strip off its channel, or opening anything that contains mains wiring. A strip's adhesive backing tears easily, and a strip peeled off in one piece is rarely reusable. Opening a driver or a socket without the right qualification is a shock and fire risk, and in a rented flat it can also breach your tenancy contract. For anything electrical, ask your landlord or building management in writing what is allowed, and let a qualified electrician or our team do the work.
There is a middle category worth naming: things that look like faults and are not. A dimmer that is set very low, a scene on a smart switch that you forgot about, a TV set to a different input that changed your habits, and a light that was simply left on a timer all produce a wall that seems wrong. Check the obvious controls first; it costs nothing, and it spares everyone a visit.
Why the far end goes dim: voltage drop on a long strip
A strip is a long, thin circuit. The copper tracks that carry the current have a small resistance, so some voltage is lost over every metre. Near the point where power enters, the strip receives nearly the full voltage and shines at full brightness. At the far end it receives less, so it looks dimmer, and on some strips the colour shifts towards warm or pink as well. HitLights, a strip maker, explains the cause in one line: resistance in the traces causes a small voltage loss per unit length.
The same article gives practical run lengths for strips without power injection: roughly 10 to 15 feet (about 3 to 4.5 m) for a standard 12V strip and 20 to 25 feet (about 6 to 7.5 m) for a standard 24V one. Those are one manufacturer's estimates for 60 LEDs per metre, and your strip's own data sheet is the authority, but they explain why a three-metre wall that works perfectly can sit next to a seven-metre run that never looks even.
The chart shows the shape of the problem. The curves are illustrative, not measurements; what matters is that the 12V line falls faster than the 24V line, and that the vendor's practical limit lies much earlier for 12V. On a media wall the lesson is practical: a single strip that wraps behind a long TV panel, down a pillar and along a shelf may be longer than it looks on the drawing. Measure the whole route, not just the width of the wall.
- 1. 12V strip: falls fastest, practical limit shortest
- 2. 24V strip: half the current for the same wattage, so a gentler fall
- 3. Shaded bands: one vendor's practical single-feed limits
Fixing a dim far end without replacing everything
Voltage drop has three usual remedies, and none of them requires a different look. The first is feeding the run from both ends, which HitLights calls power injection: the supply is connected at both ends of the run so that no part of the strip is far from a feed. The second is splitting one long run into two or more shorter sections, each with its own feed. The third is moving to 24V on runs that are long to begin with; the same page advises defaulting to 24V for any run over 15 feet.
Which one suits your wall depends on how the strip is routed and where the driver sits, and that is a job for our team or an electrician, not a decision to make from a photo. What you can do is tell us how long the run is, whether it is one continuous piece, and where the dimness begins. A strip that fades only in the last metre may just need a second feed; a strip that is uneven along its whole length may be the wrong voltage for the run.
Watch the power budget too. The same source recommends sizing a power supply at 120 per cent of the calculated load rather than at exactly the load. A driver working at its limit runs hot, and a hot driver behind a closed panel is a common early failure. If a replacement strip is longer or brighter than the old one, the driver may need to be replaced with it.
Twelve volts or twenty-four, and why the driver must match
A strip is built for one voltage, and the driver must supply that voltage. Inspired LED's guide puts it plainly: always match the driver output voltage to your strip voltage. A 12V strip on a 24V supply can be damaged quickly, and a 24V strip on a 12V supply will look dim. This is the main reason we ask for the old strip's markings before ordering a new one, and the reason we do not recommend buying a strip online and asking someone to fit it without checking the driver first.
The practical differences are modest for a media wall. A 12V strip is usually chosen for shorter runs and simple accent lighting, while 24V is the usual choice for longer runs, because for the same power it draws half the current and loses half the voltage over the same distance. Neither is better in itself. What matters is that the strip, the driver, the dimmer and the length of the run were chosen together, and that any replacement keeps that arrangement or changes all four deliberately.
That is also why a swap is not always like for like. A new strip with a different voltage, a different density of LEDs or a different power per metre can overload an old driver or look different beside the surviving sections. We note the old specification on the visit (how a measuring visit runs is explained separately), confirm what the driver can carry, and write the new strip's specification into the quotation so that the next person is not guessing.
Inside the groove: what you are actually replacing
In a well-made media wall the strip is not stuck to bare board. It sits in a small channel, usually aluminium, that is fixed in a routed pocket in the panel. The strip's adhesive backing holds it to the floor of the channel, the channel carries away some of the heat, and a diffuser in front spreads the light so that you see a soft line rather than a row of dots. The drawing is a section through that arrangement.
This construction explains the replacement. The diffuser is the part that clips out, if the wall was designed with replacement in mind. The strip is the consumable part: it can be peeled off and a new one laid in. The channel and the board stay. The driver lives elsewhere, away from the groove, and the cable between them runs through the wall. A fault can sit in any of those places, which is why reading the symptom first matters.
Whether your wall can be serviced like this depends on how it was built. Walls where the strip was stuck straight onto a board and then covered with a fixed panel have to be opened before any light can be replaced; walls with a clip-out diffuser can be serviced from the front in minutes. If you are planning a wall now, ask for the diffuser and the channel to be drawn, and ask which parts come out. The question costs nothing on paper and a great deal later.
- 1. Diffuser: clips out so the strip can be reached
- 2. Strip: adhesive back, sits on the channel floor
- 3. Channel: fixed to the board, takes the heat
- 4. Wall board: routed pocket sized for the channel
- 5. Driver: away from the groove, behind a service panel
How a strip replacement visit goes
A typical job begins with a photograph and a short video of the wall with the lights on and, if possible, of the fault itself. From that we can usually tell whether the visit is about one section, a long run or the supply. We ask for the approximate age of the wall, whether the lights are on a dimmer, and whether the TV or the electrics in the room have changed recently.
The second step is matching. We identify the strip's voltage, the white tone, the length and, where we can see it, the density of the LEDs. Our media walls use 3000K or 4000K white channels with dimmers (finishes are covered in our colour and finish guide), so the new strip is chosen from the same family of whites as the old, because a different tone between two sections is more noticeable than a slightly different brightness. If the old strip is no longer made, we choose the nearest equivalent and show the owner the sample beside the old one before it is fitted.
The third step is reaching the strip. On a wall that was built for it that means unclipping the diffuser or lifting a service panel; on an older wall it may mean opening a section of panel and closing it again afterwards. The fourth step is the swap itself, done by our team or an electrician as appropriate, including the joint where the new strip meets the feed. The fifth is the test: every stretch lit, at full brightness and at the lowest dimming level, with the TV on and then off. The sixth is closing up and leaving a short length of spare strip with the owner, labelled, because the next batch of the same strip may not exist in three years.
- 1. Photo: the wall, the fault and a short video
- 2. Match: voltage, white tone and length
- 3. Reach: diffuser or service panel opened
- 4. Swap: new strip or section fitted by our team
- 5. Test: every stretch lit at full and at low
- 6. Close: panel refitted and a spare length left
Matching the old light so the repair does not show
The commonest disappointment after a repair is not a failure but a mismatch: the new section is a little whiter or a little yellower than the old, and the groove now has two tones. The cure is to decide the white tone before the strip is bought. Our standard channels use 3000K or 4000K, and a wall lit with one of them should be repaired with the same one. If you do not know which you have, a photograph taken in the evening with the strip on and the TV off is usually enough for us to tell.
Length is the second thing to match. A strip is cut at marked points, and each cut section has to join the next without a visible gap. On a long groove we prefer to replace a whole run between two joints rather than patch a single dead segment, because every joint is a place where a future fault can start. A shorter patch is cheaper today; a whole run is usually cheaper over five years.
Dimming is the third. If the wall is dimmable, the replacement has to dim smoothly through the whole range, which depends on the strip, the driver and the dimmer together. We test the lowest setting before we leave. A strip that flickers at the bottom of the range is a bad pairing, not a bad strip, and it is better found while the diffuser is still off.
When the strip is fine and the driver is not
A driver is the box that converts mains power into the low voltage the strip needs, and among the electrical parts of a lit wall it tends to be the first to give up. If every section of the strip goes out together, or if the light flickers whatever the dimming level, the driver is as likely a cause as the strip. Replacing a perfectly good strip because the driver failed is a waste, and so is replacing the driver when a joint was the real cause, which is why we look before we quote.
The location of the driver matters more than most people think. A driver that is buried behind a fixed panel is a driver that cannot be replaced without damaging the wall, and a driver that sits in a closed, unventilated void will run hotter and fail sooner. Why we put drivers behind a lift-off panel is set out in the cable routes and service panels article, and our ventilation guide for TV niches shows how the same thinking applies to air.
If your wall was built elsewhere and you do not know where the driver is, tell us. Part of a first visit is simply finding it. Once it is found, we note its position on the drawing, so that nobody has to search again.
Walls that make replacement hard, and what to ask for next time
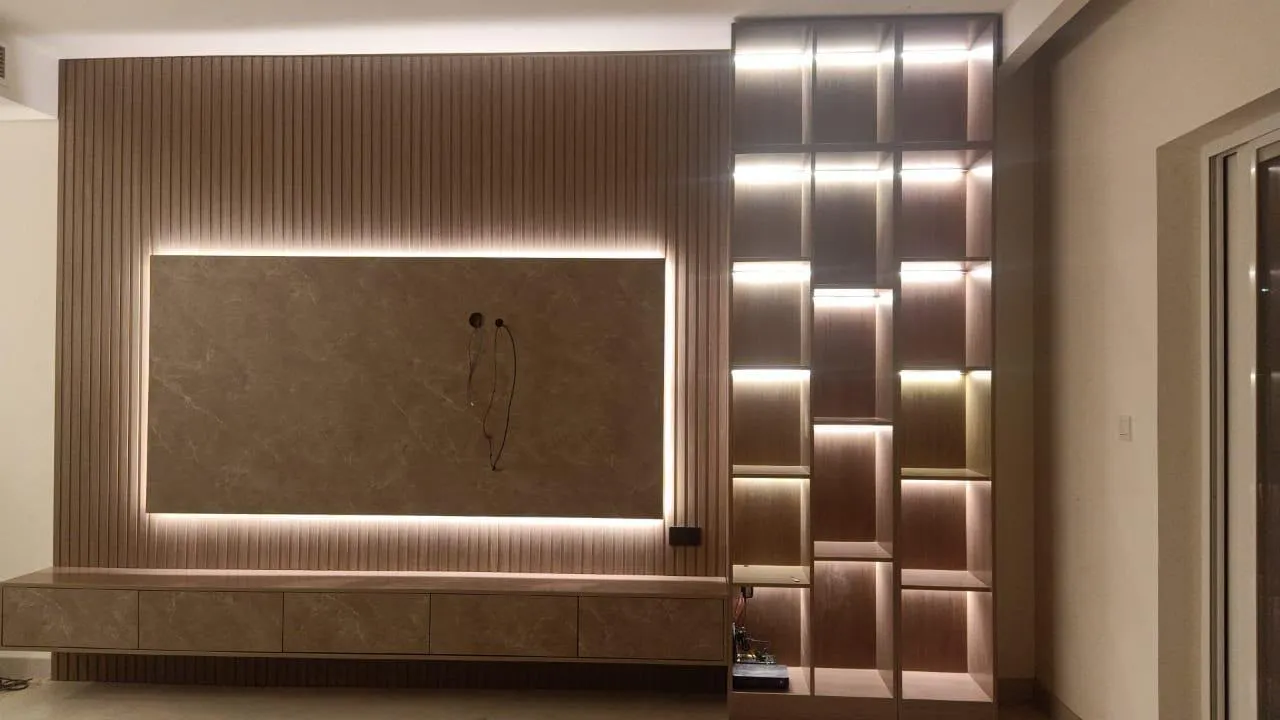
Some walls are difficult not because the strip is hard to replace but because nobody planned for replacing it. The strip may be stuck directly to the board and covered by a fixed face. The diffuser may be glued rather than clipped. The driver may be sealed behind a panel that was painted shut. Fixed finishes such as marble-effect panels and fluted sections can hide a strip so well that reaching it means damaging the finish.
When a new wall is still on paper, five questions on the drawing prevent all of that. Which parts of the light come out from the front? Where is the driver, and how is it reached? How long is each continuous run, and how is each fed? What are the strip's voltage, white tone and power per metre, written on the quotation? And is a short spare length left with you at handover? These are the same questions our handover checklist asks, and the quotation checklist turns them into lines on paper.
Humidity is a smaller but real factor in the UAE. Boards that swell can push a channel out of its pocket, and condensation behind a cold wall can corrode a joint. The guide to media walls and humidity explains the board side of that, and it is a good reason to choose a wall whose lighting can be inspected from the front without taking it apart.
Special cases: fluted walls, shelves and niches
Fluted and slatted walls often carry light in the grooves, so a failed strip sits behind a ribbed face. The plan matters here: where the channel was built into the slat profile with a clip-out cover, replacement is a front job; where it was built behind a fixed rib, the section has to be opened. Our fluted panel guide explains how we plan the channel before the first cut, and the guide to slatted walls covers the light in the groove from the design side.
Shelf and niche lighting has the opposite problem: the strip is short, easy to reach and easy to replace, but it works in a hot, enclosed place beside objects that may be stacked against it. A strip that is hidden behind a lip and warm to the touch should be mentioned when you call, because heat is a common reason for early failure. The planning notes in our guide to TV walls with shelves show where we keep a strip clear of what is stacked on the shelf.
Behind the TV, the backlight is the simplest of all. It is a straight run on a flat panel, usually short, and its main job is to reduce the contrast between the screen and the wall. If it fails, the repair is quick provided the TV can be moved or tilted forward; if the TV is on a fixed bracket that hides the strip, say so in your first message so that we bring what we need.
Fault, likely cause and next step at a glance
The table below puts the earlier sections in one place. Use it to decide how urgent a fault is and what to say when you message us. 'Can wait' means there is no safety concern from the symptom itself; anything that smells hot, buzzes loudly, shows scorching or trips the breaker should be switched off at the source and handled by an electrician at once.
Reading an LED strip fault
Nothing lights
- Likely cause
- Supply side: driver, switch, a lost connection
- Can it wait?
- Yes, unless there is a smell or heat
- What to send us
- Photo of the wall and the switch; when it stopped
One stretch dark
- Likely cause
- Joint, cut end or damaged section
- Can it wait?
- Yes
- What to send us
- Photo with the dark part marked; the length of it
Dim or pink far end
- Likely cause
- Voltage drop on a long run
- Can it wait?
- Yes
- What to send us
- Run length, shape of the route, where the dimness starts
Flicker when dimmed
- Likely cause
- Dimmer and driver do not match
- Can it wait?
- Yes, but it ages the strip
- What to send us
- Video at low and high dimming; the dimmer type if known
Two different whites
- Likely cause
- Strips from different batches or tones
- Can it wait?
- Yes
- What to send us
- Evening photo with the TV off
Hot, buzzing or scorched
- Likely cause
- Driver, overload or a faulty joint
- Can it wait?
- No: switch off at the source
- What to send us
- Call; an electrician comes first
This table describes where faults usually sit; a visit confirms the actual cause.
Three worked scenarios
Scenario one: a villa lounge whose long wall is clad in dark slats, the kind we describe in our villa TV wall guide. The light behind the TV is fine, but the groove running up the right-hand pillar and across the top has gone dim from about the halfway mark. Nothing is broken, and the owner sees no dark stretch, only a gradual fade. This is the pattern of voltage drop on a run that is one continuous piece. The visit confirms that the run is longer than the strip was designed for in a single feed; the fix is a second feed at the far end, and we replace nothing. The owner is told what was changed and the new feed is added to the drawing.
Scenario two: a flat in Sharjah where the strip under a floating console, as in our living room wall guide, stops working in the middle after the owner moved a heavy speaker. A joint was pulled when the speaker was dragged along the floor. The dark stretch starts exactly at a joint, the rest of the strip lights, and the console's underside is within reach, which makes this the easiest repair in the article: a new section, a remade joint and a test. The owner is shown where the joint sits and told to keep the front of the console clear for the diffuser.
Scenario three: a rented apartment where the lights flicker at low dimming after the landlord replaced the switch. The strip is eighteen months old and has never flickered before. The new switch contains a dimmer that does not suit the old driver. Replacing the strip would not help; matching the dimmer and the driver does, and the owner is advised to tell the landlord in writing what is being changed on the wall's electrics. The first message with a short video at low and high dimming saved the owner a visit.
What the scenarios share is that the cheapest repair came from reading the symptom, not from replacing the part that looked most obviously broken. In none of them did the owner open anything; in all of them the photographs and the description did most of the work.
Mistakes that make a repair harder
These are the errors we meet most often, and none of them involves bad luck. They all come from acting before looking.
- Buying a strip online by length alone, without its voltage, white tone or the driver it will run on.
- Peeling off the old strip to see what is behind it, then finding the diffuser or the channel has been bent.
- Replacing a single dead segment with a patch of a different white tone, so that the groove shows two lights.
- Joining extra lengths on to stretch a short strip into a long run, which invites voltage drop at the far end.
- Sealing a driver behind a painted-shut panel to tidy the wall, so the next failure needs a demolition.
- Letting someone with no electrical qualification work on the mains side because the job looks small.
- Throwing away the leftover strip and the drawing, so that nobody knows what the original specification was.
- Ignoring a flicker for months until the strip or the driver is damaged beyond a simple swap.
What changes the price of a replacement
We do not publish a standard price for a strip replacement, because the result depends on things that only a look at the wall can settle: how many separate runs are affected, how easily the strip is reached, whether the driver needs to be replaced as well, and whether a panel has to be opened and closed again. Our media walls start from AED 3,500 per project, and the price guide explains what moves the final figure of a new wall; a repair is quoted line by line after the photograph and, if needed, a visit.
The materials guide lists what a wall is built from, and our care and maintenance tool helps with routine cleaning. Things that raise the work are a strip hidden behind a fixed finish, a driver in an unreachable place, a long run that needs a second feed, and a wall in an occupied flat where furniture has to be protected. Things that lower it are a clip-out diffuser, a driver behind a lift-off panel, a spare length of the original strip, and a clear description from the owner. A drawing that lists the strip's specification can save the visit entirely.
Warranty is a separate matter. Our 5-year limited warranty covers the wood-based boards only, subject to its terms, and it does not extend to lighting, drivers or other bought-in parts; those follow their own makers' terms, and workmanship follows our written workmanship warranty for orders that carry one. Ask for the terms in writing when you accept the quotation.
What we do and how to start on WhatsApp
Our team fits lighting as part of a media wall and can service it afterwards. We work from our own workshop in Sharjah and visit across the UAE; the measuring visit is free of charge, and we aim to come as soon as is practical. On a new wall, production starts once the details are agreed and a 60% advance is paid, and most walls take up to about 10 days depending on size and design. After ten years in this trade we have seen every way a strip can fail, which is why we now draw the diffuser, the driver and the feed on every wall.
To start, send us a WhatsApp message with a photograph of the wall with the lights on, a second with them off, a short video of the fault, how long the strip run is, and whether the lights are on a dimmer. Add the age of the wall and whether the TV, the switch or anything else in the room has changed. If you are a tenant, mention it, and ask your landlord or building management in writing before any work. What to send us lists the photographs that help most, and the media walls page shows the kind of work we do.
If the wall is being redesigned rather than repaired, the same photographs start the conversation, and choosing a media wall contractor gives you the questions to put to anyone you ask. For finish options and for how we approve samples before production, the sample approval guide is the next read.
Common questions
Why is one part of my media wall LED strip dark?
Usually a joint, a cut end or a damaged section, because the rest still lights. Photograph where the dark part begins and send it to us. Lighting on a media wall.
Why does the far end of my LED strip look dim or pink?
That is the typical sign of voltage drop on a long run; it is cured by feeding the run from both ends or splitting it, not by a brighter strip. Tell us the run length. Cable routes and service access.
Can I buy a strip online and have it fitted?
Only if its voltage, white tone and power suit the existing driver, which we check first; a 12V strip must not sit on a 24V supply. Send us the old strip's markings. Planning a media wall.
Does a strip replacement mean opening the wall?
Not if the wall has a clip-out diffuser and a driver behind a lift-off panel; older walls may need a panel opened. Ask which parts come out. Renovating an existing media wall.
Why does the light flicker when I dim it?
The dimmer and driver may not be a matching pair, which a new strip will not cure; we test the lowest setting on every visit. A short video helps. What to send us.
Who does the wiring of a strip replacement?
A qualified electrician or our team does anything on the mains side; you should only observe and photograph. In a rented flat, ask your landlord or building management in writing first. Media walls in Sharjah.
How much does replacing a media wall LED strip cost?
It depends on how many runs are affected, how easy they are to reach and whether the driver changes too, so it is quoted after your photographs. New walls start from AED 3,500 per project. What a media wall costs.

Sources & specifications
Manufacturer information applies to the named products and systems. Sources reviewed on 11 November 2026.
- HitLights: LED strip voltage drop, what it is and how to fix it (cause, run lengths, power injection, 24V for long runs, supply sizing)hitlights.com(opens in a new tab)
- Inspired LED: 12V vs 24V LED strip lights (voltage drop, matching the driver to the strip voltage)inspiredled.com(opens in a new tab)
- LEDCO: voltage drop chart for 12V and 24V strips (voltage drop = resistance x current; 24V draws half the current of 12V at the same wattage)ledco.ca(opens in a new tab)
Want this planned for your home?
Consultation and measurement are free. Tell us the rooms, location and what you need; we arrange a sample visit and define the measured quotation.