Media Walls · 19 min read · 1 October 2026
Hiding a router and games console in a media wall without hurting the signal
How to hide a router and games console in a media wall: where the router should live, four fronts compared, a ventilated console bay, remotes and access, and a cable map.

By Ali Haider Basra, Founder, Al Tareeq Decor · Contact our workshop
Key takeaways
- Hide the lights and leads, not the signal and the air: a router shut in a cabinet usually covers the home worse.
- Keep the router where the line enters or on an open shelf, run a network cable to the wall and add an access point where the signal is needed.
- Choose the front for what is behind it: glass or slats for the router, an open ventilated bay for the console.
- Give a console air in at the bottom, air out at the top and space round it; never close a door on a running console.
- Count every cable and power brick before the bay is drawn, and plan access for lights, buttons and the internet company.
On this page
- Key takeaways
- Hiding a router and a console without hurting either
- Where the router should actually live
- Four fronts: wood, glass, slats and an open bay
- Heat: why a console should never live in a sealed box
- Remotes, lights and the buttons you still need
- Count the cables before you draw the bay
- Decision table: where each device should live
- Router, console and box: where and behind what
- Three living rooms, three bay plans
- Mistakes that make a hidden router or console a problem
- A checklist for the bay
- Bedrooms, offices and majlis: the same bay in other rooms
- Questions to put to any maker about the bay
- What we do about it, and what to send us
- Common questions
Hiding a router and a console without hurting either
The router, the games console and the streaming box are the least attractive things in a living room. They have blinking lights, thick power bricks and a spaghetti of leads, and almost everybody who plans a media wall asks the same question: can all of it disappear behind a door? The honest answer is yes, partly. You can hide the lights, the leads and the clutter. What you cannot hide is the physics: a router needs to send a signal out, a console needs to get rid of heat, and a remote control needs a path to the device it controls.
A wall built to hide a router can therefore make the Wi-Fi worse, and a wall built to hide a console can make the console louder, hotter and shorter-lived. That is not an argument against hiding them. It is an argument for hiding them in a way that keeps the three paths open: signal, air and access. This guide shows how, with a plan view of Wi-Fi reach, a section of a ventilated bay, a comparison of four kinds of front and a map of the cables that must reach the bay.
It does not repeat the guide to cable routes and service access, which covers conduit sizing, HDMI choice and service panels, or the guide to ventilating a TV niche, which covers the TV itself. This one is about the box on the shelf: where the router and console live in the wall, and what their front should be.
- Hide the lights and the leads, not the signal and the air.
- A router in a closed cabinet usually covers the home worse.
- A console needs open space round it, not a sealed box.
- Plan every cable route and a way to reach the lights and buttons.
Where the router should actually live
Start with a question you can answer from the room: where does the internet line enter the home, and how long a cable would you need from there to the living-room wall? In most flats the line arrives at one point chosen by the building, often near the entrance or in a cupboard, and the router sits next to it. If that is the case, the router may be better where it is, and the media wall only needs a network cable to carry the connection to the TV and the console. Ask your building or your internet company in writing where the line can end; we cannot say.
TP-Link's advice, in a support article on router placement, is plain: placing the router inside a cabinet blocks the signal and reduces coverage, metal objects and high-powered appliances can interfere with Wi-Fi, and the router should sit as close to the centre of the room as possible so the signal spreads evenly. Netgear's placement guide says the same in its own words: place the router in a central location, and do not hide it in a closet, cabinet or cupboard because that reduces signal strength. A TP-Link blog adds that a router should be centrally placed, up high and in the open, with a few feet between it and any large metal object. That is advice from two router makers, not a measurement of your flat, but it points the same way as common sense. A box in a corner behind a stack of equipment is the worst place for a transmitter.
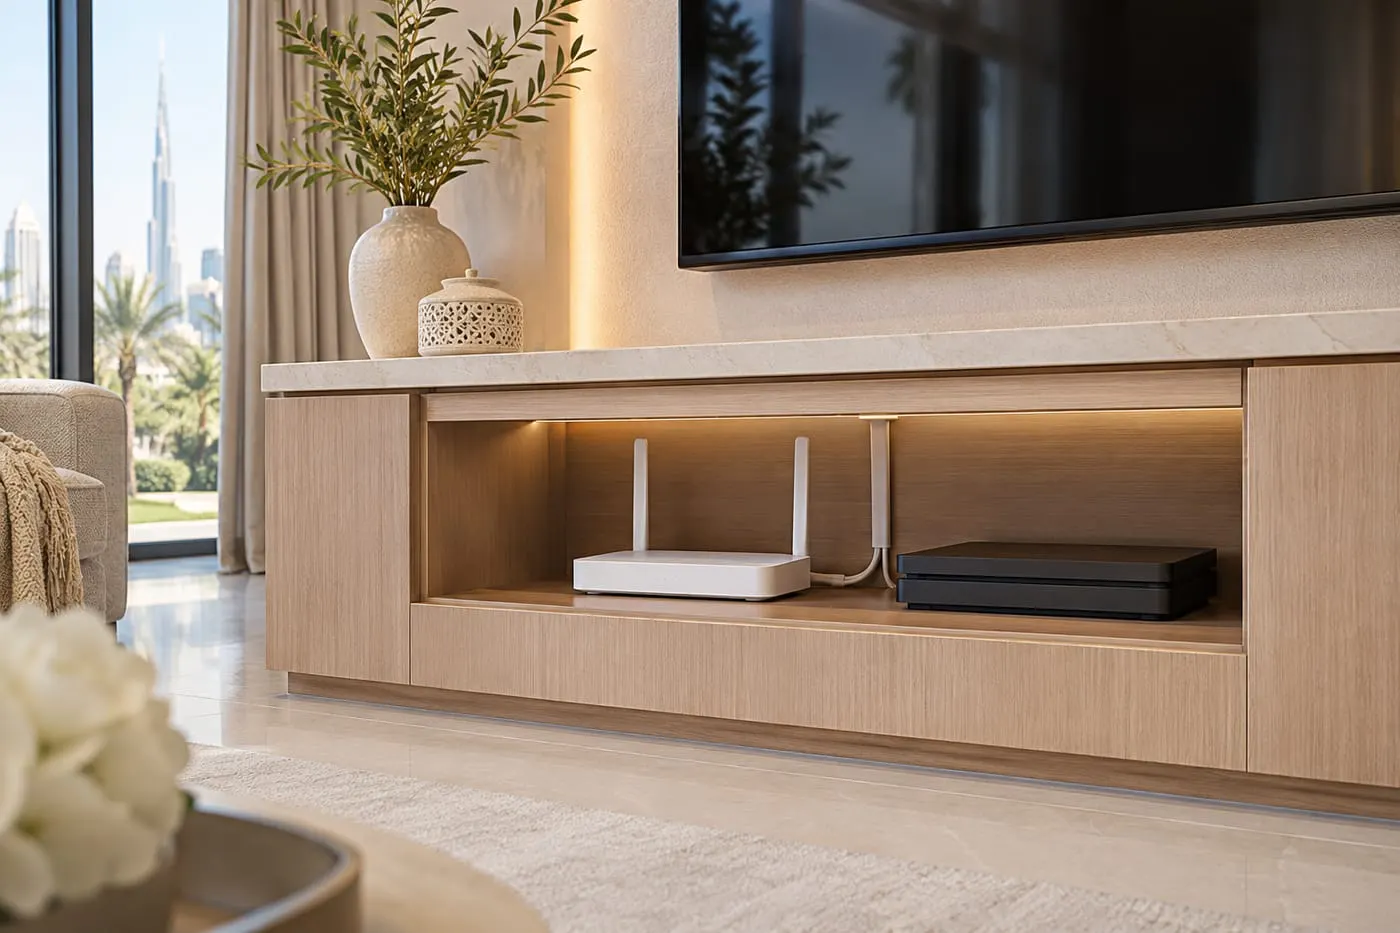
The drawing shows three positions in an illustrative living room. Position A, shut in a cabinet at the media wall, reduces reach. Position B, on the open console top, is better but visible. Position C, central and away from the wall, is best for coverage and needs a cable. The practical answer for most media walls is a mix: the router stays where the line enters, or on an open ventilated shelf of the wall, and a network cable runs from it to wherever the TV, the console or an access point needs a wired connection.
A wired connection is also better for the console and the TV. Our guide to cables already says to leave a network cable in the wall; here the reason is a different one. If the router is hidden, wired devices keep working at full speed whatever the Wi-Fi does, and the Wi-Fi can be handled by a separate access point put where the signal is needed.
Four fronts: wood, glass, slats and an open bay
Once you know the router and console will be in the wall, the choice is the front. There are four honest options, and none is perfect. The drawing compares them qualitatively, not by measurement.
A solid wood door is the cleanest look and the worst for Wi-Fi and remotes, and it traps heat. A glass front, clear or tinted, lets remotes work and lets some Wi-Fi through, shows the lights faintly and still traps heat unless the bay is vented. A slatted or perforated front, with gaps between timber slats or a pattern of holes, lets heat escape, passes most of a remote's signal and hides the lights well, and it is the most useful front for a router. An open ventilated bay is best for signal and heat and shows the devices; it is the right choice for the console.
Our usual answer is a mix: a glass or slatted front for the router, an open bay for the console, and a closed door only for what does not need a signal or air, such as spare cables, a modem or a power strip. Our walls are made with these options in mind, and our own team installs the wiring, so the bay is drawn with its routes, its vents and its access before anything is cut.
Another point is metal. Metal fronts and metal frames block radio signals, and a perforated steel panel is not the same as a timber slat. If a drawing shows a metal front to a router bay, ask what the router will do behind it. Our guide to fluted and slatted walls shows how timber slats look, and the panel materials guide explains what each board is.
Heat: why a console should never live in a sealed box
Every device in a bay turns electricity into heat. A games console under load can run hot, a router runs warm all day, and a power brick is a small heater. In open air, that heat rises and disperses. In a closed box, it collects, the temperature climbs, and the devices throttle, shut down or age faster. A UAE living room already starts warmer than a temperate one, so the margin is smaller.
The rule we draw is simple: air in at the bottom, air out at the top or back, and space round each device. The drawing shows a side section of a console bay with a cool air gap at the bottom, a vent at the top, devices spaced rather than stacked, and power bricks kept out of the pile. The paths are the same ones a TV niche needs, which our guide to TV ventilation explains, applied to smaller boxes.
A technology news article (Engadget, 2 November 2026, quoting the makers) reports that Sony recommends about 4 inches, roughly 10 centimetres, of clearance around a PlayStation, and that Microsoft proposes 4 to 6 inches on all sides for an Xbox. We could not open the makers' own pages, so treat that as a secondary report and check your console's manual. We also follow what the makers ask. Each console and box has its own manual with its own clearances, and that is the number to use, not ours. The soundbar and its amplifier follow the same rule, and our soundbar guide shows how one maker's guide asks for space on all sides. Read the manual before the drawing is approved, and send us the model names so the bay can be sized for them.
Do not close the door on a running console. If the front is solid, leave the door open or choose a different front. Do not stack the router on the console, or a power brick on the router. And do not hide the bay behind a decorative object that blocks the vent: a vase on a ventilated shelf can become a lid.
Remotes, lights and the buttons you still need
Hiding a device does not remove your need to reach it. A router has lights that tell you whether it is working, a reset button, sometimes a switch or a port you must change. A console has a power button, a disc slot and ports. A streaming box has a remote that needs a clear path. The first design question is how often you touch each one, and the answer shapes the front.
Infrared remotes need a line of sight to the device's sensor; a cabinet-making knowledge-base page puts it simply, saying the signal uses invisible light and so requires transparency between sender and unit, and that add-on hardware exists to carry infrared through wood doors. A solid door breaks that line, which is the commonest reason a remote works with the door open and not with it closed. A glass front, a slatted front or an open bay keeps the line. Radio-frequency remotes and phone apps do not need a line, but the devices still need the bay's signal, which is another reason to avoid a solid front. Our guide to soundbars and speakers explains where the remote sensor of a soundbar must be kept clear.
For the router, keep its status lights visible to you or reachable in seconds. A friend who is told to check the lights on the router has to open a door, move a vase and crouch; a bay with a slatted front or a small glass pane avoids the whole exercise. And keep the reset button, the ports and the label reachable, because the internet company will ask for them.
Technicians sometimes need access to the line and the equipment. Ask your internet provider what it needs, in writing, and plan the bay with a removable panel or a door that opens fully, not a fixed box. Our guide to service panels explains why every hidden joint should be reachable, and this is one more reason.
Count the cables before you draw the bay
A bay is a junction. The internet line comes in, the router passes it on, the console and the streaming box take network and power, the TV takes an HDMI lead from each of them, and a power strip feeds the lot. The drawing shows six boxes and the three kinds of line between them: network, HDMI and power. Count yours before the wall is drawn, because each line is a route the wall must provide, and an extra route is far cheaper at the drawing stage than after the panels are on.
Keep power and signal on separate routes where they run together, leave a pull cord in each route so a cable can be changed later, and add one empty spare route. All of this is covered in our guide to cable routes and service access, and sockets and power explains how many sockets a bay should have and why one is never enough.
Think about the power bricks. Routers and boxes come with adapters that are bulky and warm; give them a place outside the stack, ideally on a shelf or a side compartment, with a short lead. A single power strip with a switch at the back of the bay is tidier than five adapters in a row, and it gives you one place to cut the power when a device freezes.
If you plan a bigger TV, a new console or a soundbar later, the bay should have room for it. Our guide to changing the TV later explains how to leave capacity, and buying the TV first explains why we need the model names before we cut anything.
Decision table: where each device should live
The table collects what the sections above say, device by device. Use it when you read a drawing, and ask for the reason behind any row that differs.
Router, console and box: where and behind what
Router
- Best place
- Where the line enters, or an open shelf; network cable to the wall
- Front
- Glass or slatted; not solid or metal
- Why
- A closed cabinet reduces coverage (TP-Link)
Extra Wi-Fi access point
- Best place
- Central in the room
- Front
- Open
- Why
- Spreads the signal evenly
Games console
- Best place
- Open ventilated bay
- Front
- None, or a vented front
- Why
- Heat has to leave
Streaming box
- Best place
- Near the TV, with a clear line to the remote
- Front
- Glass or slatted
- Why
- Remote sensors need a path
Fibre box or modem
- Best place
- Behind a solid door if it needs no signal
- Front
- Solid is fine
- Why
- No radio or remote needed
Power strip and bricks
- Best place
- Side compartment or back of the bay
- Front
- Solid is fine
- Why
- Warm and ugly; keep out of the stack
Spare lead and cables
- Best place
- Compartment with a door
- Front
- Solid
- Why
- Nothing to cool or signal
Illustrative: ask the maker's manual for clearances, and the internet company where the line can end.
Three living rooms, three bay plans
A small apartment with the internet box by the front door. The living room is open to the entrance. The plan: leave the router and fibre box where the line enters, in the hallway cupboard, run a network cable along a route in the wall to the media wall, and put a small access point on a shelf. The bay in the wall holds the console and the streaming box behind a slatted front, with a pull cord in the cable route. The wall stays tidy and the Wi-Fi is better than a router in the wall would give.
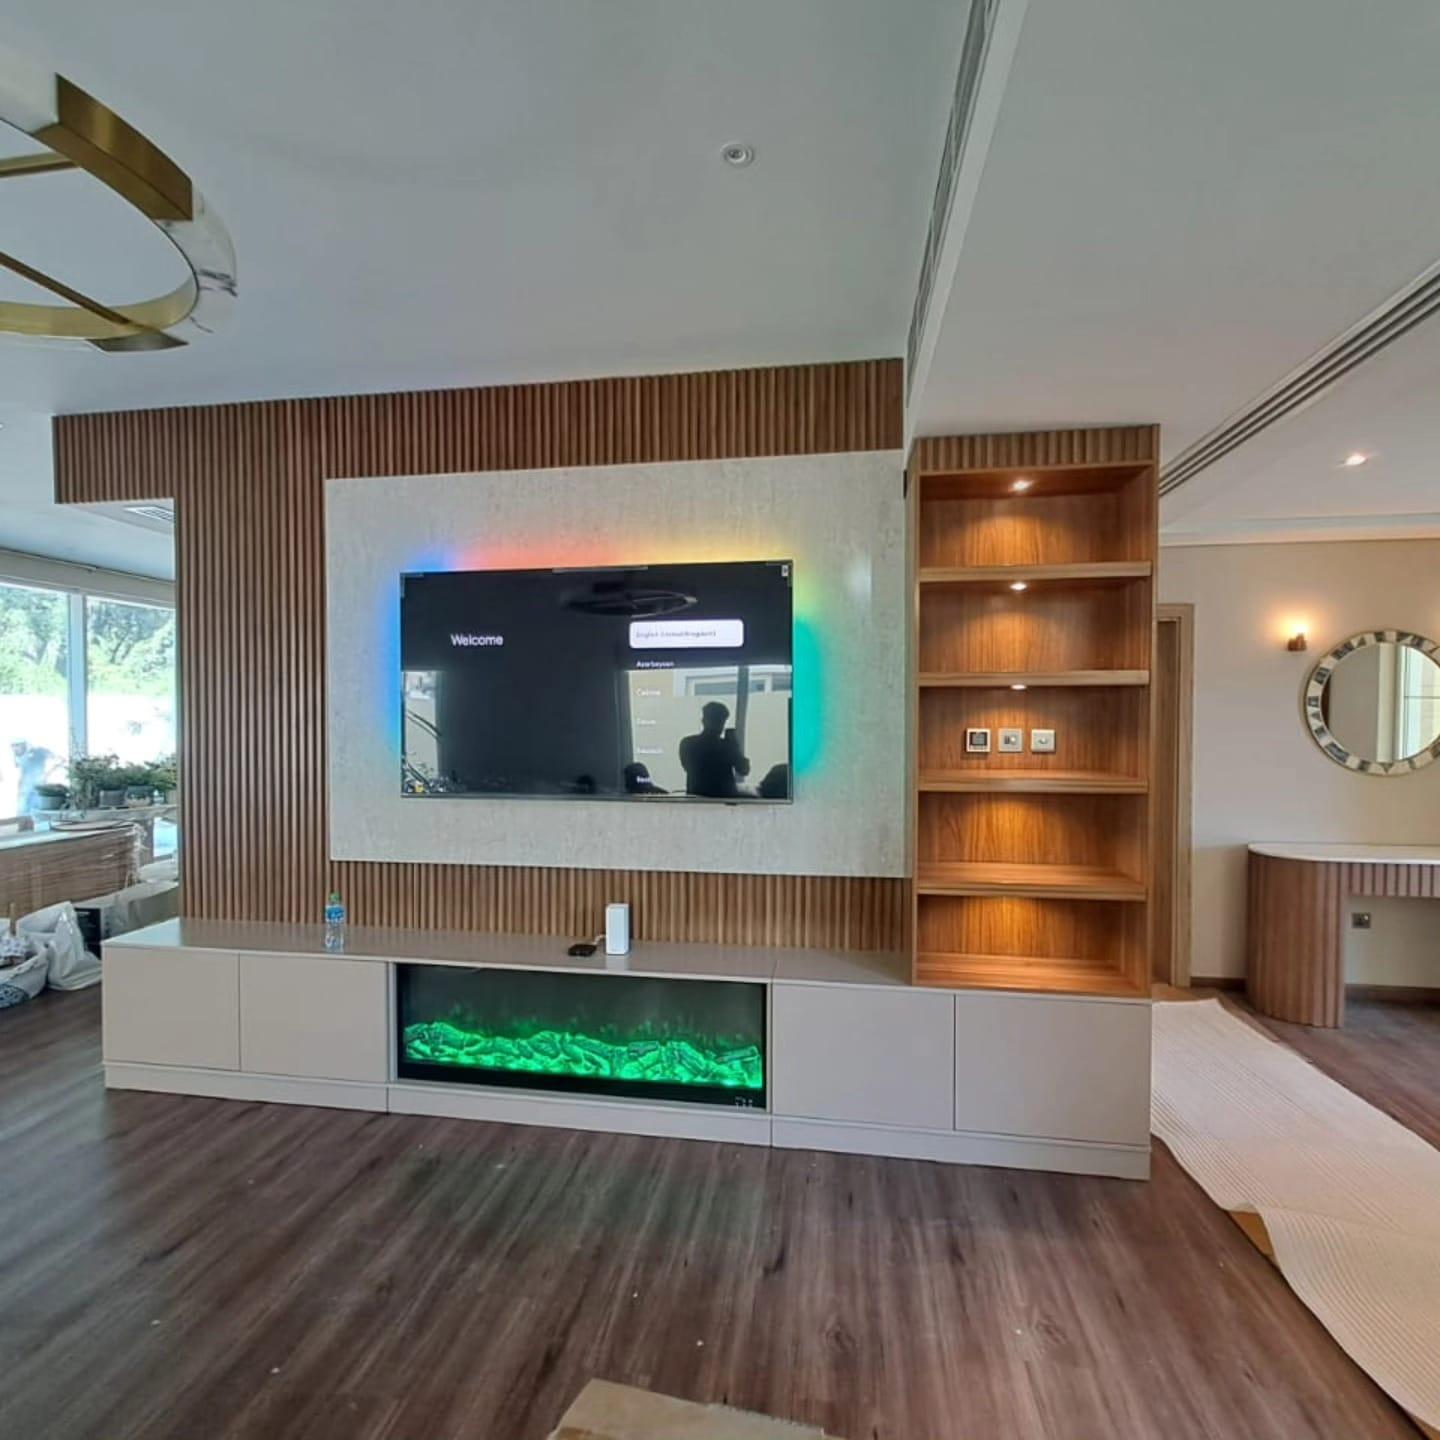
A living room with a fireplace and a console. The console runs along the wall below an electric fireplace, and the owner wants the router and a games console inside. The plan: the router sits on an open ventilated shelf at one end with a glass pane, the console has its own open bay at the other end, with a vent at the top and a gap at the bottom, and a separate compartment with a solid door holds the power strip and bricks. The fireplace's own heat is planned apart from the bay, as our electric fireplace guide explains.
A wall with a soundbar and a subwoofer. The TV has a soundbar below it and a subwoofer beside the console. The plan: the soundbar's remote sensor stays clear of the front, the amplifier gets the space its maker asks for, the router and streaming box sit behind a slatted front, and there are two empty routes for later. This is the kind of wall where counting the cables early prevents a rebuild.
Mistakes that make a hidden router or console a problem
The first mistake is putting the router inside a solid door and wondering why the bedroom has no Wi-Fi. The second is using metal or a metal-backed panel. The third is stacking the router on the console and a power brick on the router. The fourth is a sealed bay for a console. The fifth is forgetting that infrared remotes need a line of sight.
The sixth is hiding the lights so well that nobody can see when the internet is down. The seventh is no access for the internet company's technician. The eighth is one socket for five devices. The ninth is forgetting the network cable in the wall and using Wi-Fi for everything. The tenth is drawing the bay before the devices are chosen: bring the model names, or at least the sizes.
The eleventh is a decorative object that blocks a vent. The twelfth is not asking us. A WhatsApp message with a photograph of the wall, the devices you own and the place where the internet line enters tells us what the bay needs.
A checklist for the bay
Tick each line before the drawing is approved, and ask for the answers in writing.
- Where the internet line enters the home, and the cable route to the wall.
- Router on an open shelf or behind glass or slats, not metal or solid.
- A wired network cable to the TV and console; an access point where needed.
- The console in an open or vented bay, with space round it.
- Air in at the bottom, air out at the top, no stacking.
- Remote sensors with a clear path; status lights reachable.
- Sockets and a power strip planned, bricks out of the stack.
- A pull cord and a spare route in each cable route.
- Access for the internet company's technician.
- Model names sent so the bay is sized to the manuals.
Bedrooms, offices and majlis: the same bay in other rooms
The same questions come up in every room, with different answers. In a bedroom the TV is smaller, the router is often elsewhere and the console may be a streaming stick; our guide to a bedroom TV unit with a wardrobe shows how the two share a wall, and a small bay behind a slatted panel is usually enough. The bedroom TV unit guide adds how the wardrobe doors and the TV unit are planned together.
In an office or meeting room, the equipment is more serious: a video-call unit, a network switch, a wall-mounted screen and a power strip, often in a cabinet that staff open daily. Office media walls and the office guide explain how those walls are planned, and the bay needs the same three paths: signal, air and access, with the access wider because people use it. In a majlis the wall is a formal feature and the equipment should disappear completely, which makes the slatted front and a pull-out compartment the usual answers; see the majlis TV wall guide.
In a small living room the bay has to share space with everything else. Small living room media walls explains how to keep a wall light, and the living room TV wall guide covers how the wall relates to the room. The screen size and the distance to the sofa matter too, and TV size and viewing distance explains how to choose them before the bay is drawn.
Lighting inside a bay is a small touch with a large effect: a warm strip along the top of the bay makes the devices look deliberate and helps you see the lights, and our lighting ideas guide explains how it is done without adding heat. A media wall is also not the only choice: a media wall compared with a TV unit shows when open furniture solves the router and console problem more simply.
Questions to put to any maker about the bay
Before you approve a drawing with a hidden bay, ask the maker five questions and keep the answers. Where does the router sit, and what is in front of it? Which front is on the console bay, and where does the heat go? How many network, HDMI and power routes reach the bay, and is there a pull cord and a spare? How does the internet company's technician get in? And which devices was the bay sized for?
A maker who answers these with a drawing and not a sentence is a maker you can compare. Our guide to choosing a media wall contractor explains how to judge the answers, and the quotation checklist shows which lines should name the bay, the vents and the electrical work. Use the pricing guide to see how scope changes the figure, and the TV wall units and consoles page to see the kind of console we build.
What we do about it, and what to send us
Our media walls start from AED 3,500 per project for a compact panel and floating console in standard laminate; the final figure comes from the quotation and depends on the wall size, the finish (laminate, veneer or lacquer), marble-effect panels, lighting and an electric fireplace. We make them in our Sharjah workshop, our own team installs them across the UAE, and the concealed wiring and the lighting inside the wall are part of our work. The measuring visit is free, the drawing and itemised price are approved before anything is cut, and once measurements and details are agreed, a 60% advance is paid and production starts when it is received, up to about 10 days depending on size and design. The founder, Ali Haider Basra, has ten years in the trade, and the 5-year limited warranty covers wood-based boards only; hinges, runners, labour and misuse are excluded.
To plan your bay, send a photograph of the wall straight on, a photograph of where the internet line enters the home, the names or sizes of the devices (router, console, streaming box, soundbar), and the TV size. We will tell you what we would draw: where the router lives, which front, where the air goes and how many routes. We do not supply or configure routers or internet services; those are for your internet company. The range is on the media walls page, and the price guide explains what moves the figure.
The simplest next step is a WhatsApp message: the wall photo, the TV size, the devices you want to hide and a photo of the room. Orders are confirmed on WhatsApp, so the thread, the drawing and the quotation stay together. A checklist of what to include is in what to send before a consultation.
Common questions
Can I hide my Wi-Fi router inside a media wall?
Yes, but not behind a solid or metal door: an enclosed cabinet reduces coverage. Use an open shelf, a glass pane or a slatted front, and run a network cable to a central access point. Cable routes and service access covers the cable side.
Will a cabinet door block my Wi-Fi?
A solid door and any metal will reduce the signal; TP-Link says a router in a cabinet blocks the signal and reduces coverage. Glass or slats help. Media wall panel materials explains the boards.
Does a games console overheat in a media wall?
It can if it is shut in a sealed box with no air path. Give it an open or vented bay, air in at the bottom and out at the top, and follow its manual's clearances. TV ventilation in a niche explains the same logic.
Why does my remote not work with the cabinet door closed?
Infrared remotes need a line of sight, which a solid door breaks. A glass, slatted or open front keeps it. Soundbars and speakers in a media wall shows where sensors must stay clear.
How many sockets does a router and console bay need?
Usually more than one: plan a power strip for the router, console, streaming box and any soundbar, with bricks outside the stack. Sockets and power for a media wall explains how we plan them.
Can I add a network cable to the TV later?
It is far easier at the drawing stage: ask for a network cable and a pull cord in the signal route, plus a spare empty route. Changing the TV later explains how to leave capacity.
Do you supply the router or internet?
No: we plan and build the bay and wire it, and the internet service and router are for your internet company. Send photos on WhatsApp for a plan. Our media walls page shows what we build.

Sources & specifications
Manufacturer information applies to the named products and systems. Sources reviewed on 10 November 2026.
- TP-Link: Router antenna position and tips for the best Wi-Fi signal (a cabinet blocks the signal; metal interferes; central position)tp-link.com(opens in a new tab)
- TP-Link blog: Where to place your Wi-Fi router (central, up high, in the open; distance from large metal objects)tp-link.com(opens in a new tab)
- NETGEAR: Best router placement (central location; do not hide it in a cabinet)netgear.com(opens in a new tab)
- Woodweb: Making remote controls work through cabinet doors (infrared needs transparency; add-on hardware exists)woodweb.com(opens in a new tab)
- Sonos: Amp guide (clearance from the TV; keep away from heat sources)sonos.com(opens in a new tab)
- Engadget: Think twice before putting your gaming console inside a cabinet (Sony and Microsoft clearance, secondary report)engadget.com(opens in a new tab)
Want this planned for your home?
Consultation and measurement are free. Tell us the rooms, location and what you need; we arrange a sample visit and define the measured quotation.